
Wok Hei and Grill Marks
Making an outdoor cooking station for my apartment balcony
Australians spend a lot of time cooking outdoors. Public parks have barbeques for anyone to use, sausage sizzles are a ubiquitous way to fundraise money for local community groups, and practically every household has some form of cooking appliance in the backyard or on the balcony. Open fires, wok burners, barbeques, tandoors, pizza ovens, satay grills, rotisseries, seafood boilers, smoke houses and pit ovens are used across the country.
Fine weather lends itself to entertaining, cooking and eating outdoors, and Australia has it in swathes. The practicality of cooking out in the open further contributes to its popularity. Smoky, smelly, sticky, steamy, splashy or spitty food preparation is better performed outside.
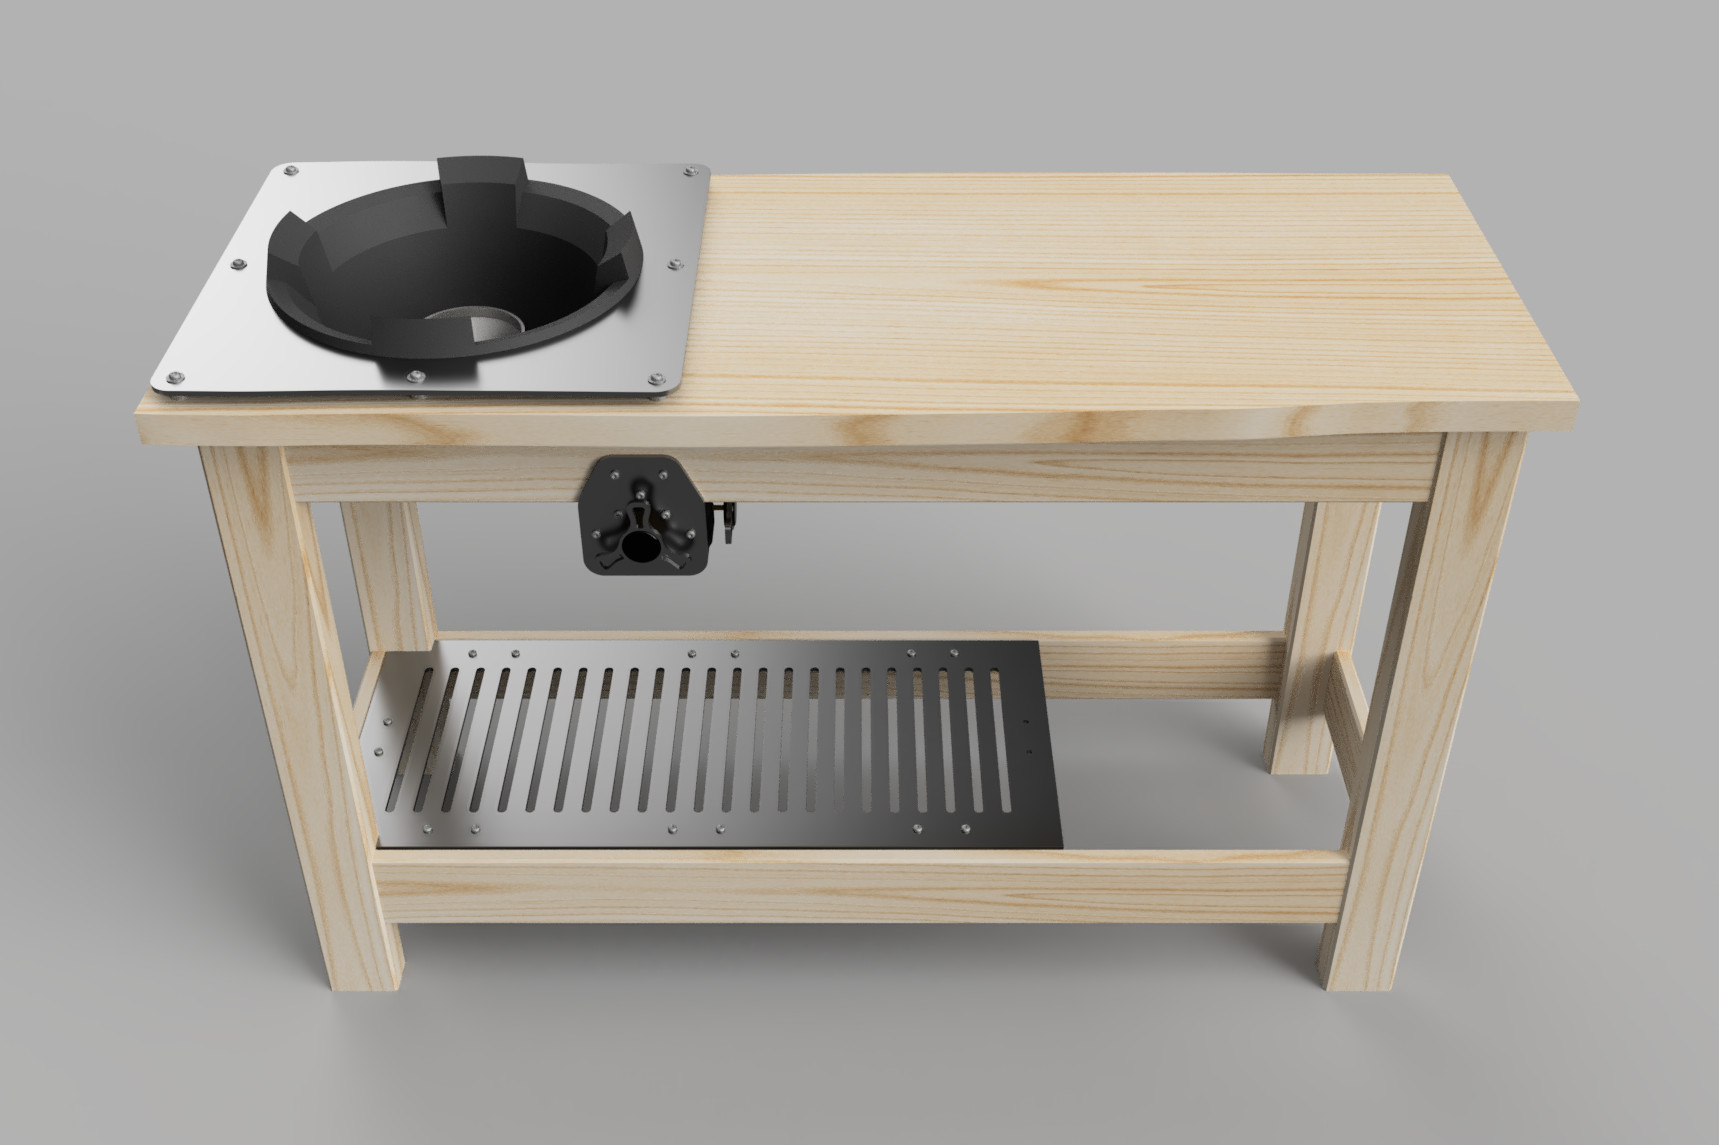
In Luxembourg, my wife and I live in a relatively small first floor apartment with a balcony. Although it has a well equipped indoor kitchen, the long summer evenings and empty space on our balcony were calling to my Australian tendencies. I decided I wanted a small outdoor cooking station that I could use for grilling, wok cooking and possibly large scale boiling. Commercial offerings do exist, but I really enjoy building things so I set off to do exactly that.
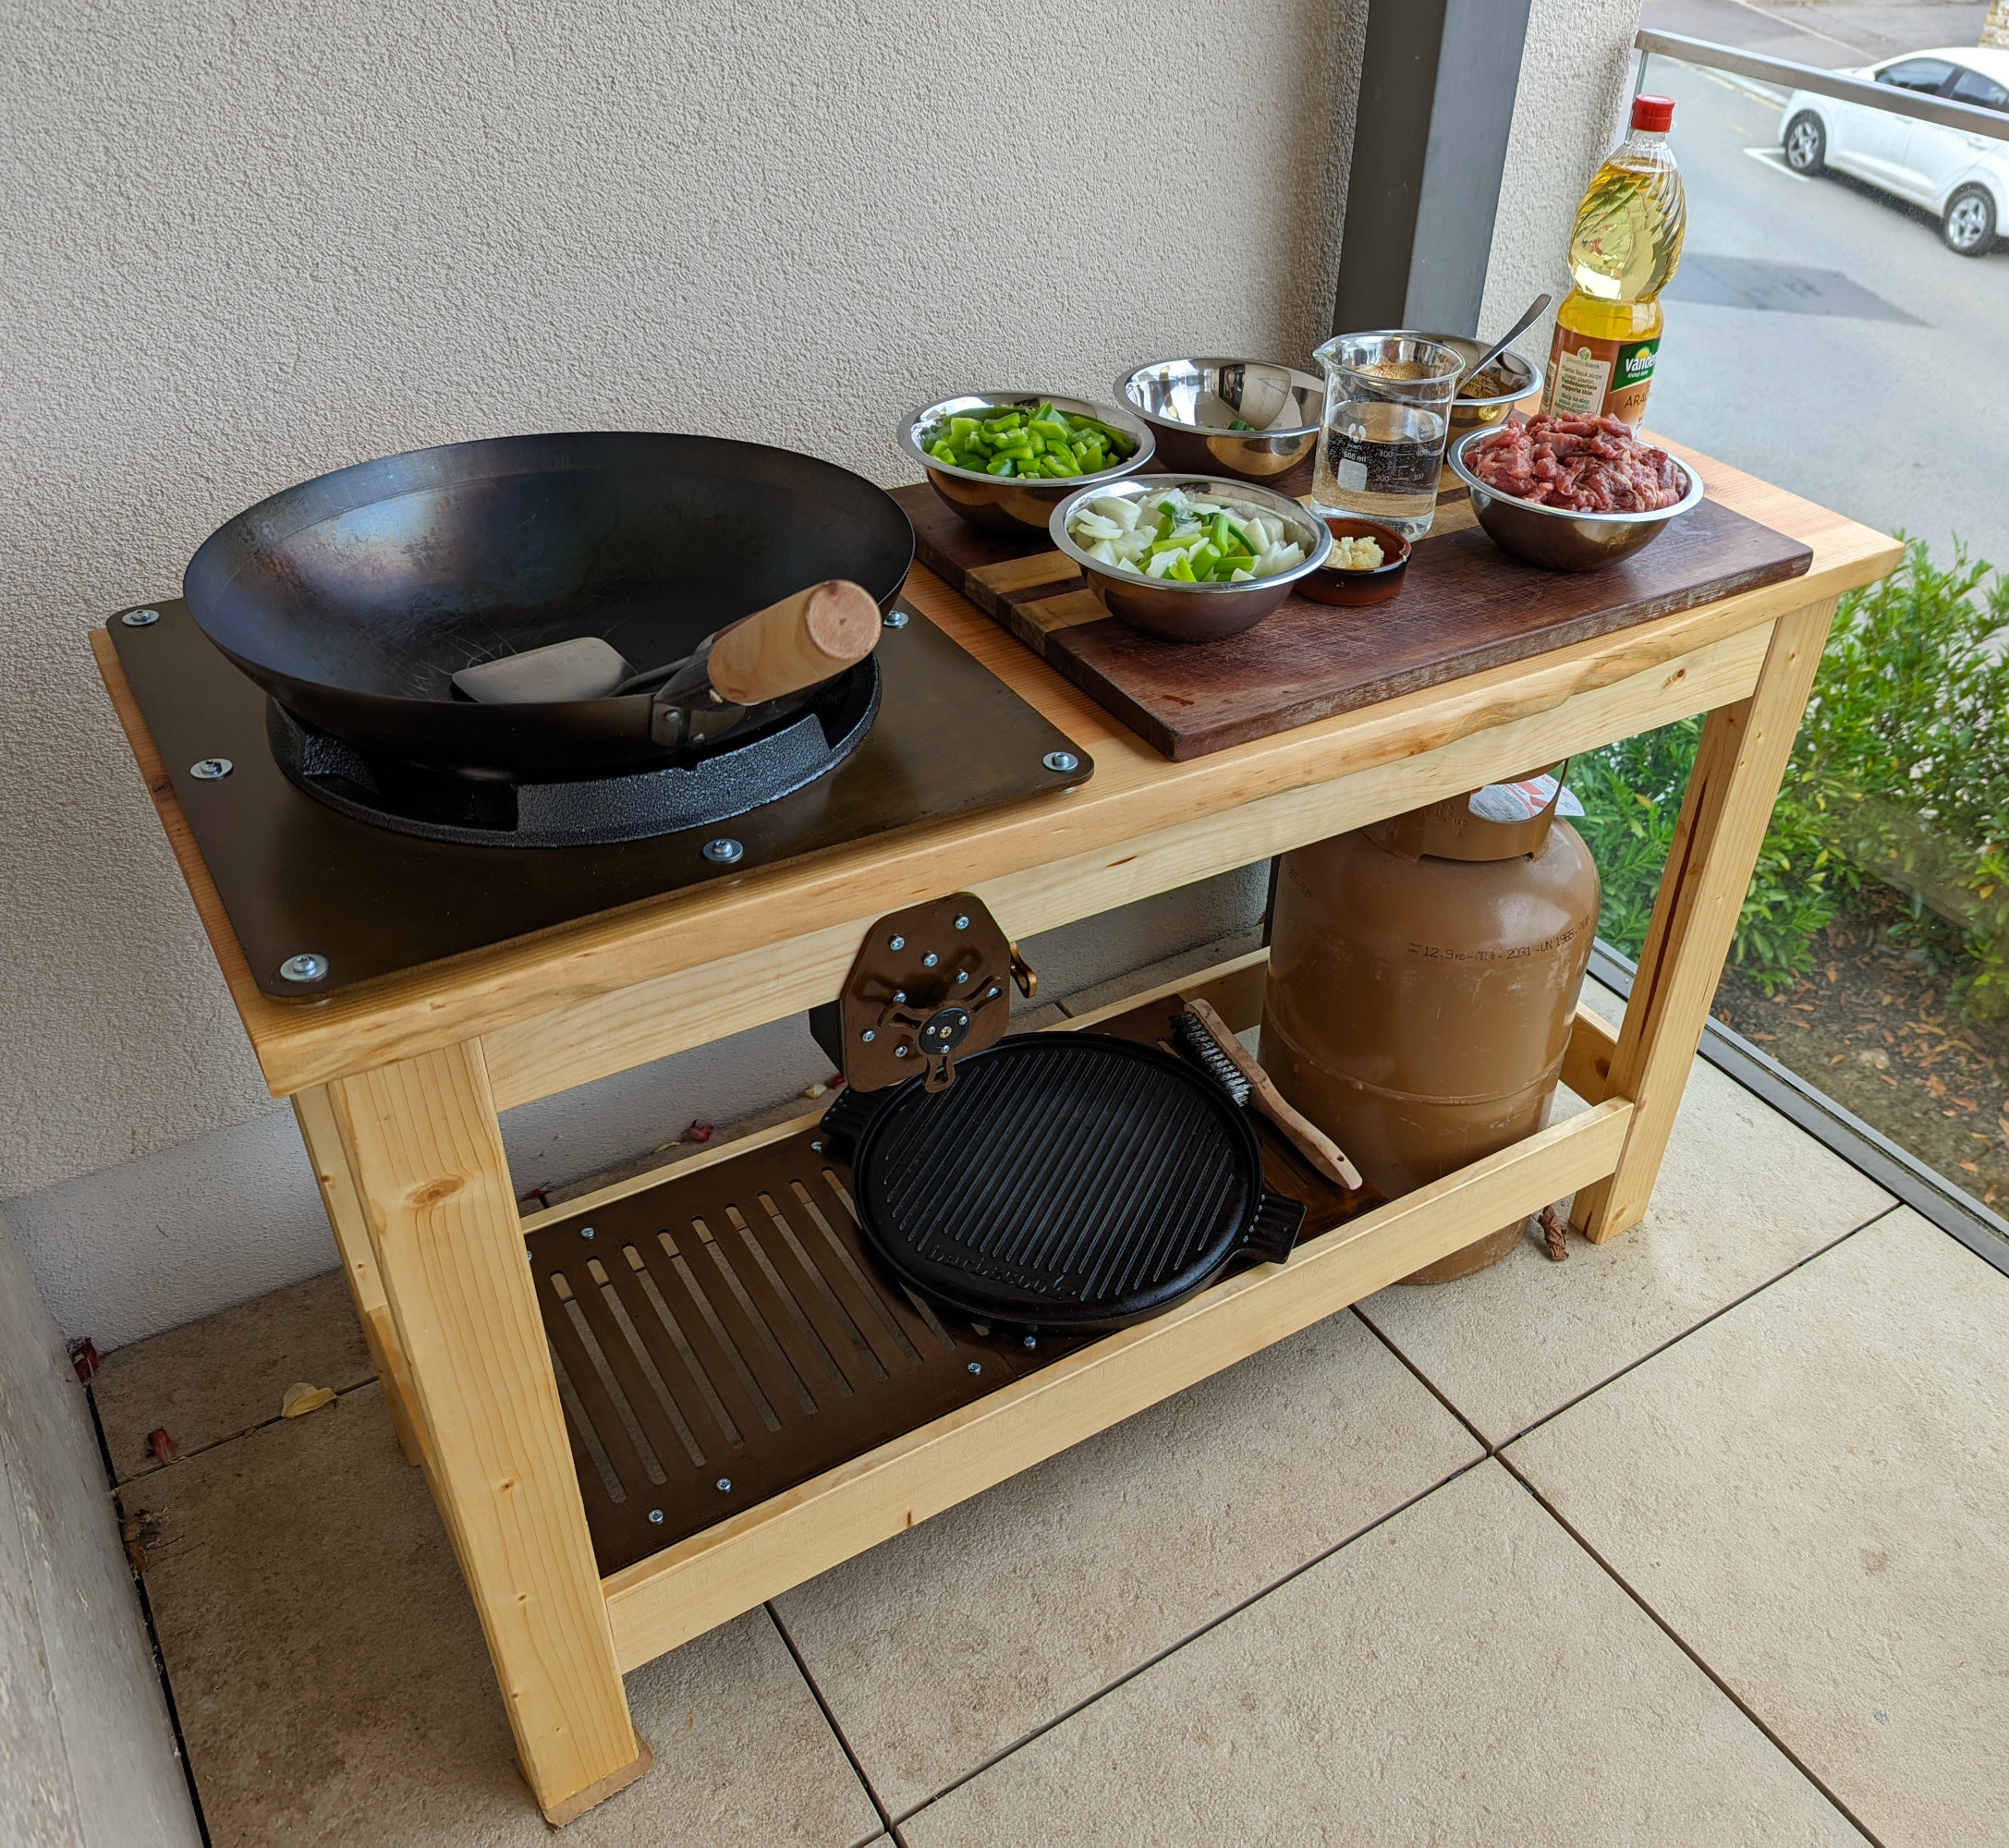
Raw Ingredients
Heat Source
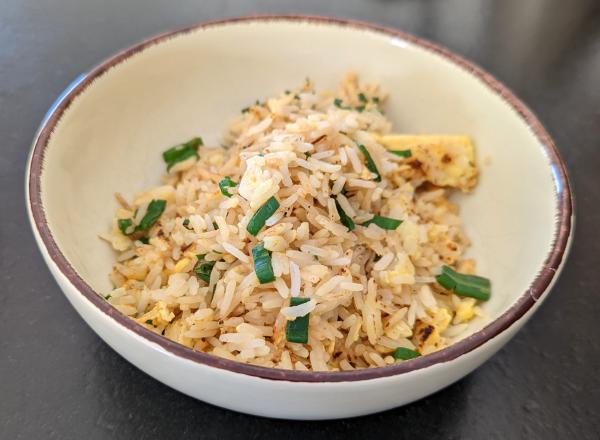
For authentic stir fry, you need two things — ultra high heat, and fire. What we’re chasing here is wok hei, that classic smoky flavour that is a requirement in dishes like char kway teow, pad thai or hokkien mee. It primarily comes from droplets of heated oil and vaporised fat catching alight while tossing the stir fry over a flame. I’ve had some success achieving a wok hei-esque flavour profile indoors on a powerful induction stove using the “torch hei” method, but doing it properly requires a high-powered gas burner.
Sourcing an affordable high-powered gas burner here in Luxembourg took a while. I did a lot of reading on Grillsportverien, which is full of German wok afficionados sharing their experiences. Ultimately I settled on the idea of importing a burner from a seller on Alibaba.
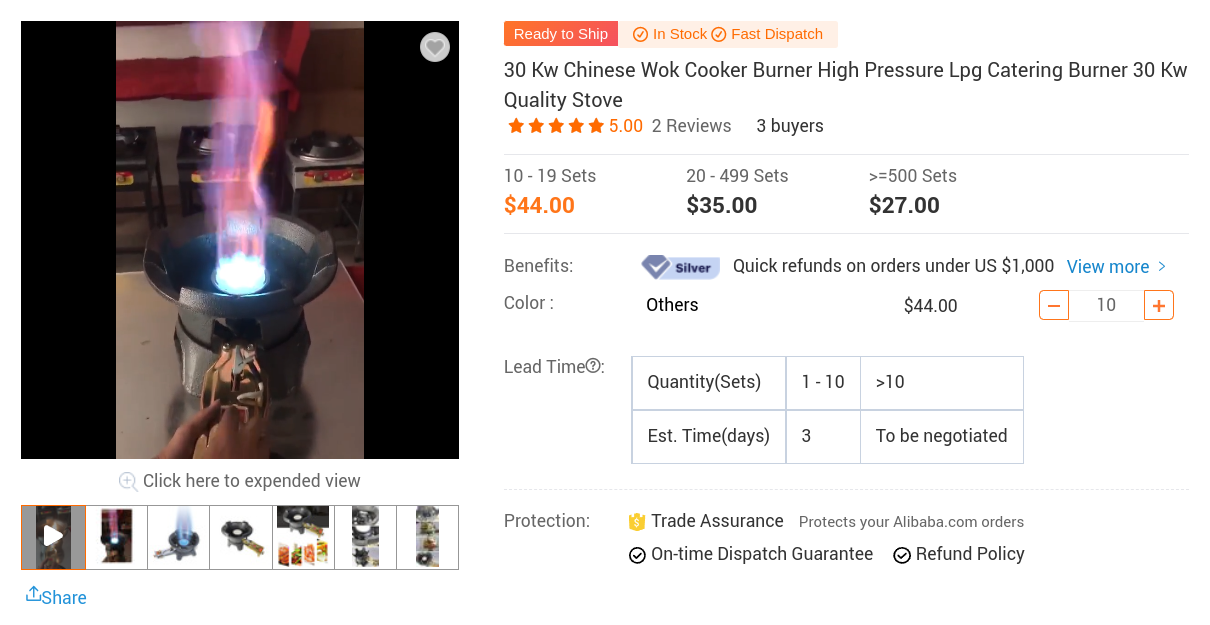
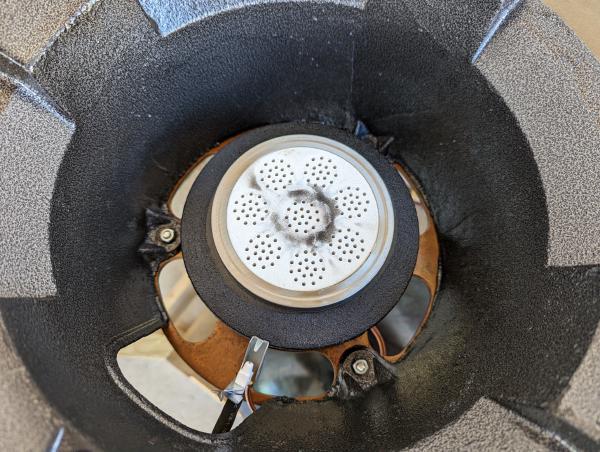
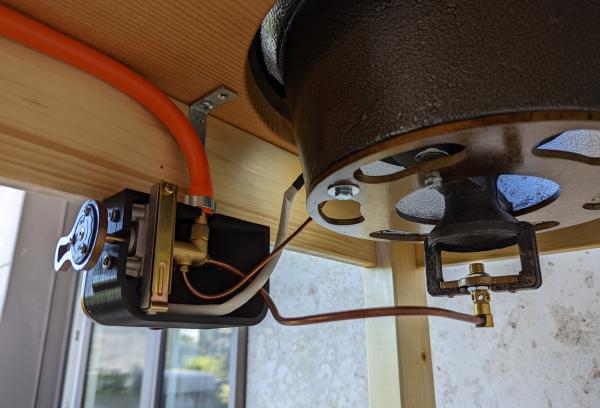
The burner I chose was cheap, but had all of the features I was looking for including a pilot flame and a deep cast iron heat shield. It was designed as a low free-standing burner, but looked easy enough to mount into a table. Heat output was specified as 30 kW (≈100 000 BTU/hr). This was less than I was aiming for, but the output rating isn’t the whole story. As J. Kenji López-Alt points out, combustion efficiency and heat transfer are also critical factors. The listing was a duty and delivery paid sale for a single unit to Luxembourg, so I went for it.
All of the gas plumbing needed to hook up the burner to a propane tank was purchased online from EU based vendors. A high-pressure, high-flow adjustable regulator with a pressure gauge, large diameter propane hose, hose barbs, ear clamps and thread tape made up the bulk of the order.
Cookware
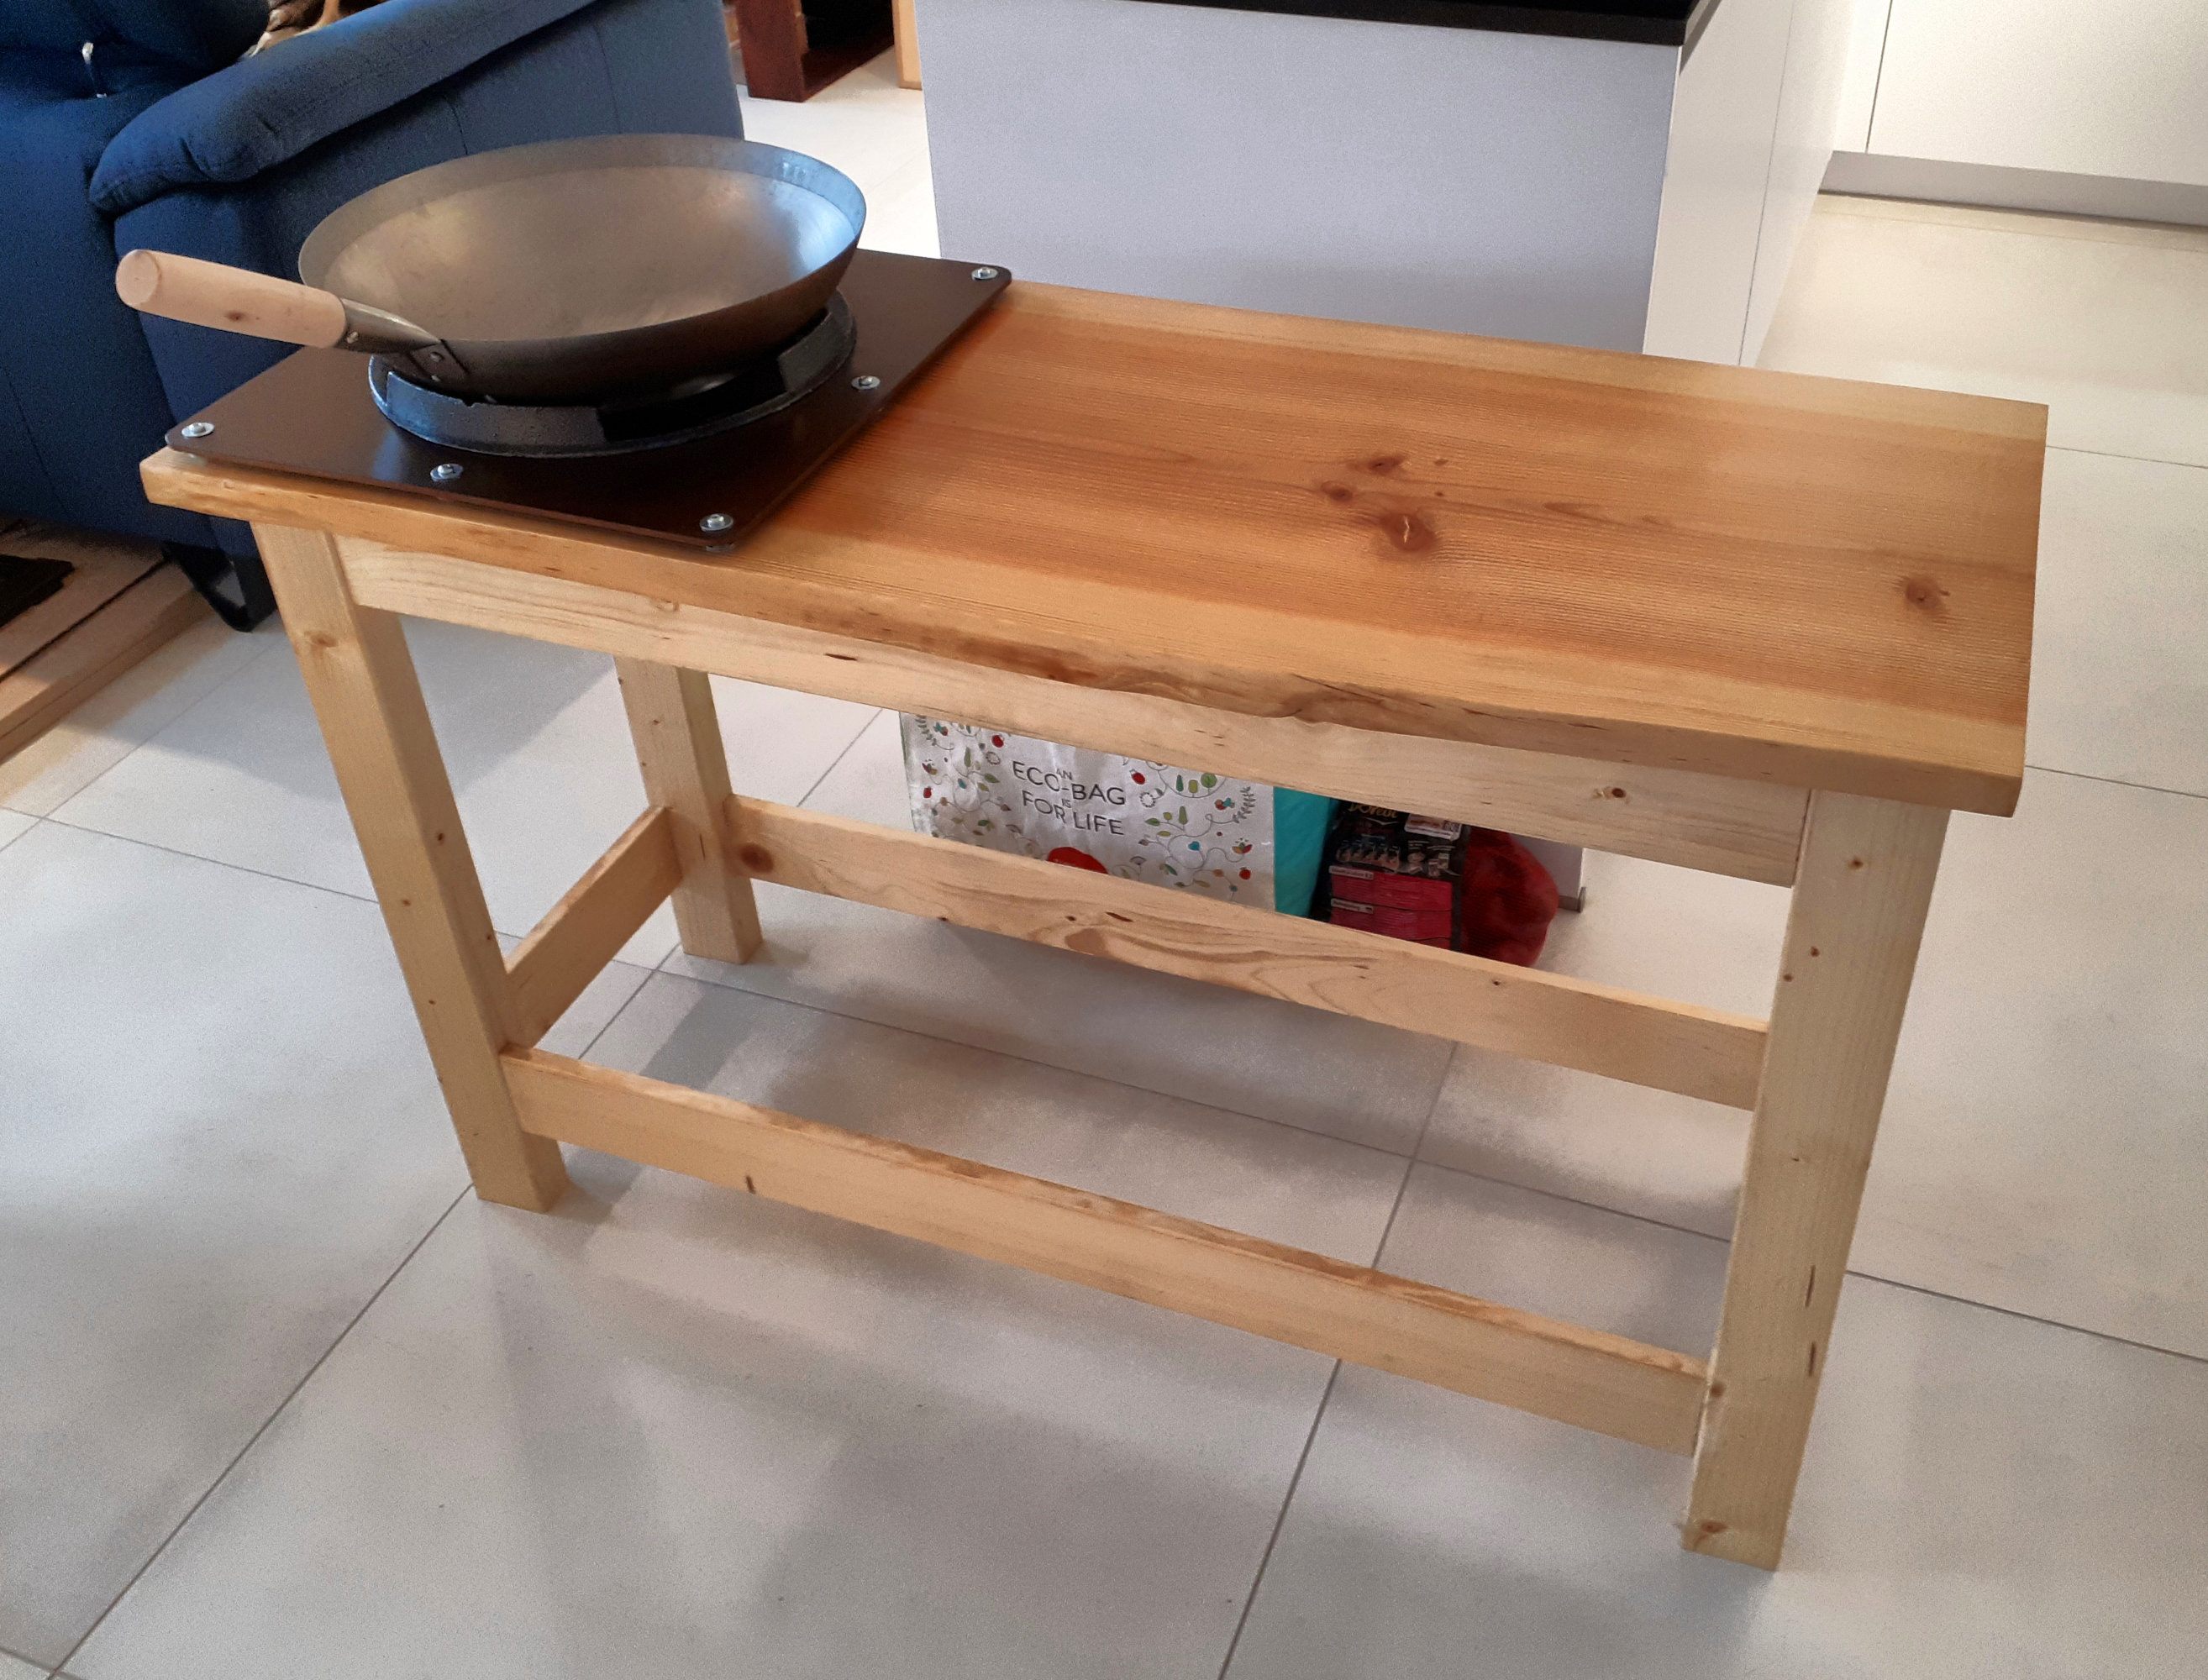
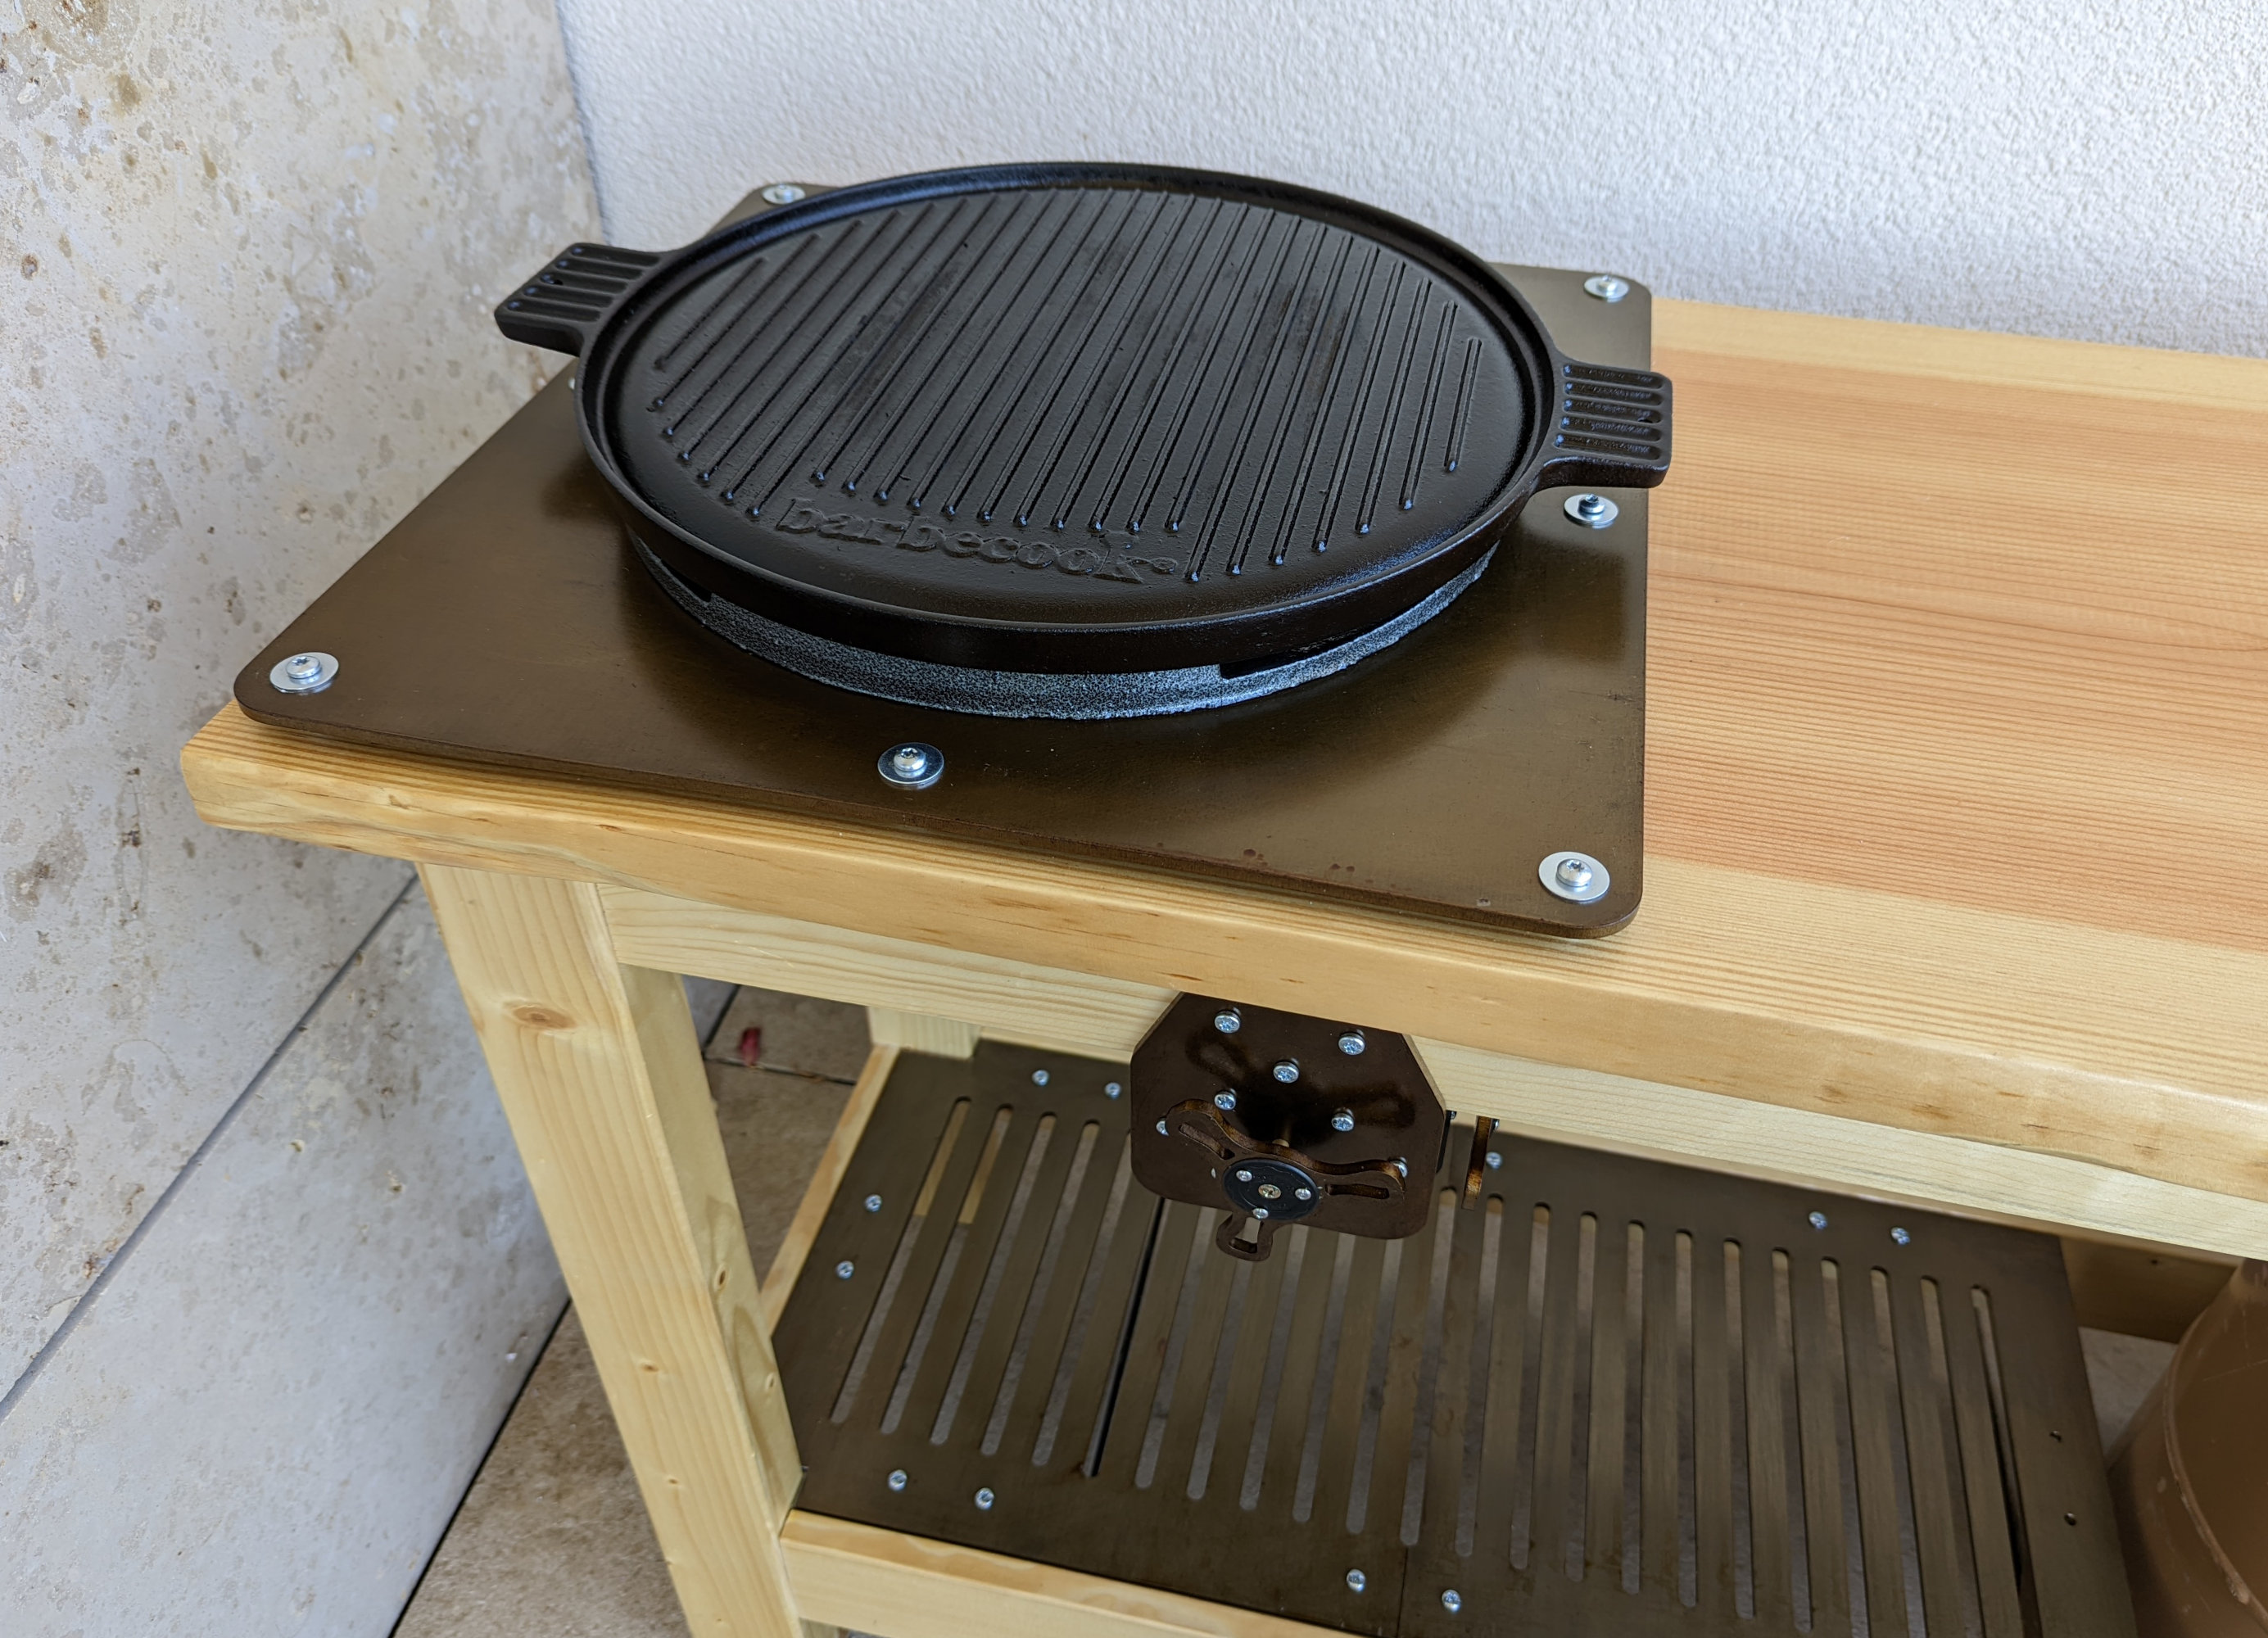
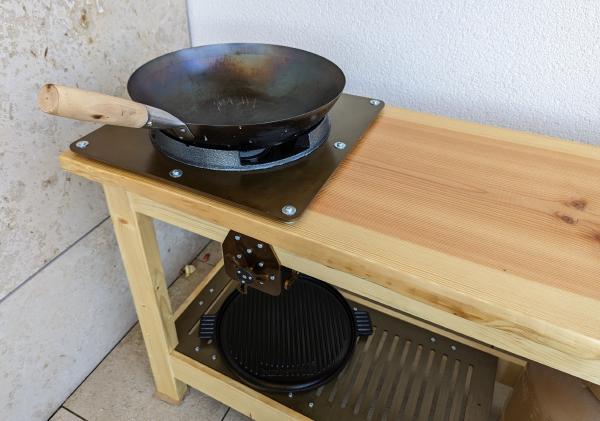
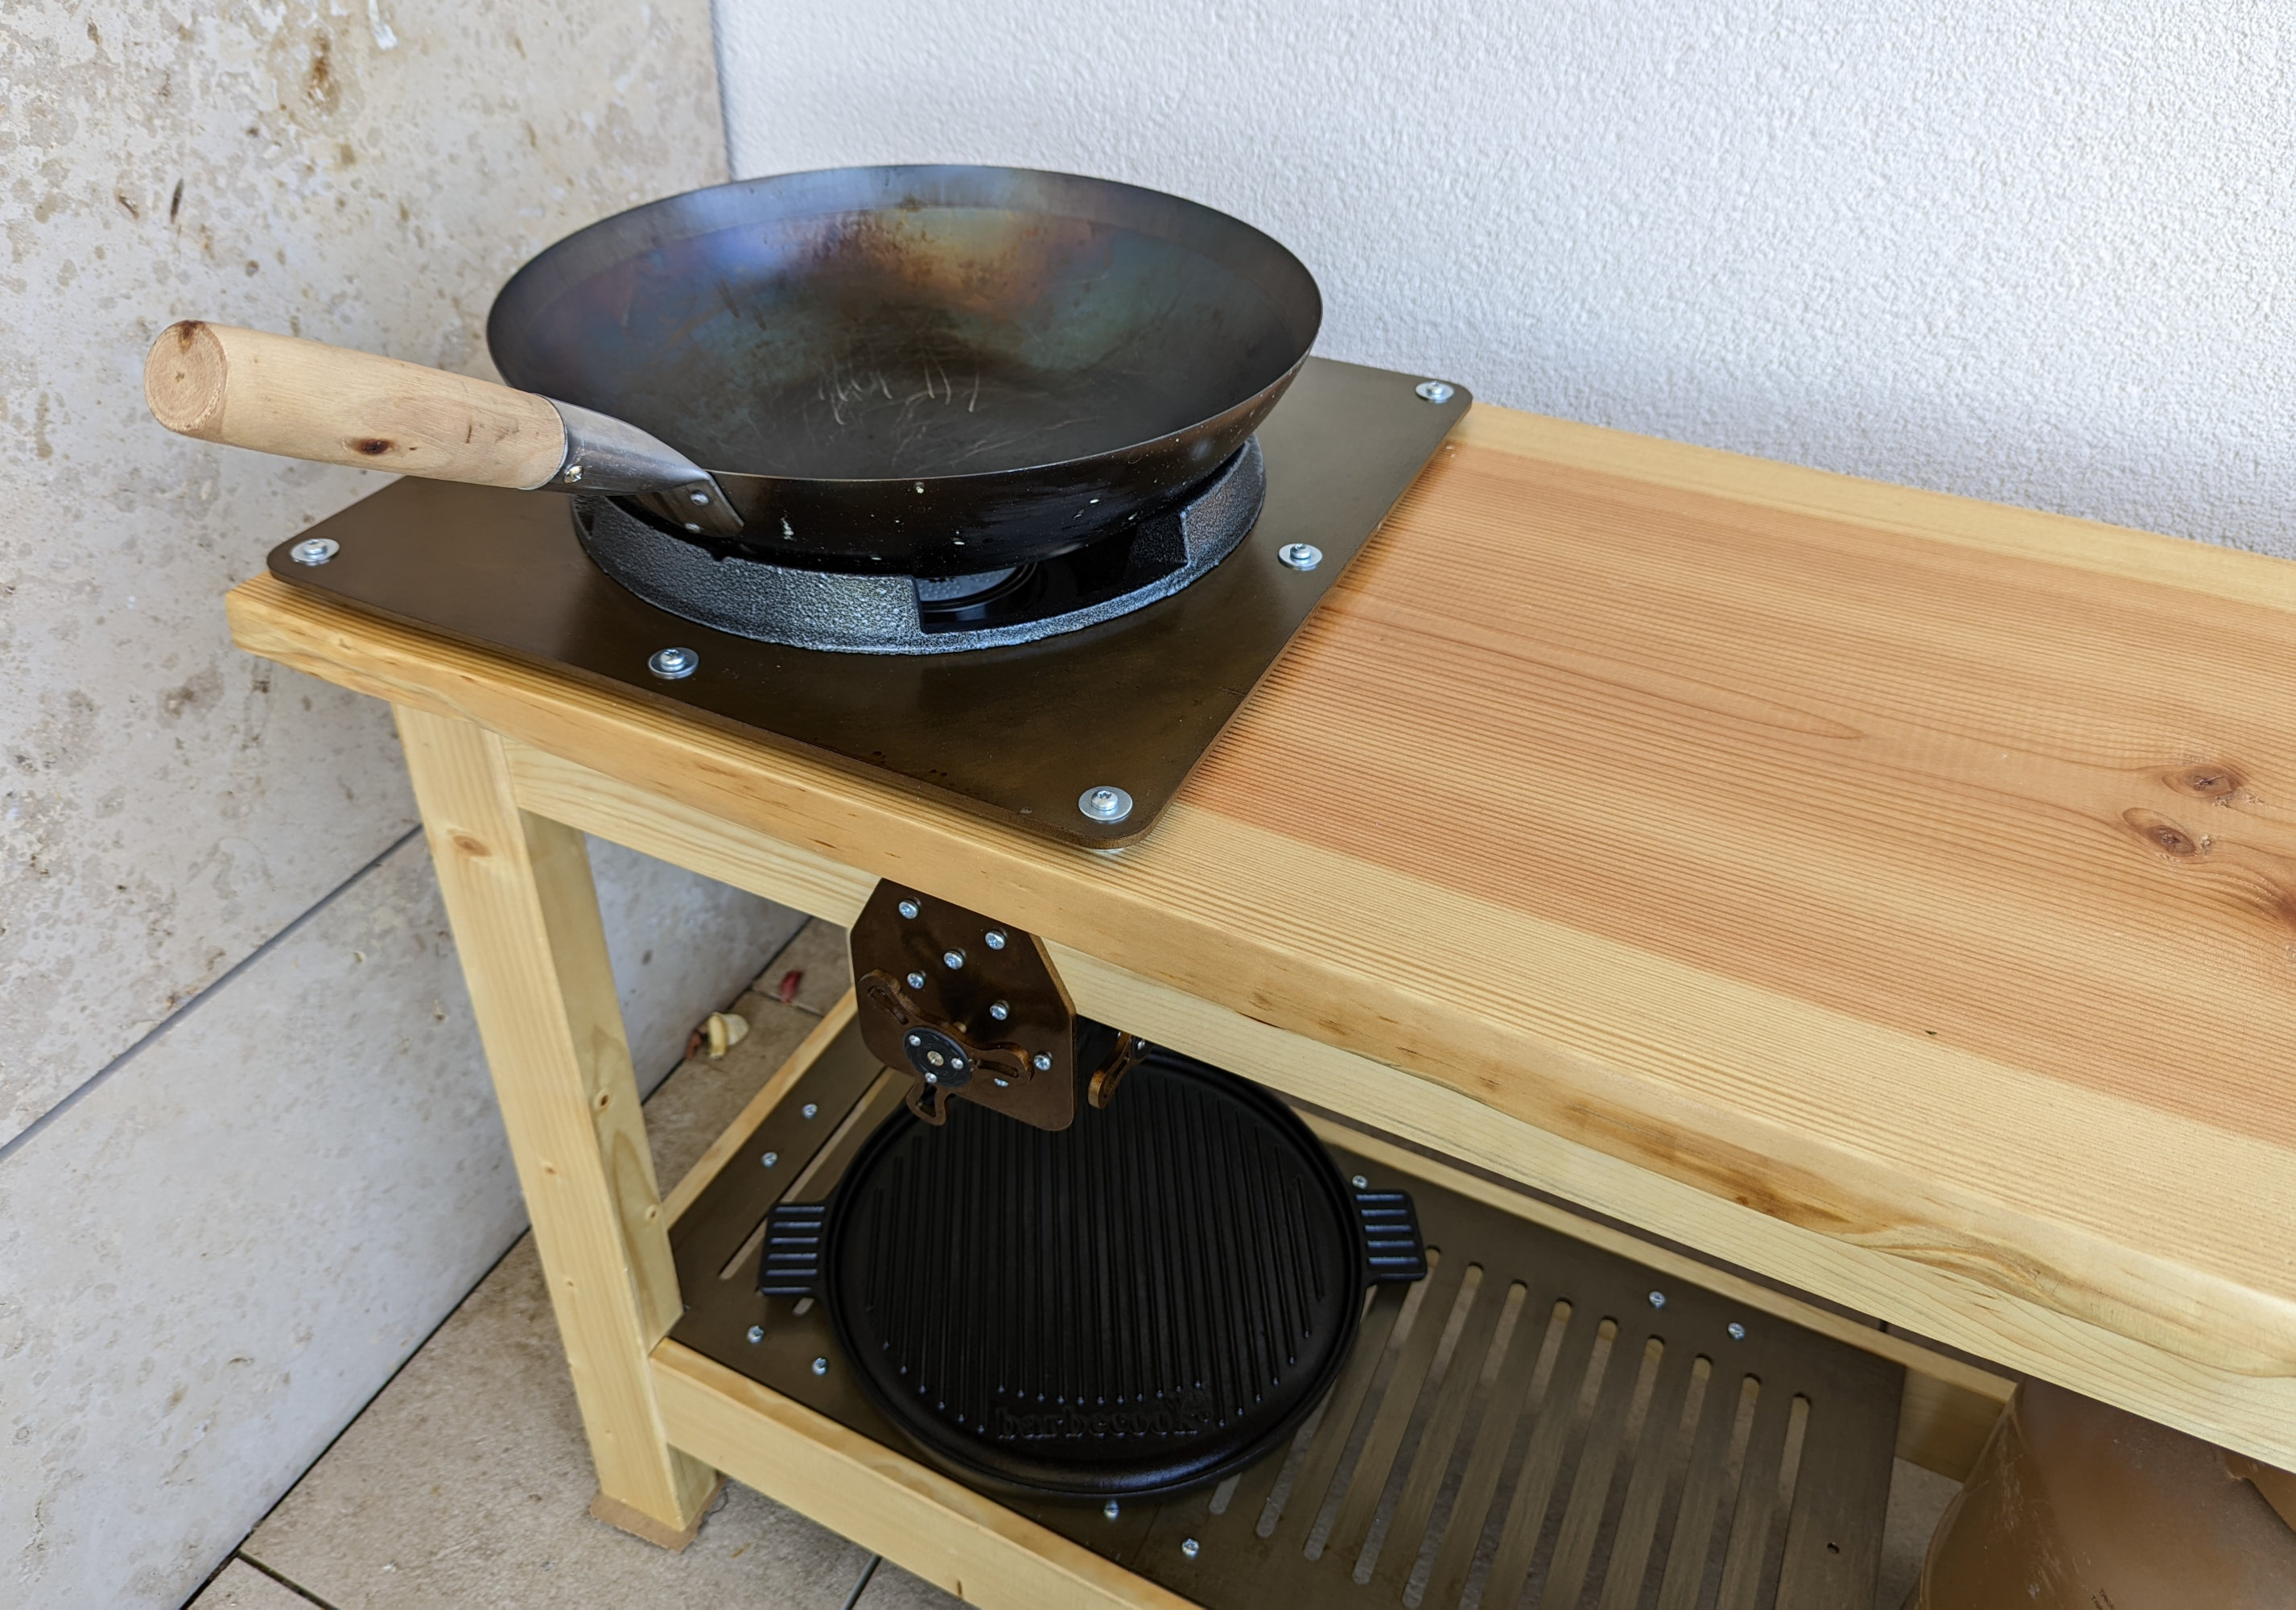
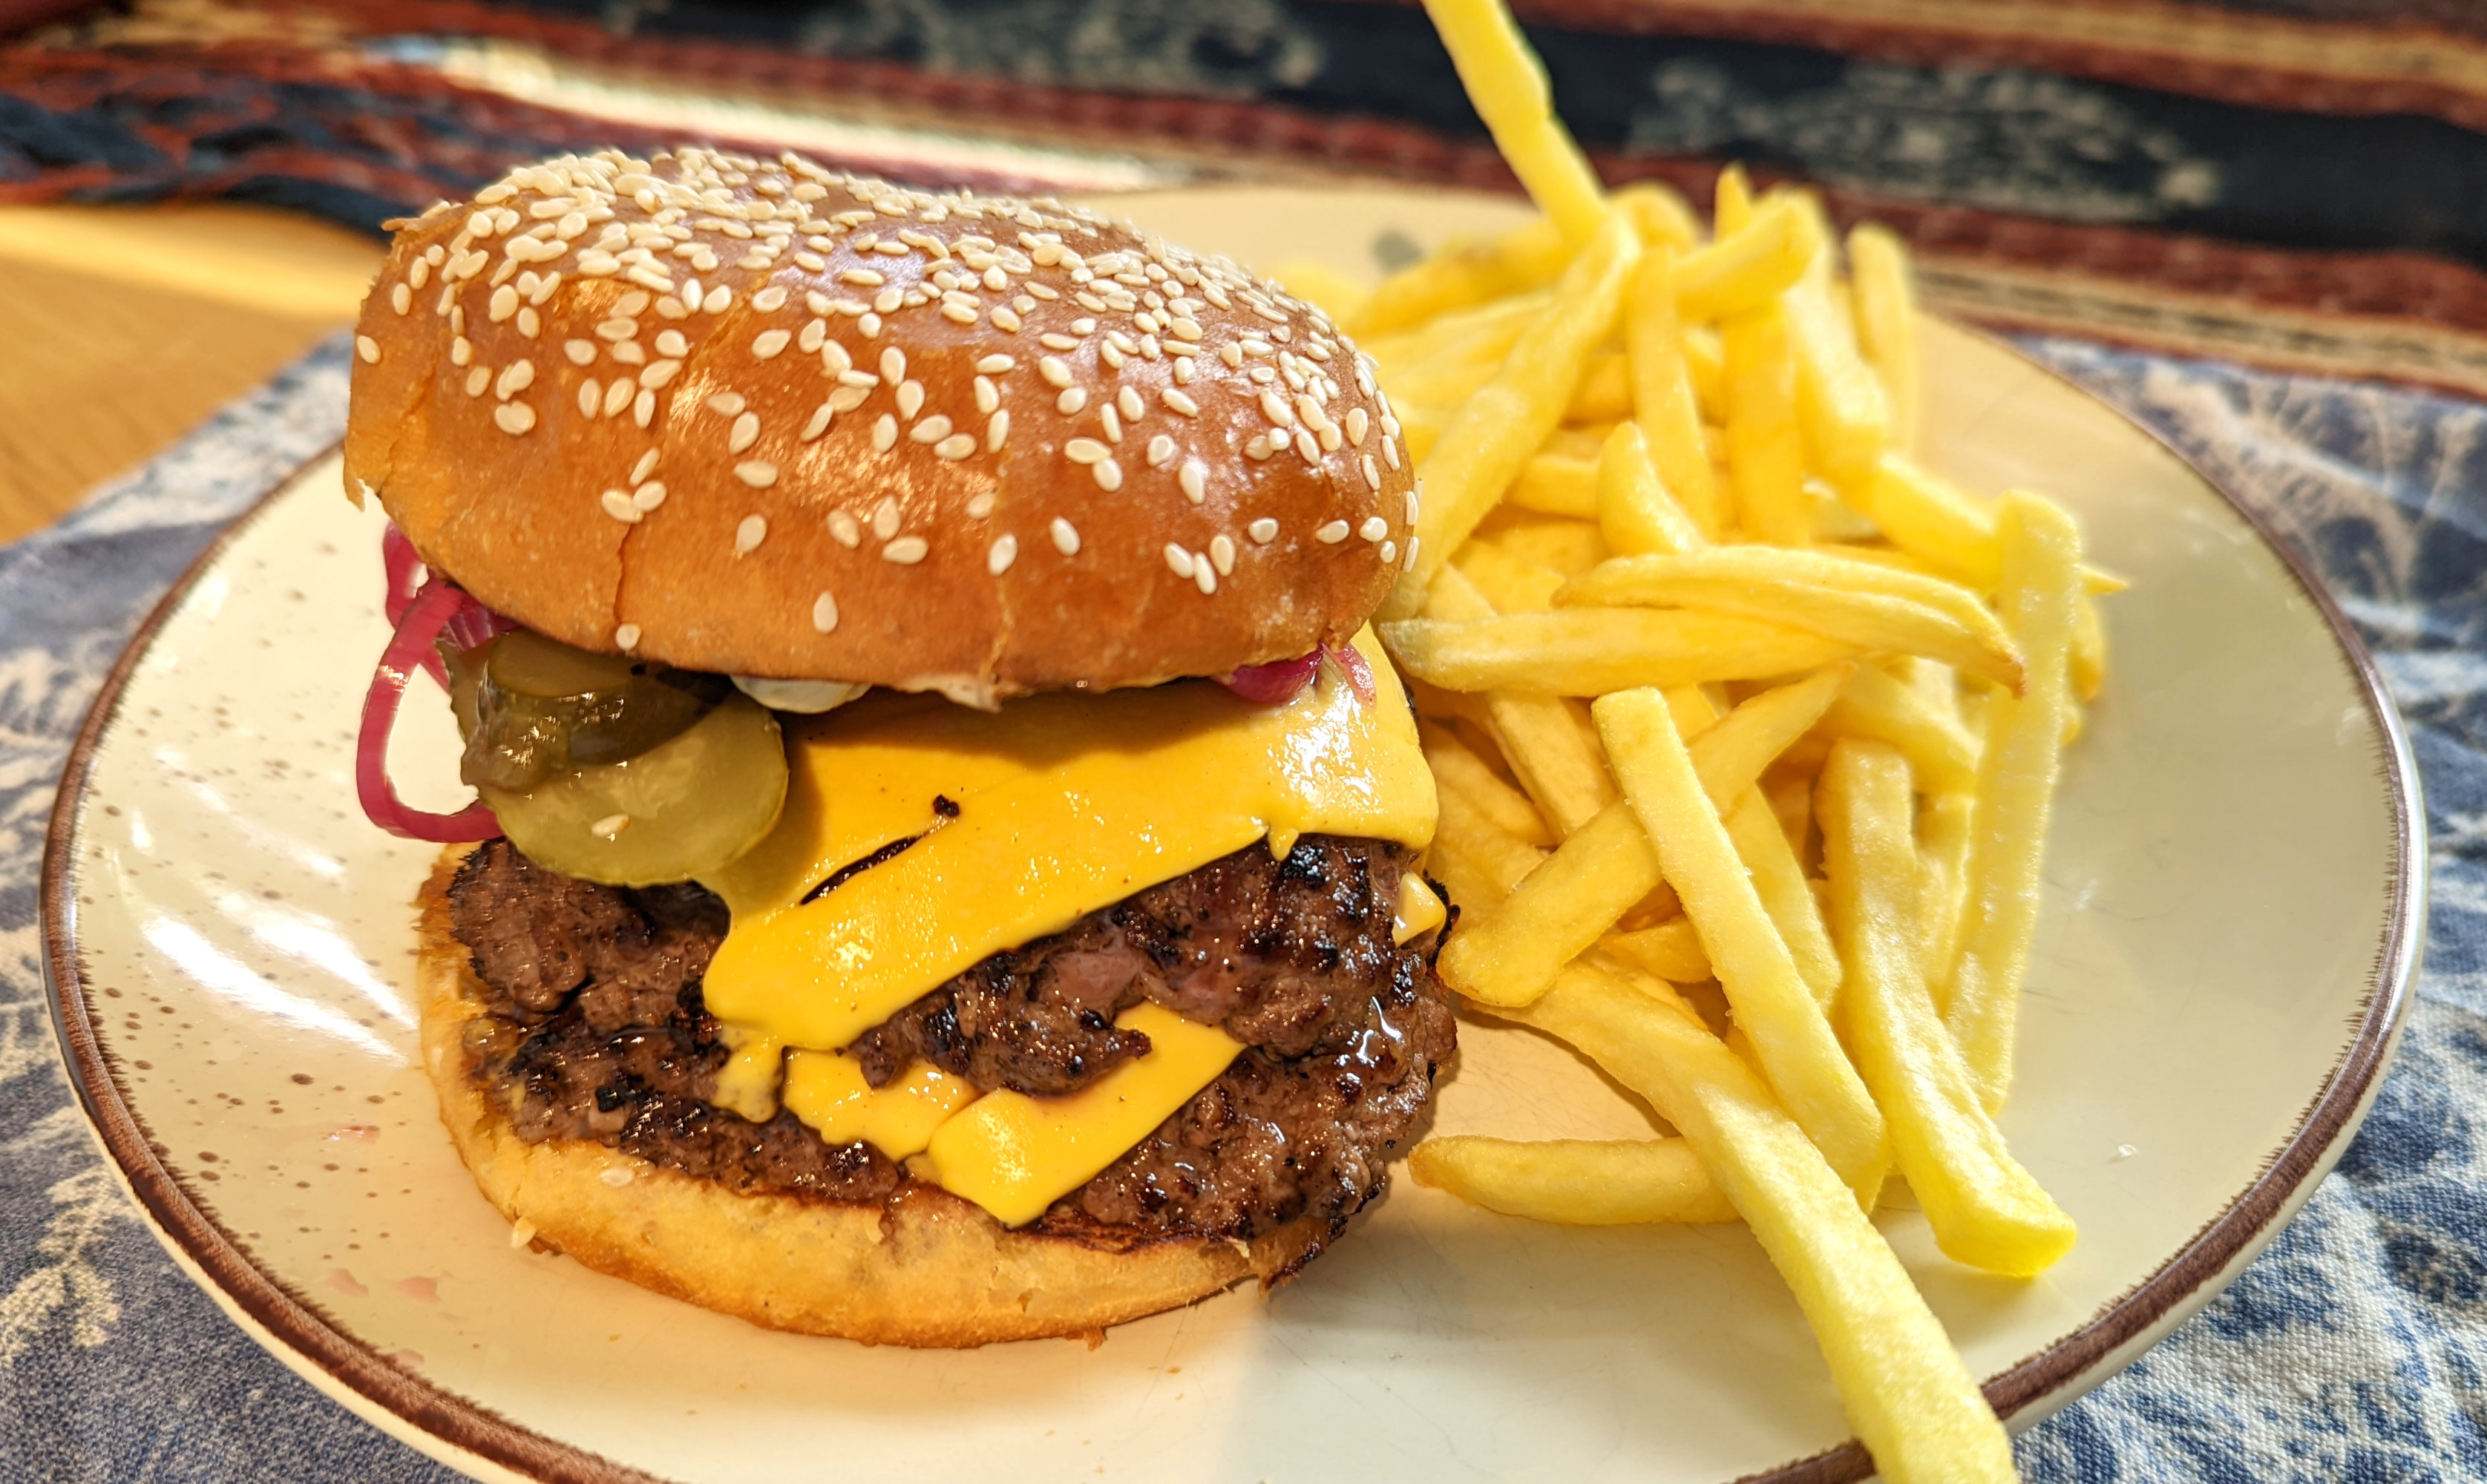
To begin with, I just bought a cast iron plancha and a carbon steel wok. The plancha is 360 mm in diameter and fits perfectly on top of the wok burner. It’s double-sided, with grill ridges on one side and a flat surface on the other. The wok is a cheap Northern Chinese style pao wok from the local Asian grocer. It’s 380 mm in diameter, which should be good for anywhere up to 8 portions of stir fry.
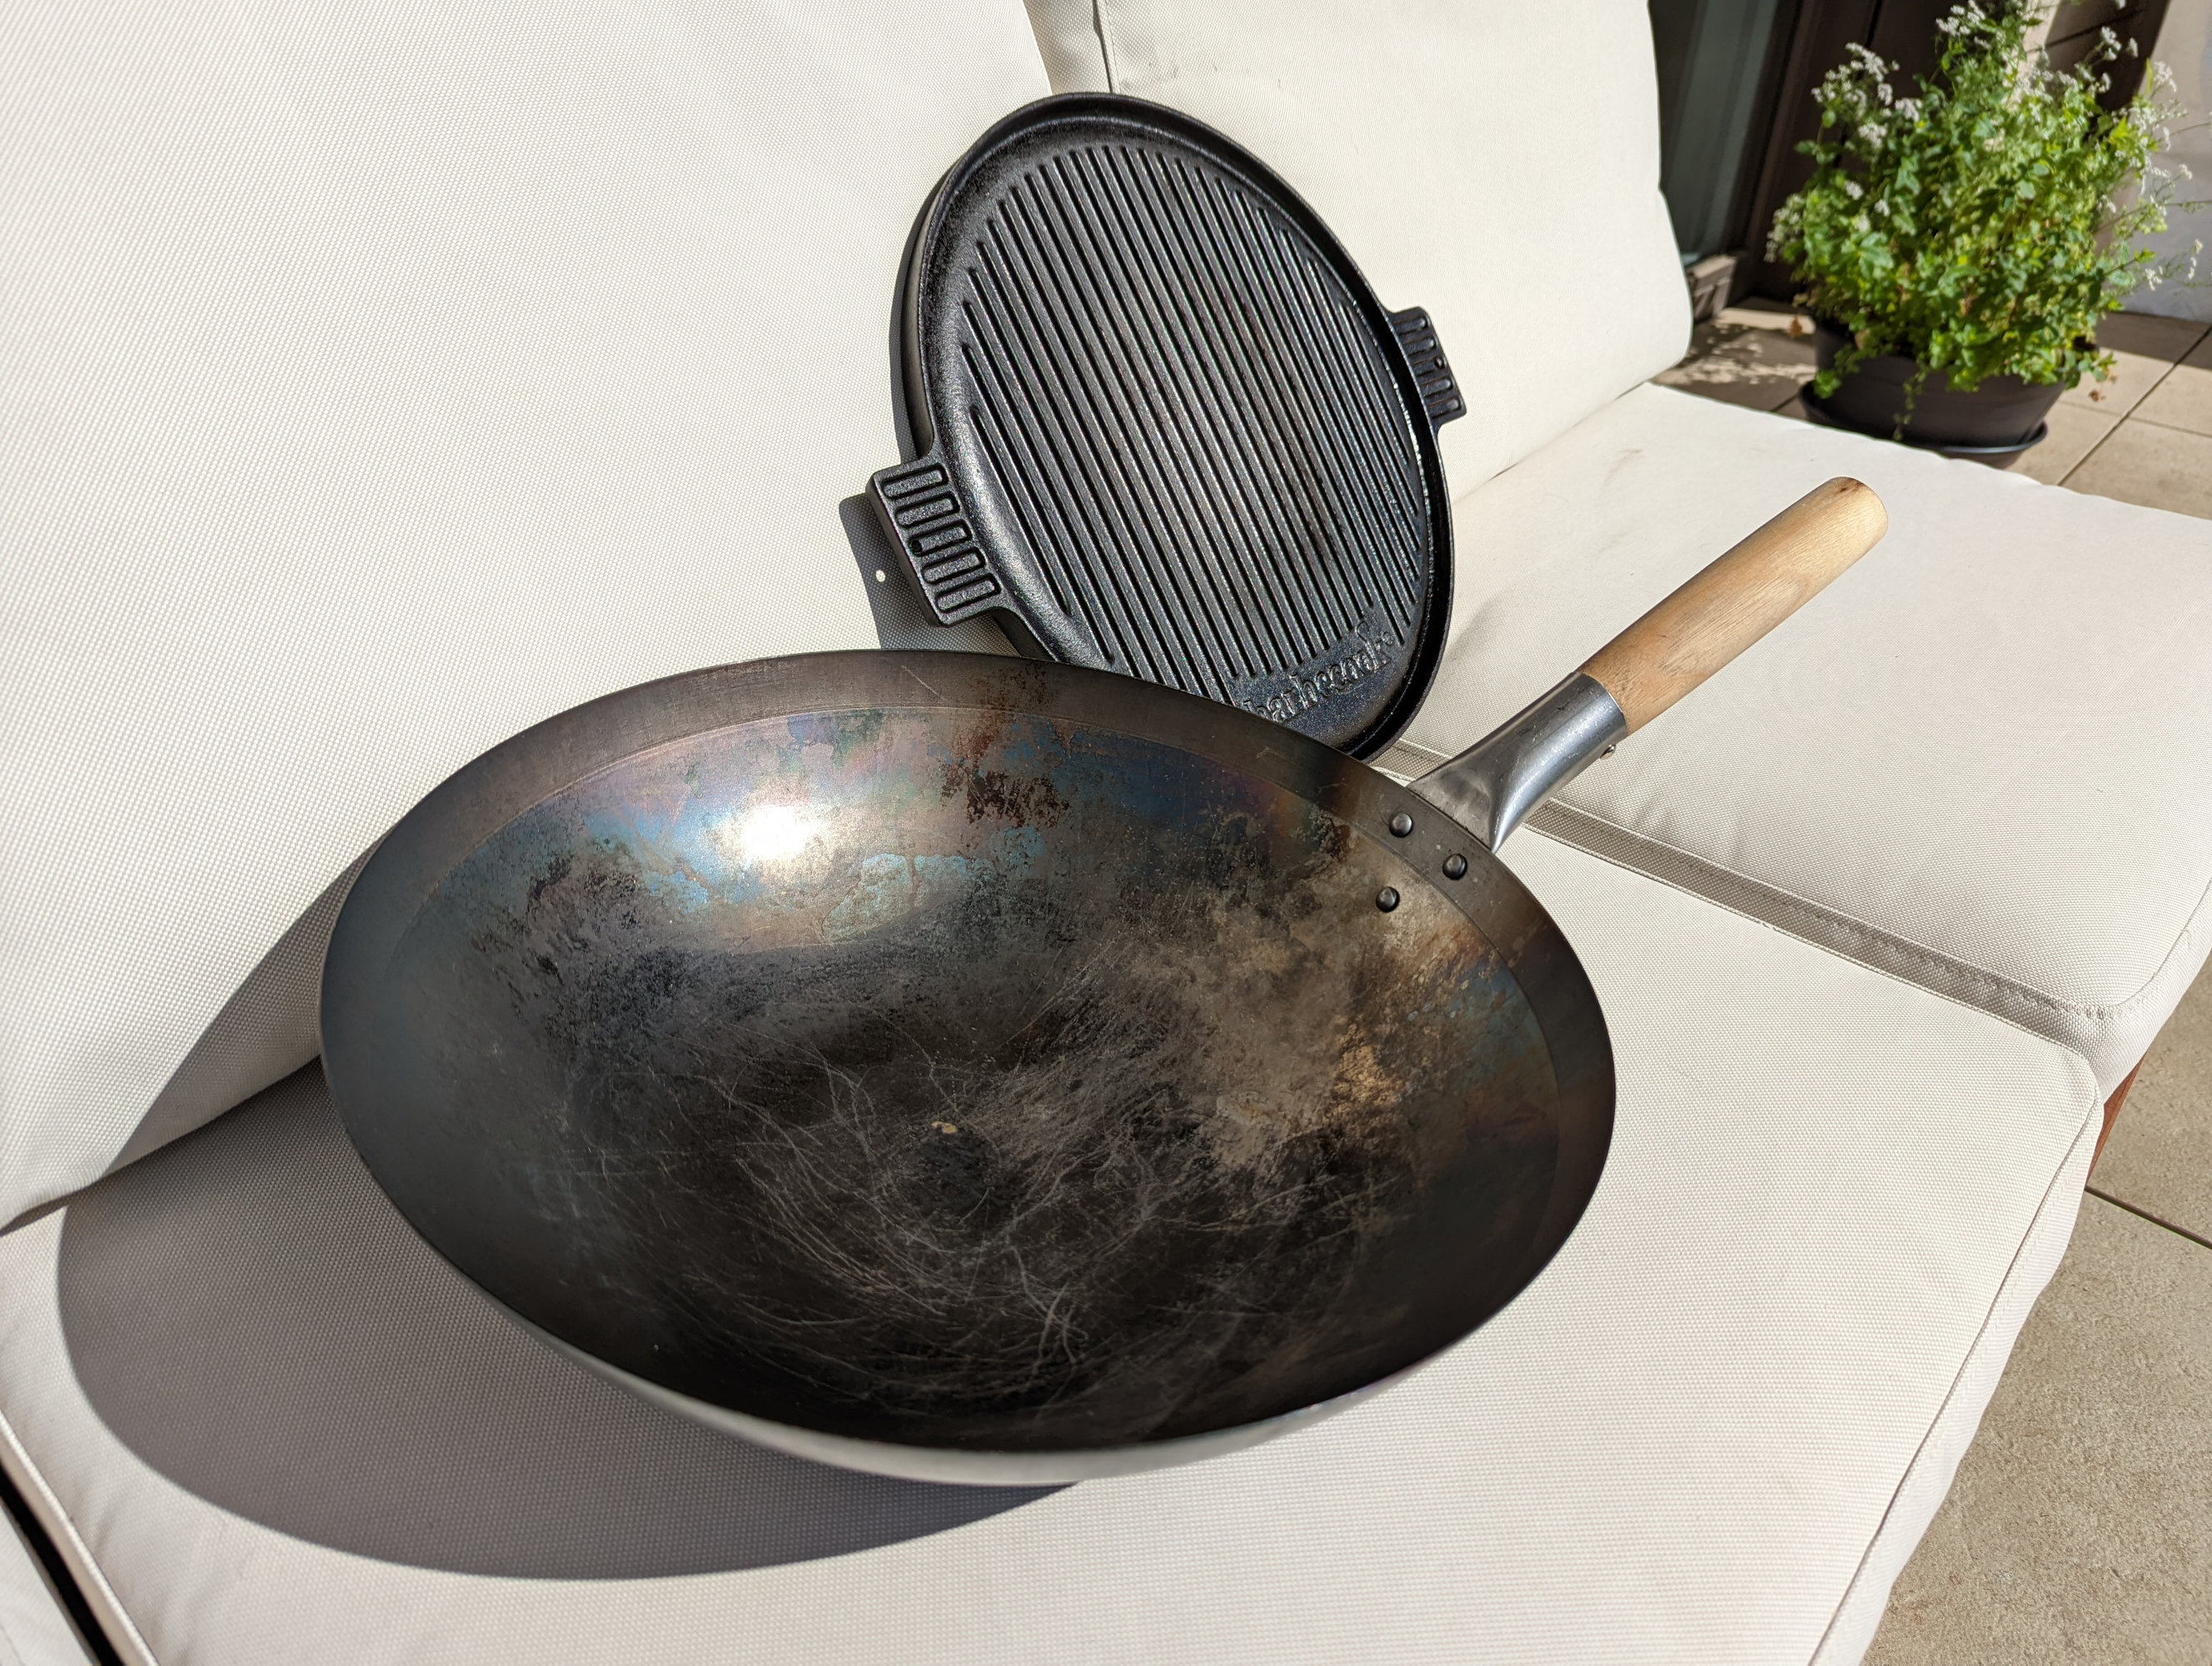
With these two pieces of cookware, I’ll be able to grill meats and vegetables, smash burger patties, stir fry noodles and rice, simmer curries and deep fry chicken. In the future, I may add a large saute pan and a large stock pot to the mix, which will open up options to making bulk tonkotsu broth, paella and more.
Workspace
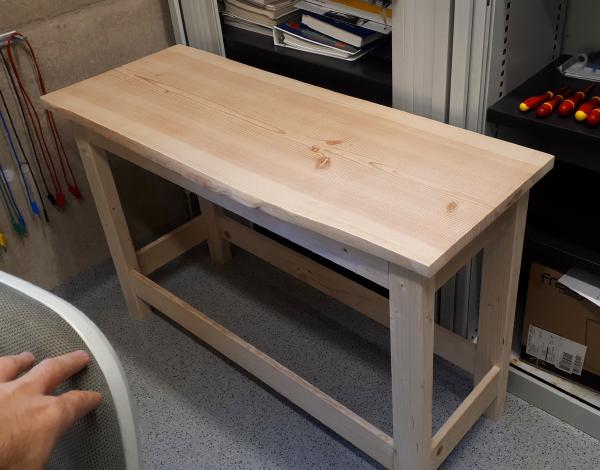
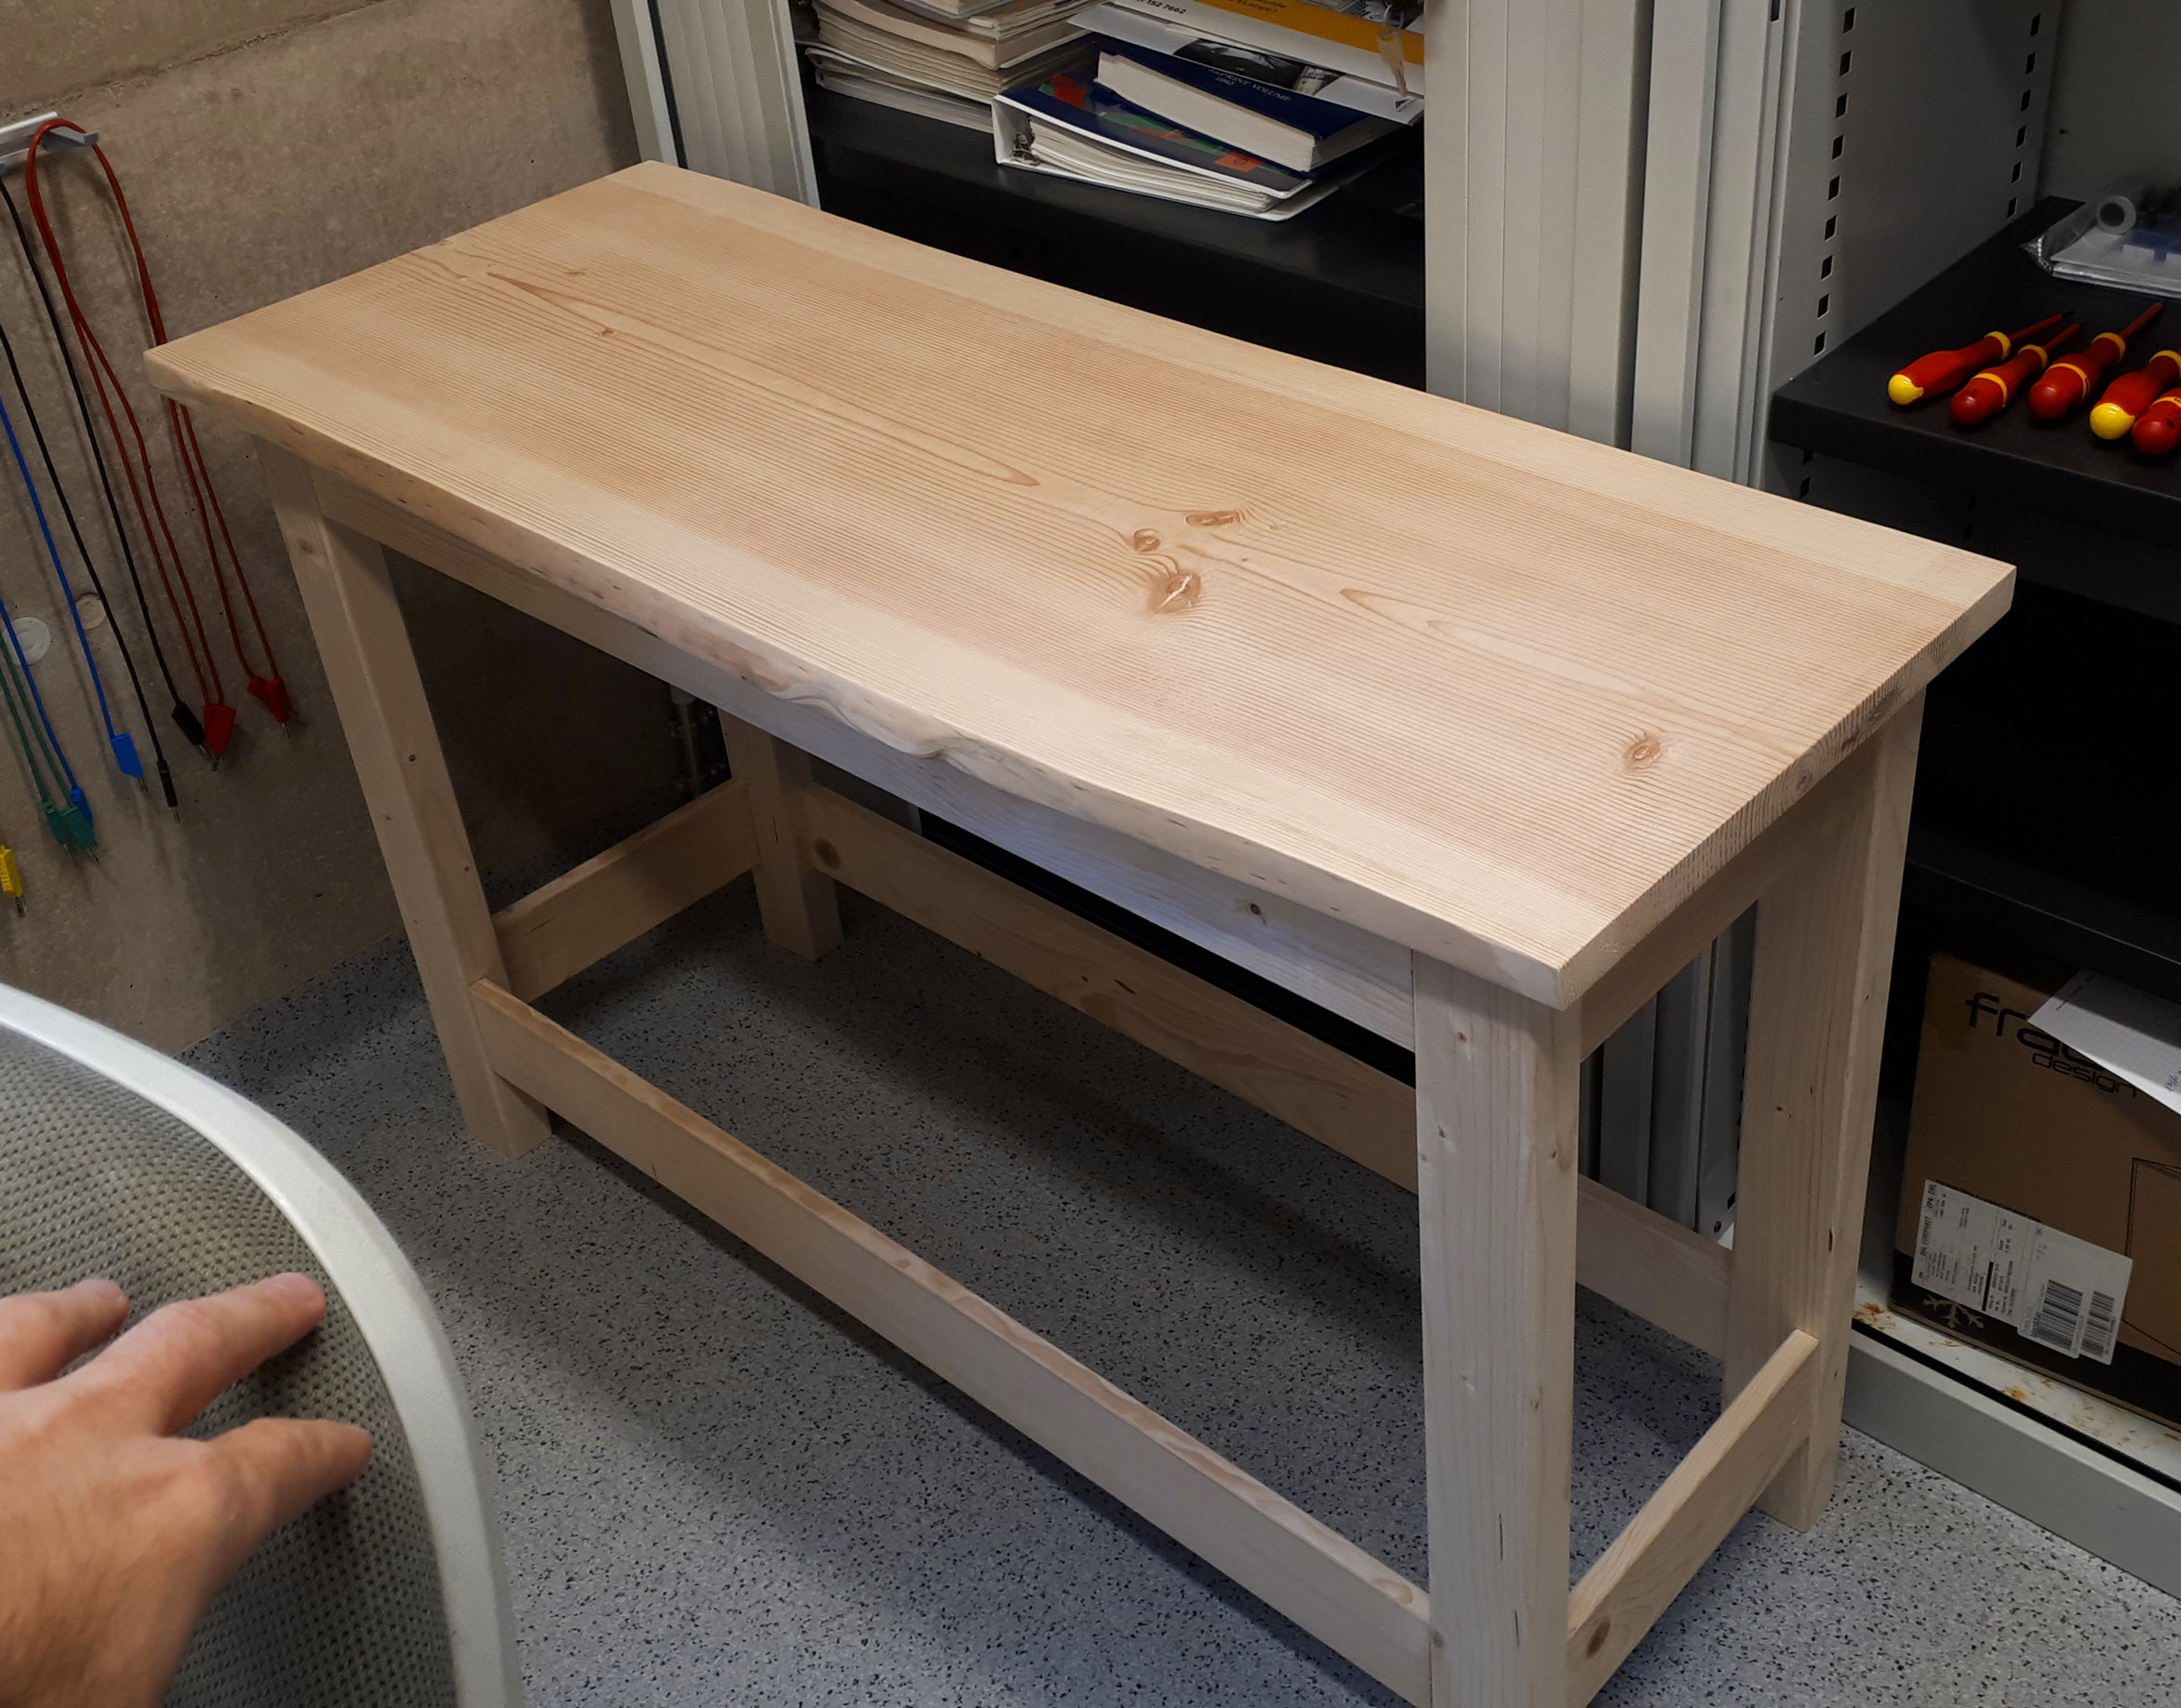
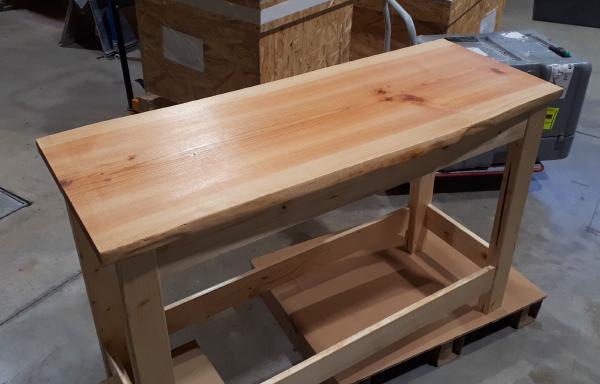
Initially I’d hoped to mount the burner into an off-the-shelf kitchen island bench. I had a small nook on my balcony for the cooking station that was about 1.6 m wide and about 1.0 m deep, and I wanted to maximise the bench space available around the burner. Visiting the IKEA in Arlon just across the border in Belgium didn’t turn up any good candidates, so I decided to build a simple bench myself with the limited tools at my disposal.
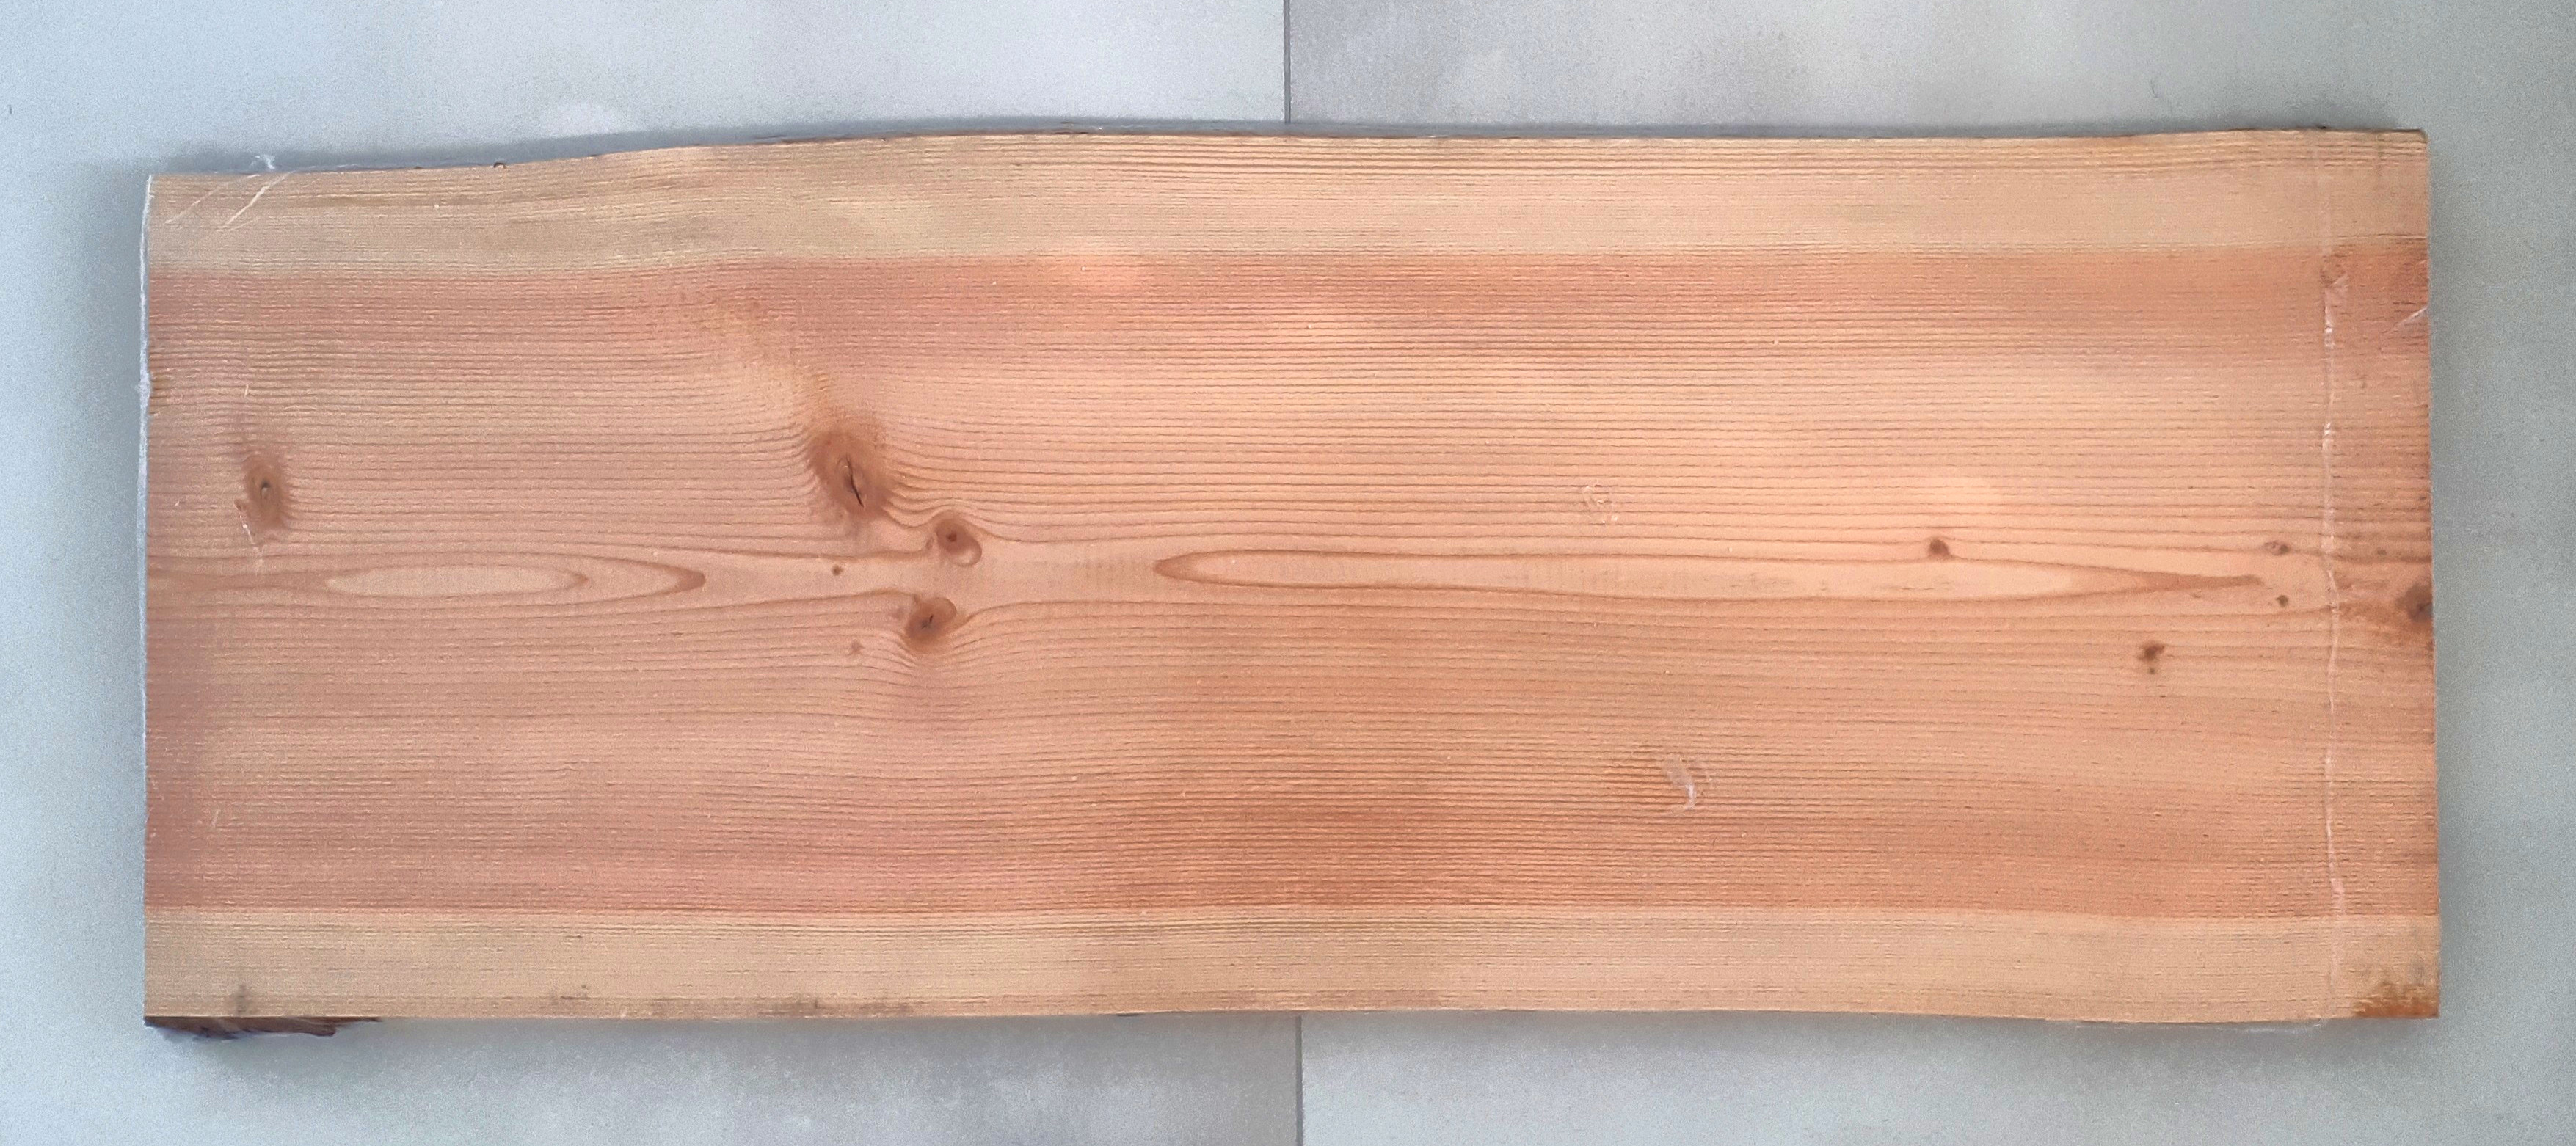
One of the hardware stores that operates in Luxembourg, Bauhaus, sells lovely live edge timber slabs. I selected a centre-cut slab of Douglas Fir around 1200 mm long, 500 mm wide and 35 mm thick as a benchtop for the cooking station. Douglas Fir is quite soft and easy to work with, but is very pretty. It has a prominent open grain, pine coloured sapwood and coral pink heartwood. The remaining timber, fasteners, glue and lacquer used to build the bench were also purchased at the same store.
Making a Plan
Living in an apartment means I don’t have access to a large workspace, nor to a collection of tools to do any serious woodwork or metalwork. Fortunately, my work allowed me to borrow some of their equipment and to use their garage space on the weekends. They are not set up to do any serious fabrication, but I had access to some basics — a 3D printer, a hand drill, a jigsaw, angle grinder, mallets, screwdrivers and a selection of abrasives.
To ensure I could build something with the tools and space I had access to, I first modelled the cooking station in Fusion 360. I’m normally a SolidWorks guy, but I didn’t have access to a license for personal use. It was a good opportunity to learn Autodesk’s hobbyist-targeted software and assess its capabilities.
Measurements With a Camera or Scanner
Both the burner mounting plate and the burner base replacement interfaced with existing parts that I didn’t have the model for. This meant taking accurate measurements and modelling up the live edge benchtop and the burner heat shield.
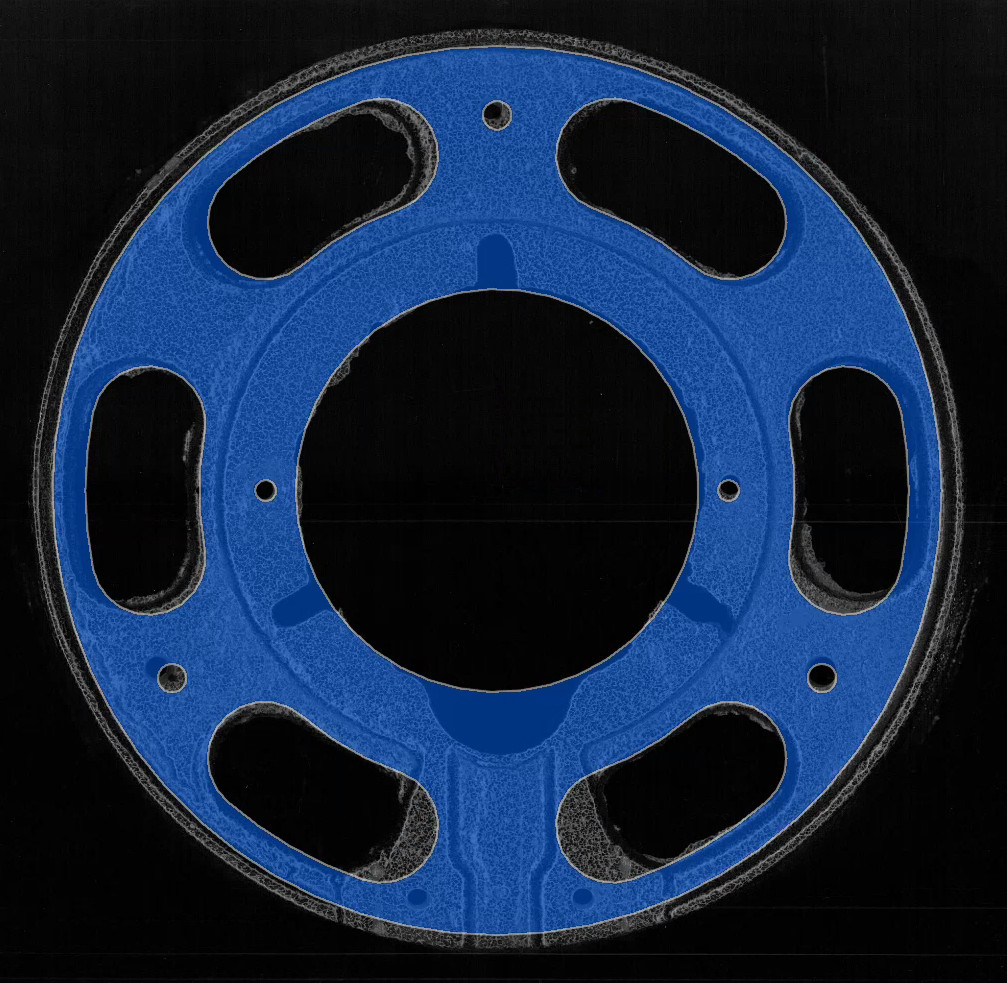
A regular flatbed scanner can be used as a precise measurement device. Most scanners will image at resolutions of 600 dpi (roughly 42 μm per pixel) or higher, and provide a clean, undistorted image of a flat surface. For the heat shield base, I simply placed the existing base on the scanner and ran a scan with the lid open. To validate the scan accuracy, I took a couple of manual measurements of the part and compared them to measurements taken from the scan in an image editor. Fusion 360 then allows direct import of images onto a plane through the Insert 🠖 Canvas command in the Solid tab of the ribbon bar.
For the benchtop, I just took a photo the timber slab with my crappy old phone. There are fancy photogrammetry techniques with complex workflows out there, many of which produce accurate 3D models, but they weren’t necessary for the benchtop. After basic perspective correction and scaling of a single image, I got a plenty accurate trace of the live edge contour.
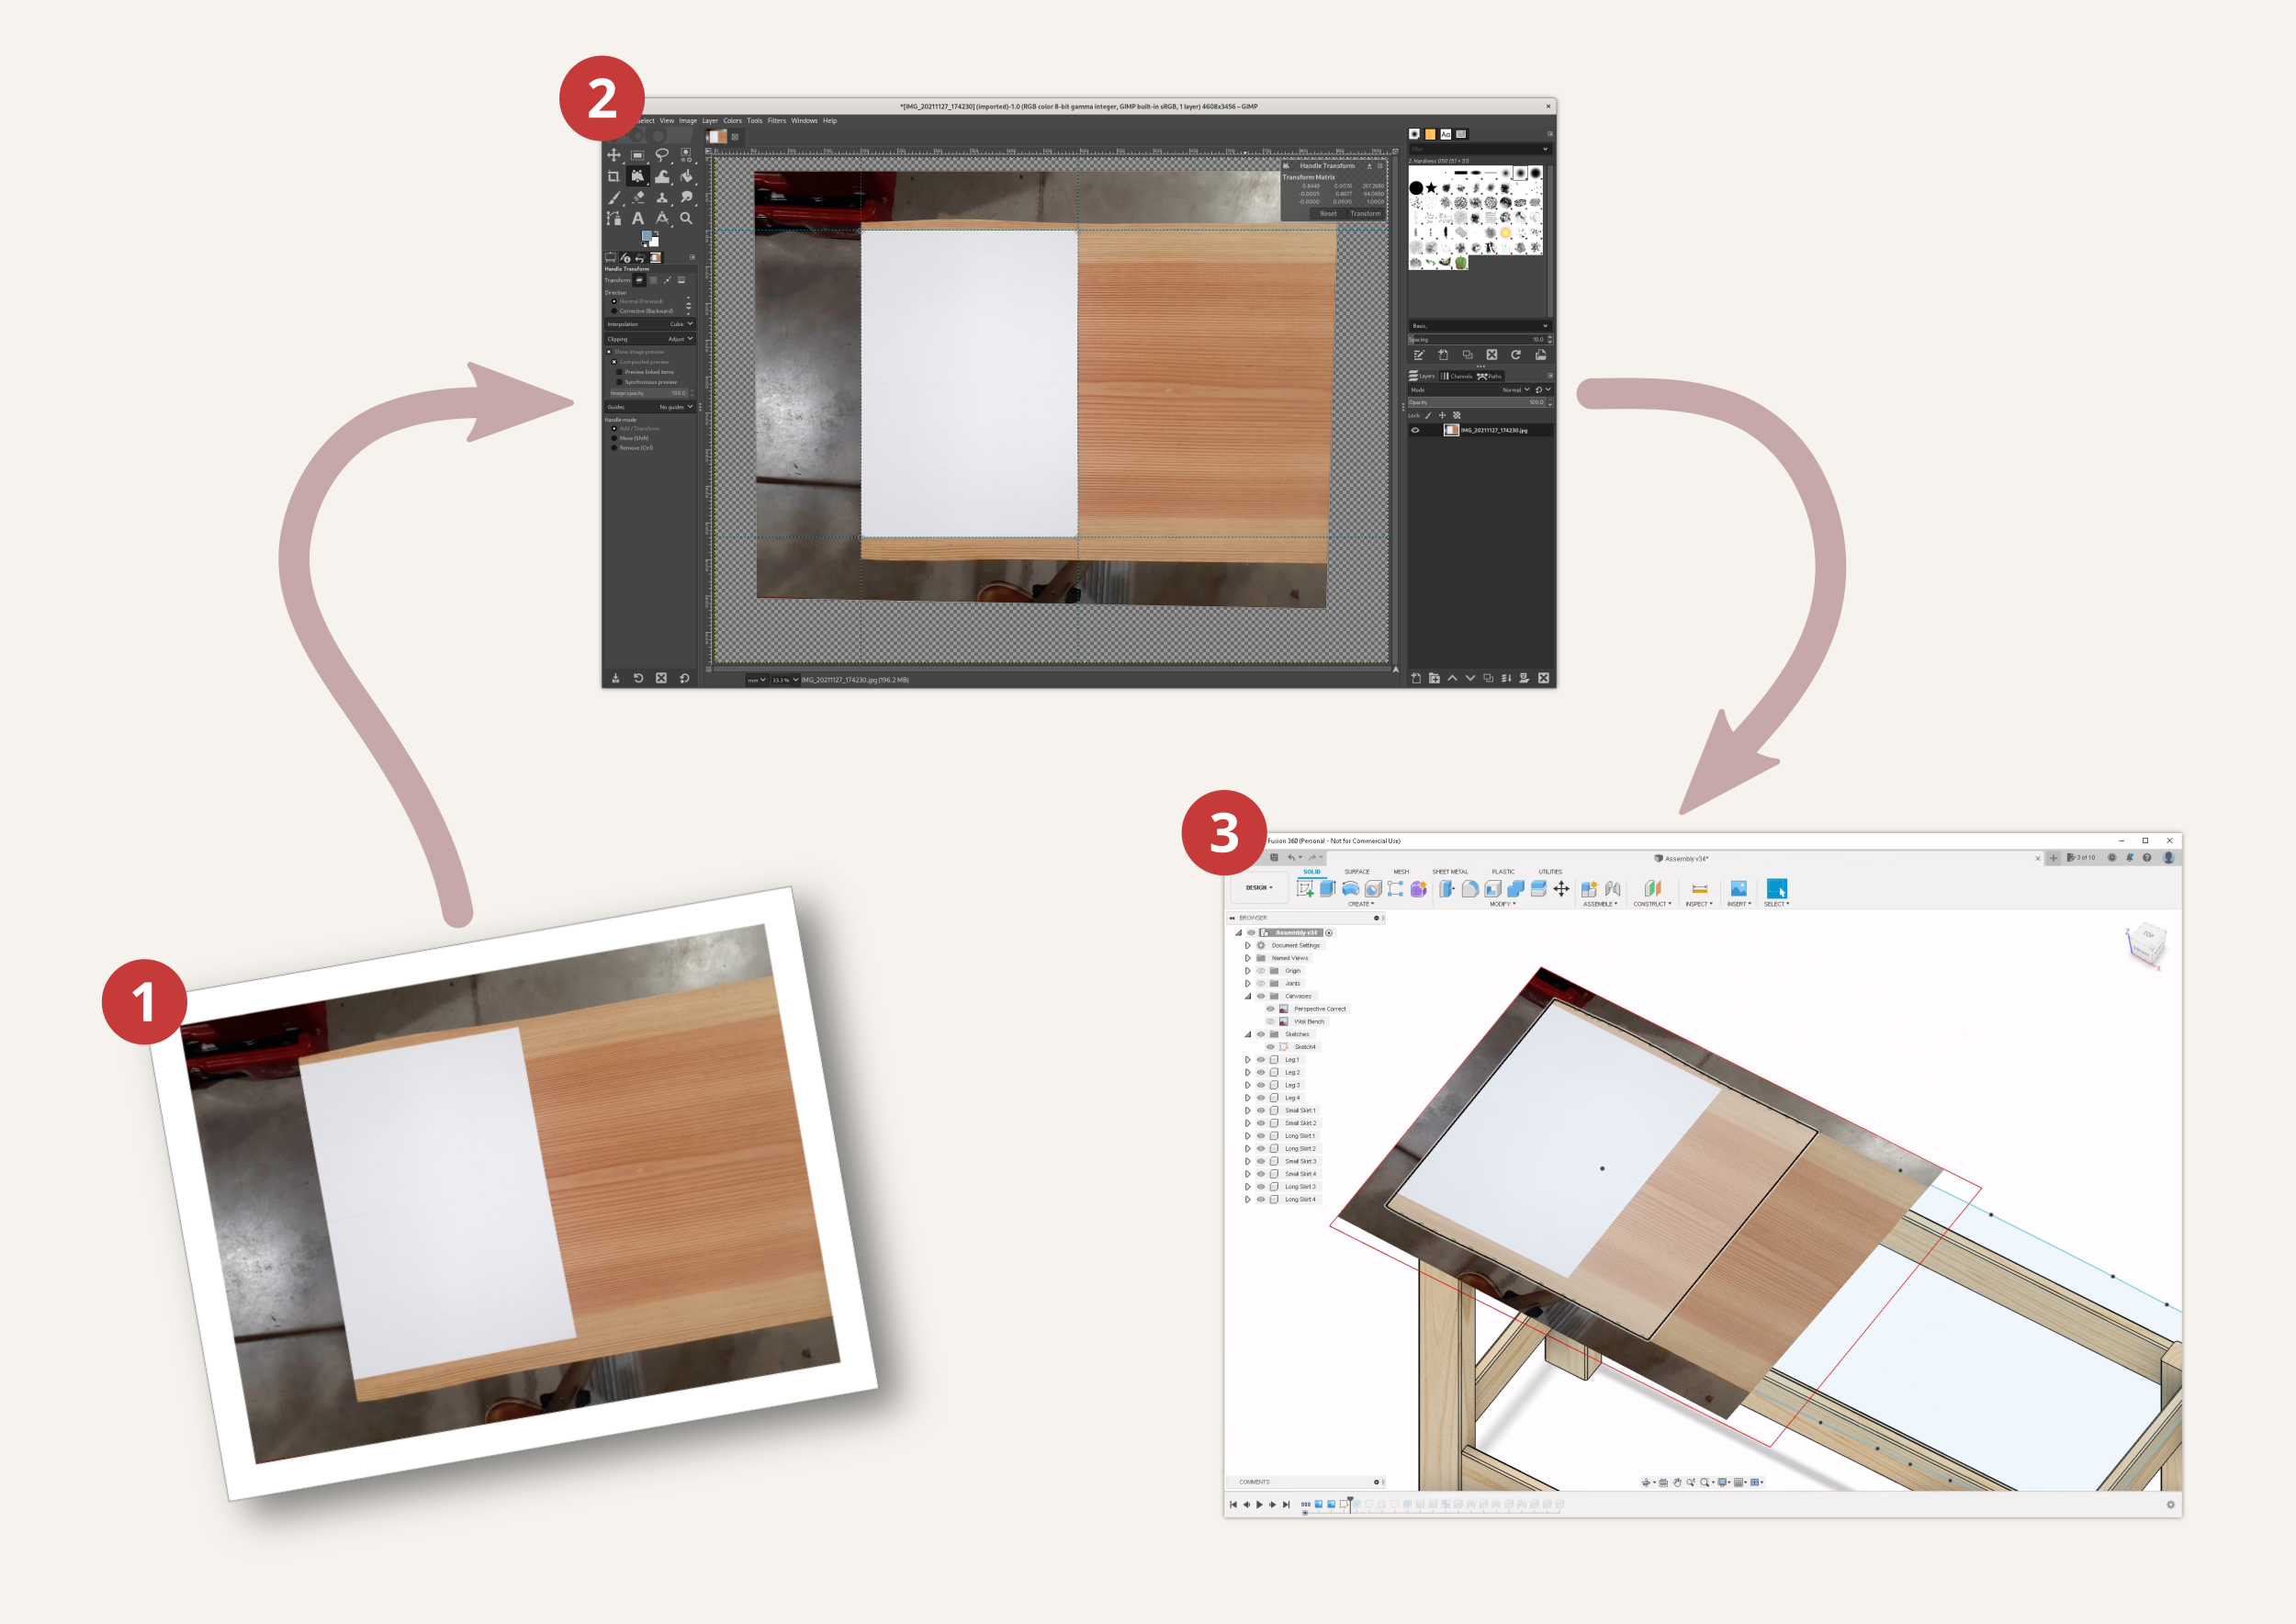
Taking measurements of a flat surface using a single image from your phone or a camera is a fairly simple process:
Take a photo of the surface to be measured. You’ll need a large rectangular reference of known size on the surface. I simply placed 2 pieces of A3 paper (making up a 420 mm x 594 mm rectangle) on the benchtop. It helps if the camera is pointed as close to perpendicular to the surface as possible.
Correct for perspective distortion in the GIMP using the handle transform tool. I first scale the image to roughly the correct resolution in px/mm, add guides to form a rectangle that is the size of my reference, then drag the 4 handles from the corners of the reference in the image to the corners of the guides.
Import the corrected image into Fusion 360 as a canvas. The canvas scale then needs to be calibrated by setting the a known real-world distance between two points in the image. You can start this process by right-clicking the canvas and selecting “Calibrate”.
Heatproofing
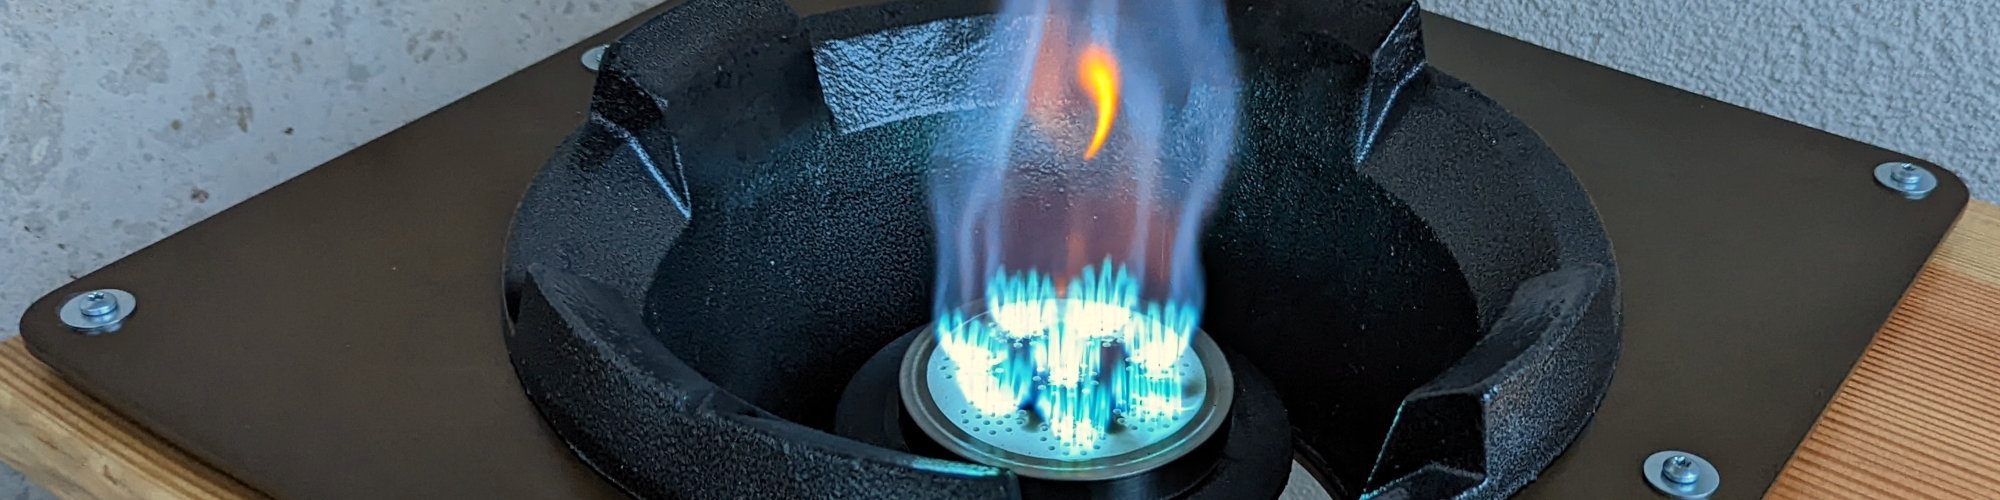
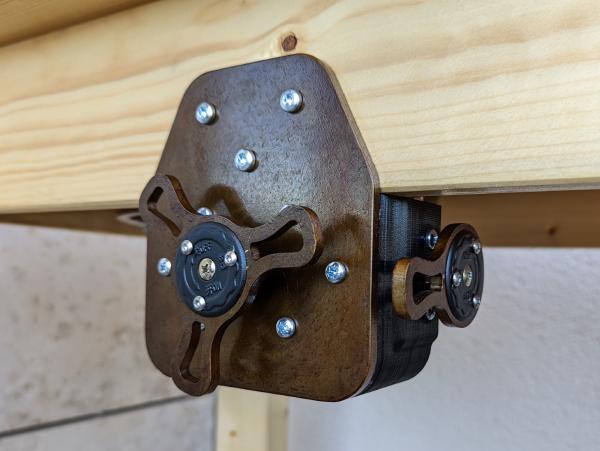
Choosing to make the workspace from wood and use a high-powered gas burner as a heat source presented an obvious risk — charring or burning of the bench. After receiving the burner, I did a few quick tests to assess where there was excessive heat transfer around the heat shield. I found that the bottom and lower sides of the heat shield stayed relatively cool. The upper sides and lip of the heat shield got very hot, but didn’t radiate much. There was significant sideways convection due to combustion gases escaping between the heat shield and the wok or BBQ plate.
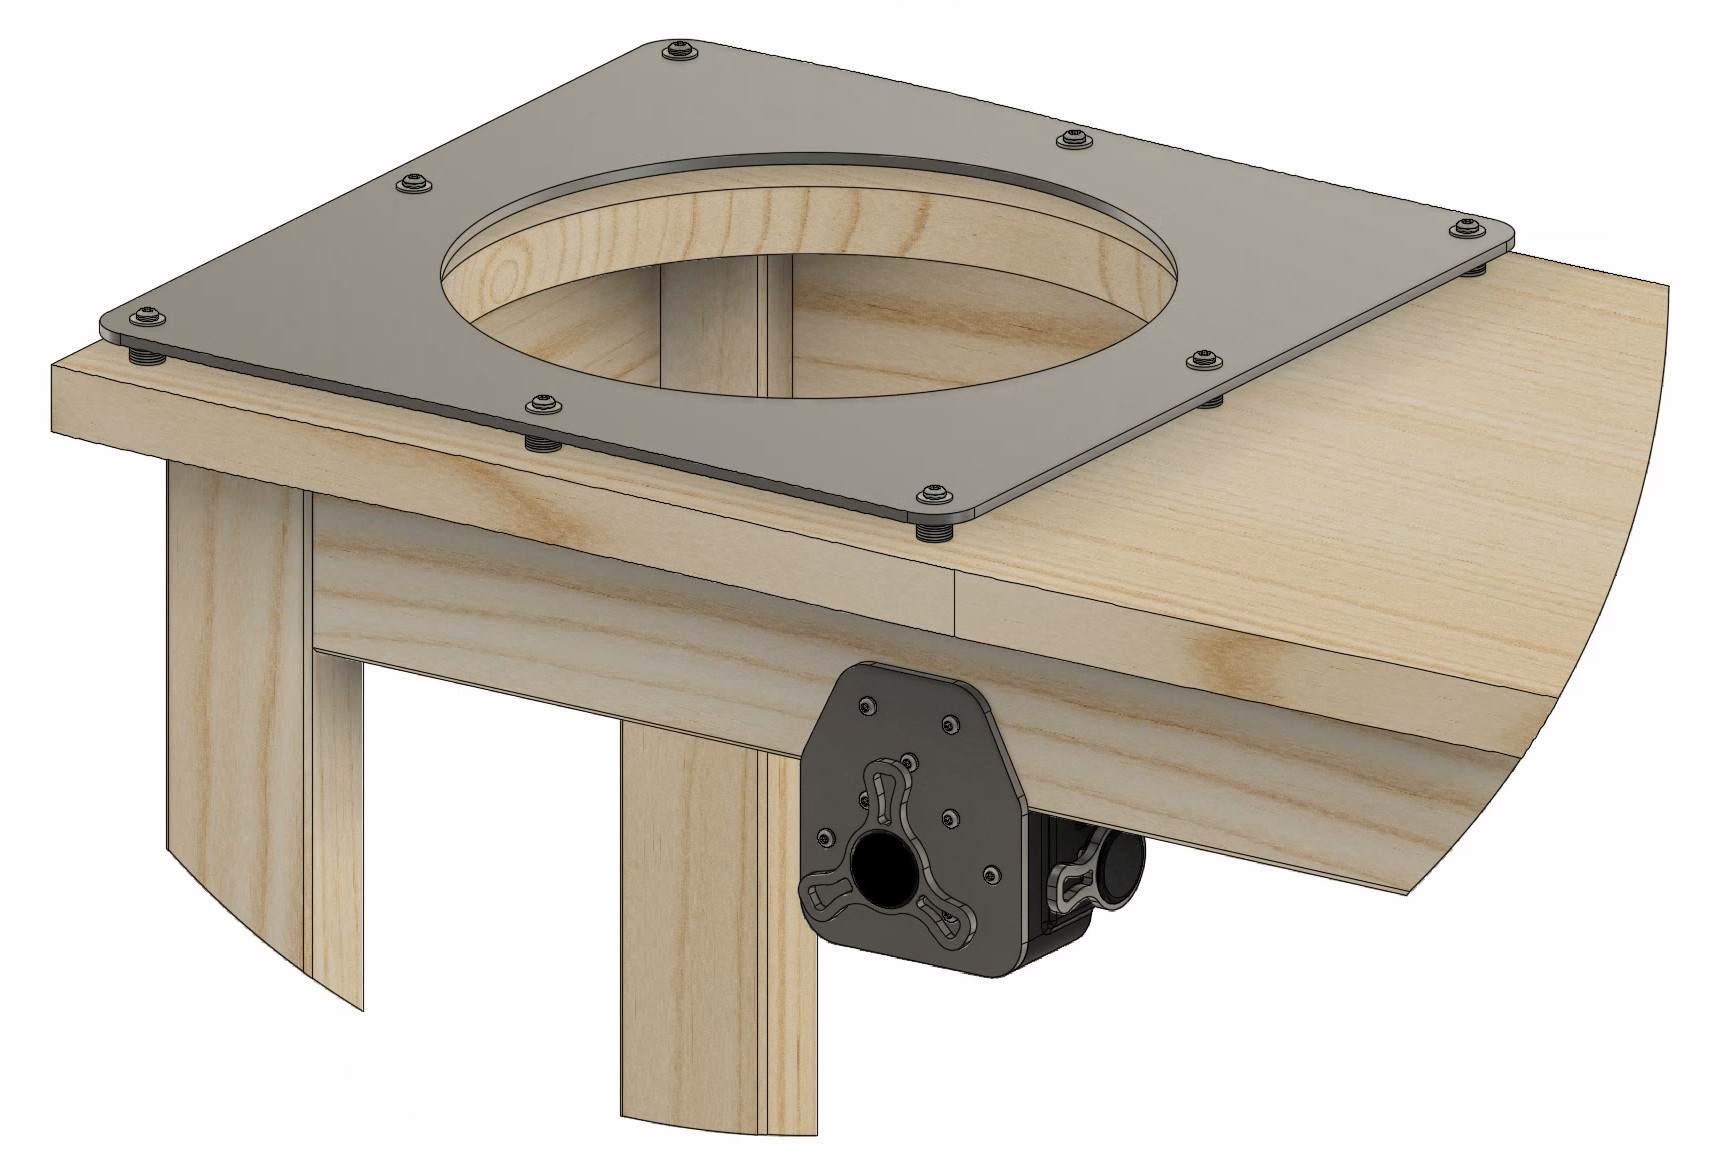
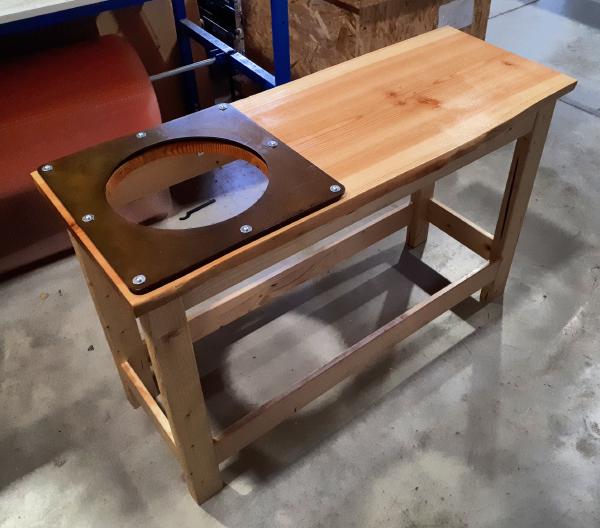
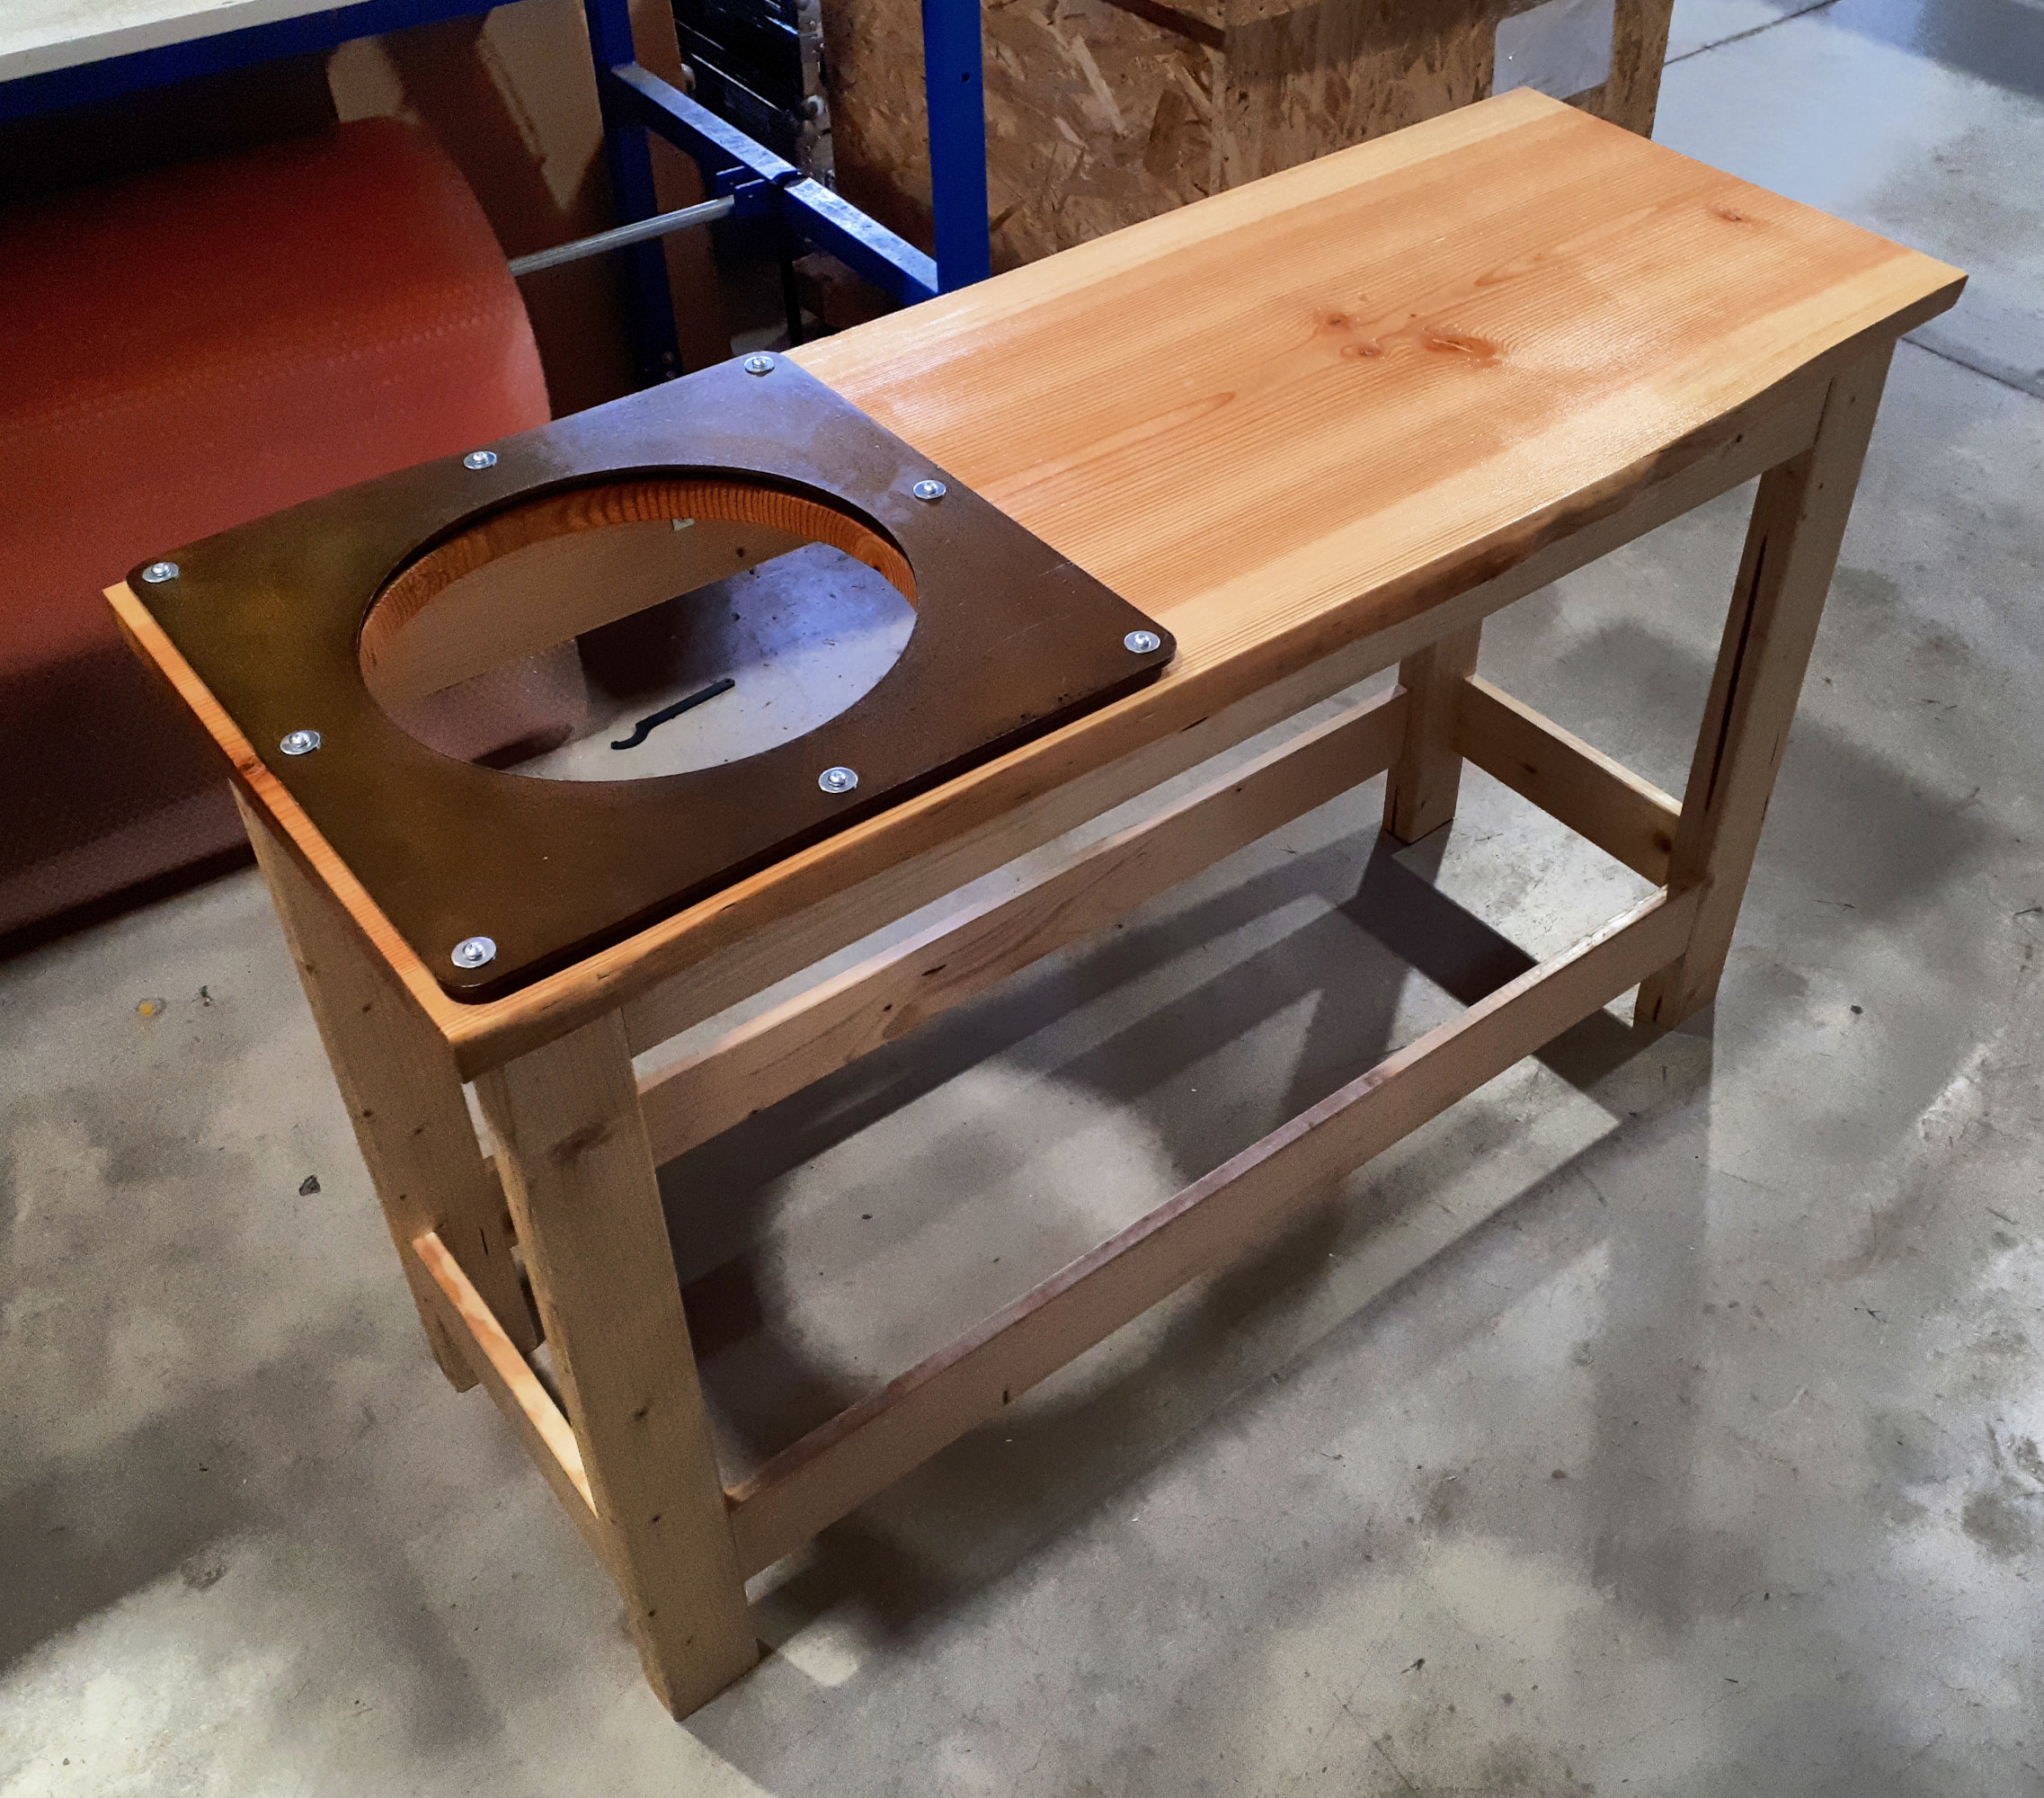
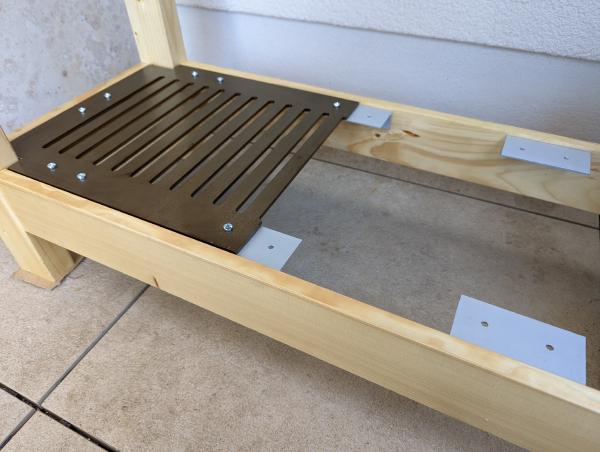
To mitigate the heat conduction and convection problem, I designed a steel mounting plate to hold the burner. The mounting plate outline followed the contour of the live edge benchtop and had a circular cutout that the burner would neatly drop into. It would be raised off the benchtop by around 15 mm and only screwed down at 8 points around its perimeter. In this way, it could operate as an effective heat shield / heat break to prevent the bench from getting warm.
Laser Cutting
The mounting plate was designed to be laser cut from 5 mm plate steel. I realised I’d need to hit a minimum order size from the laser cutters, and that I could nest smaller parts inside the burner cutout. This drove the plan to design a significant number of other parts from laser cut steel plate.
I designed the following to add to the laser cutting order:
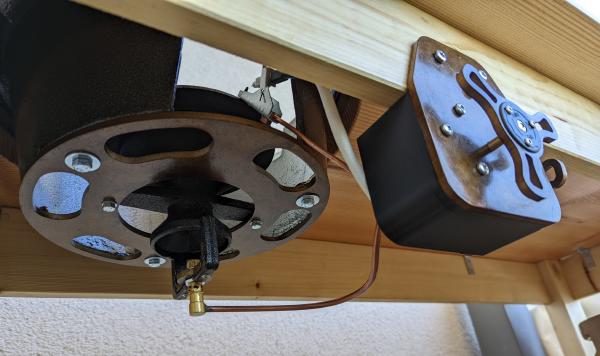
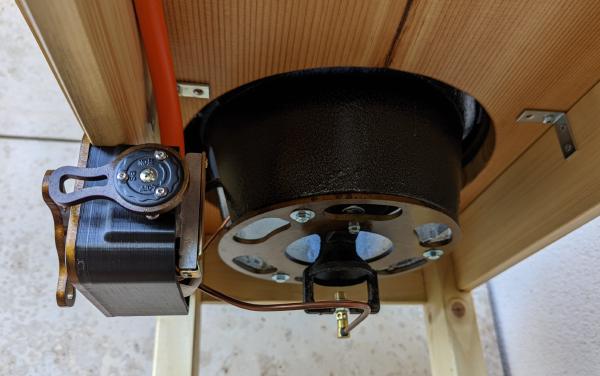
- A new base for the burner
- A bracket to mount the gas valve block to
- A replacement mount for the main gas orifice (the existing one was drilled way off centre)
- Larger handles for the main burner and pilot light valves
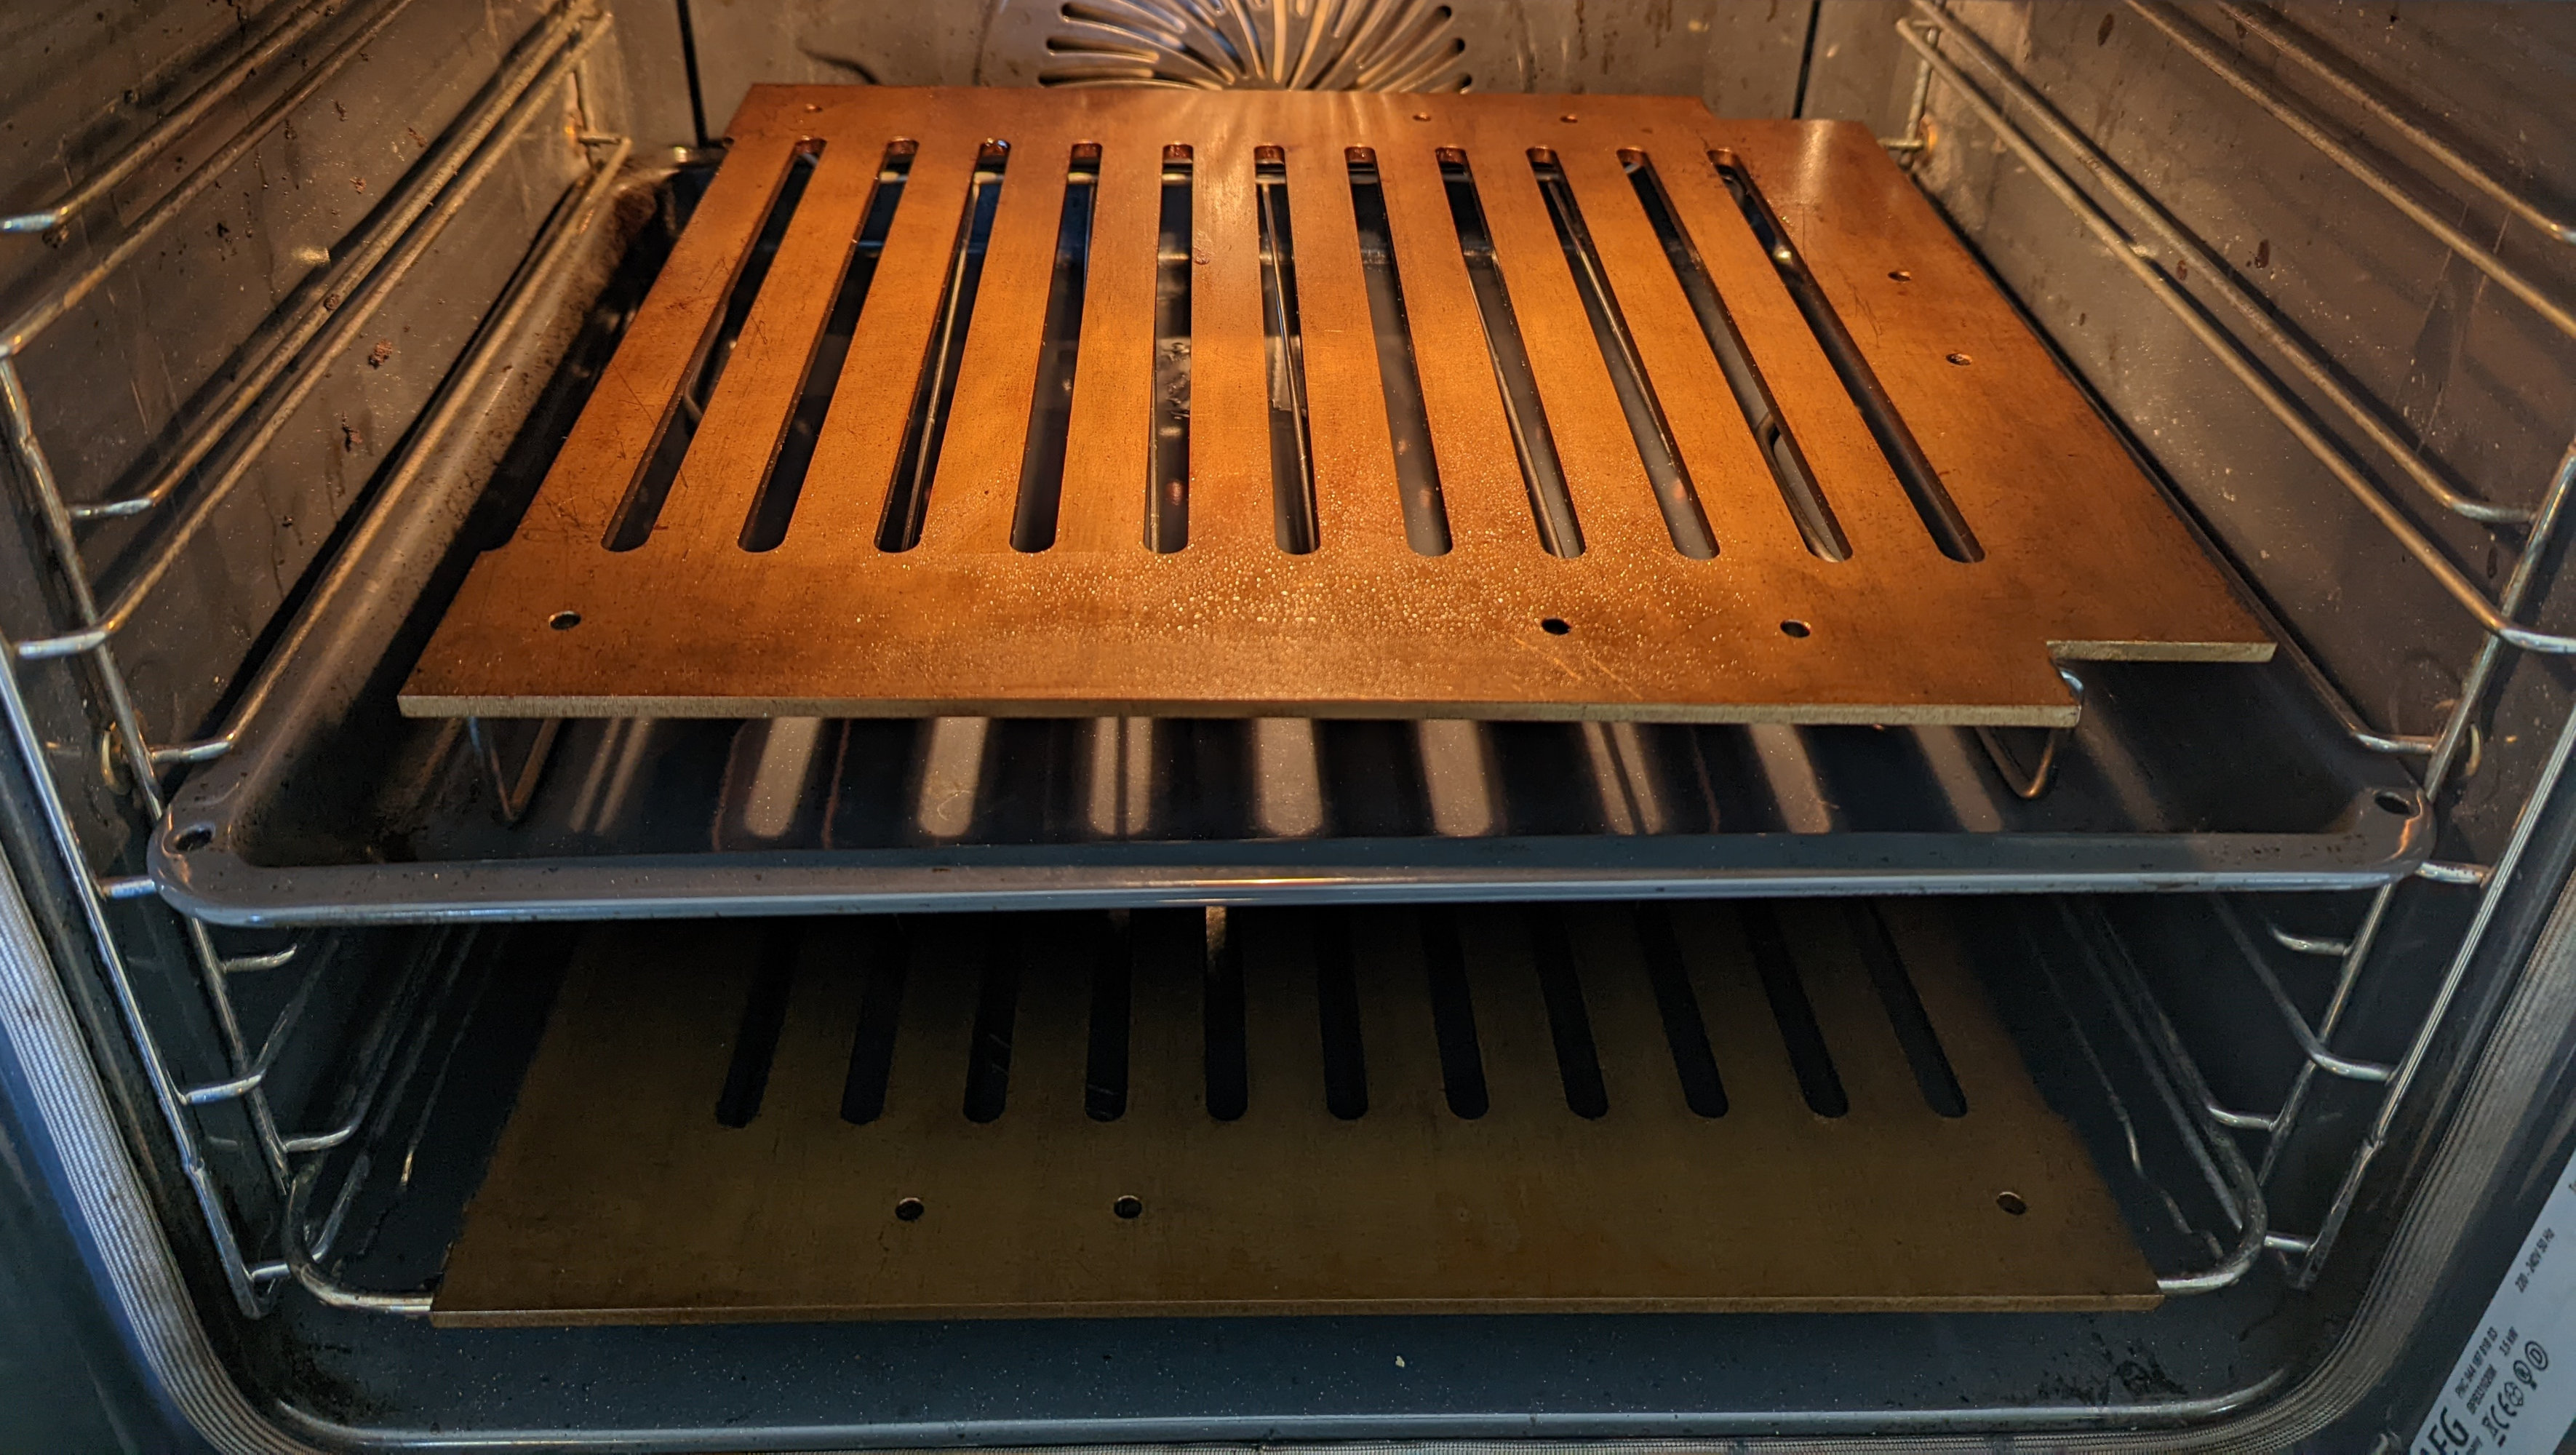
- Grates for a shelf below the bench
- A loop handle for my wok
Fusion 360 made it pretty easy to generate DXFs of the combined parts with small tabs connecting them. When I received the parts, I could simply cut them out with a hacksaw or angle grinder.
I contacted a few local laser cutters here in Luxembourg, but none of them would accept once-off private orders. I eventually found LaserHub across the border in Germany, who have a really great online process for instant quoting. I could upload my designs, choose material type and thickness, and it’d analyse the parts and provide an instant quote. They are relatively expensive, but for low volume orders like mine the price was acceptable.
3D Printed Jigs
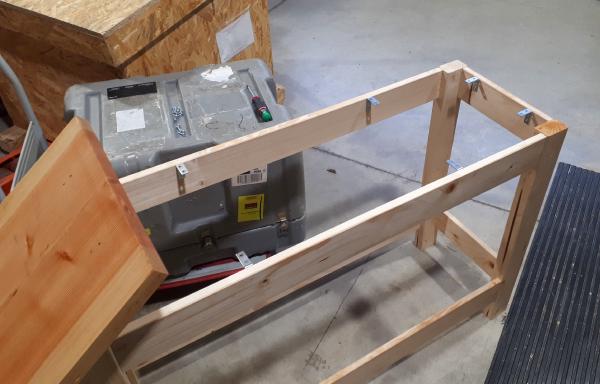
In my experience, one of the fantastic uses for 3D printing is the rapid production of specific, custom jigs for woodworking. I knew for this build that I wouldn’t have access to many woodworking tools, so I had to keep the joinery simple. I settled on dowelled butt joints for their strength, and planned to use a jig to avoid the tedium of measuring hole centers and the error of trying to position a drill bit by hand.
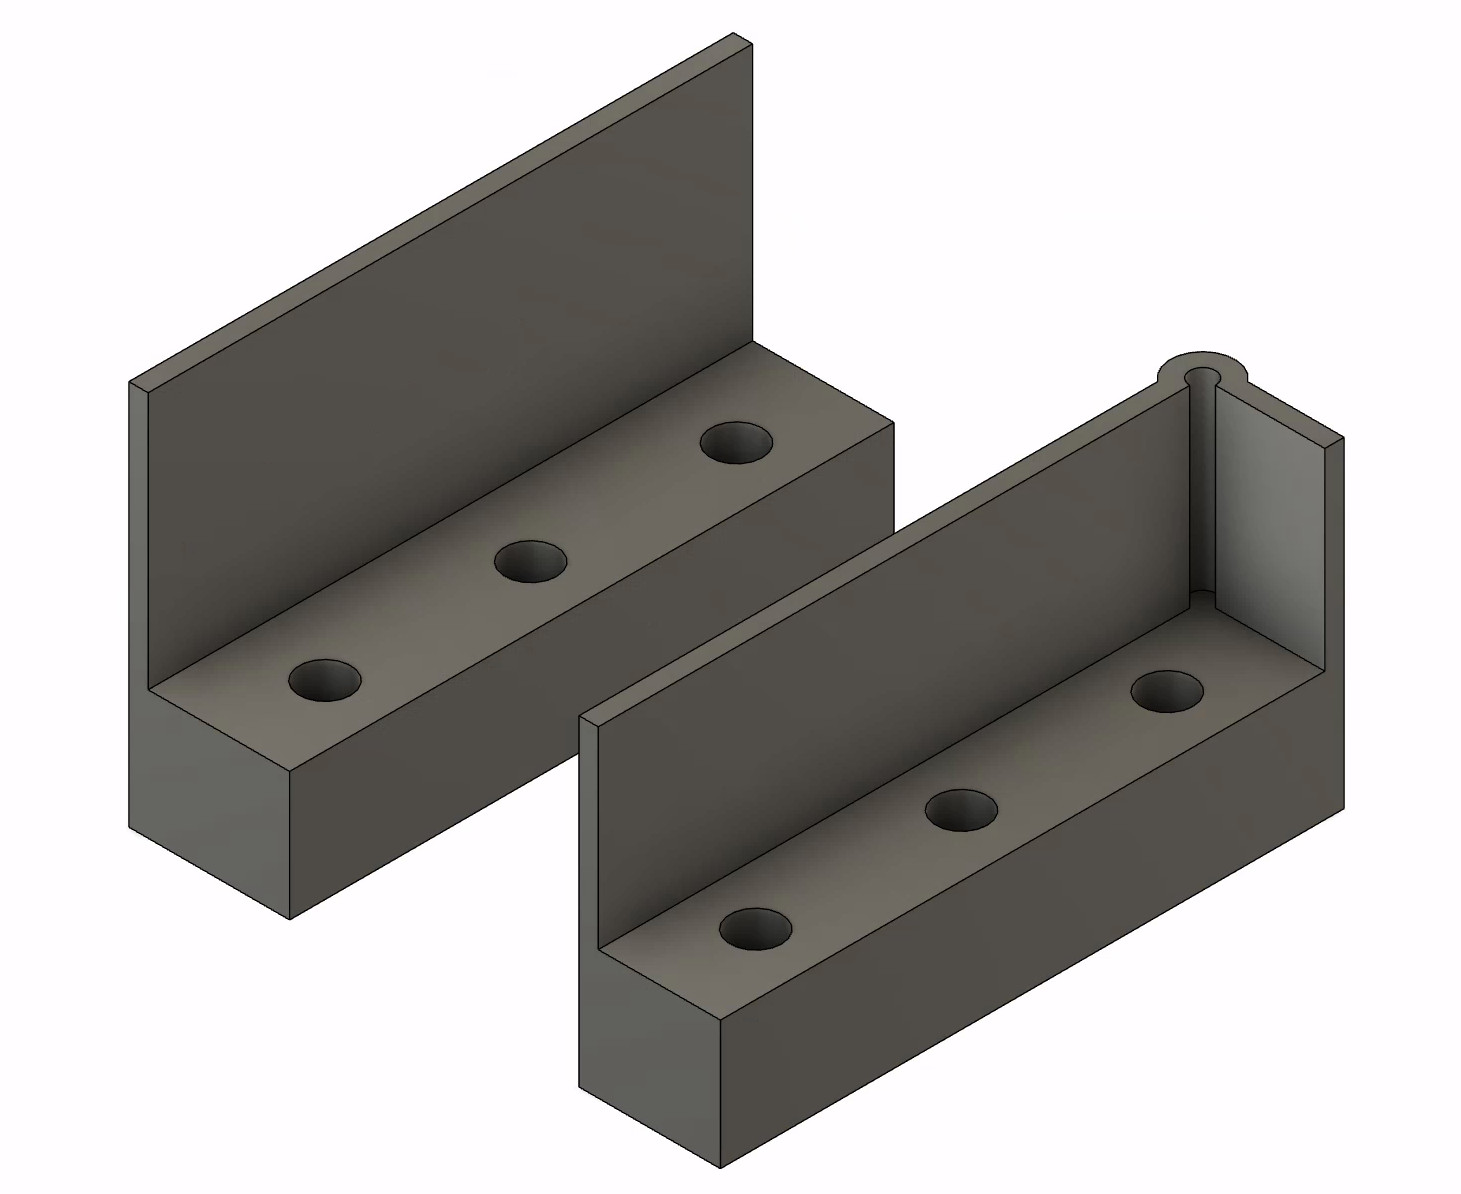
Generic jigs are commercially available, but instead of buying one, I quickly modelled and printed two semi-disposable jigs specifically for this project. One of the jigs was designed to accurately drill dowel holes in the endgrain of the timber used for the skirt and stretcher of the bench. The other jig had the same pattern of holes, just a slightly different stop to properly locate them in the legs.
The Build
Unfortunately, I didn’t take many photos of the build process. The work was basic drilling, gluing, sanding, finishing and screwing everything together. The gallery below shows the assembly as it came together.


Steel Finishing
All of the laser cut parts were cut from mild steel, which is not at all corrosion resistant. Given the cooking station was designed to be outdoors, I needed to add a protective surface coating to these parts. Painting, powder coating or metal plating are the traditional options, but I wanted to experiment with another technique that I’ve never seen used for this application — seasoning.
Seasoning is usually used to form a stick resistant coating on cast iron or carbon steel cookware. It involves building up thin layers of a fat based polymer on the surface by repeatedly oiling the cookware and heating it to high temperatures. The coating survives high temperatures, has a lightly textured brown colour that pairs well with timber and is easily applied. For me, that sounded like an ideal way to finish off the steel parts.
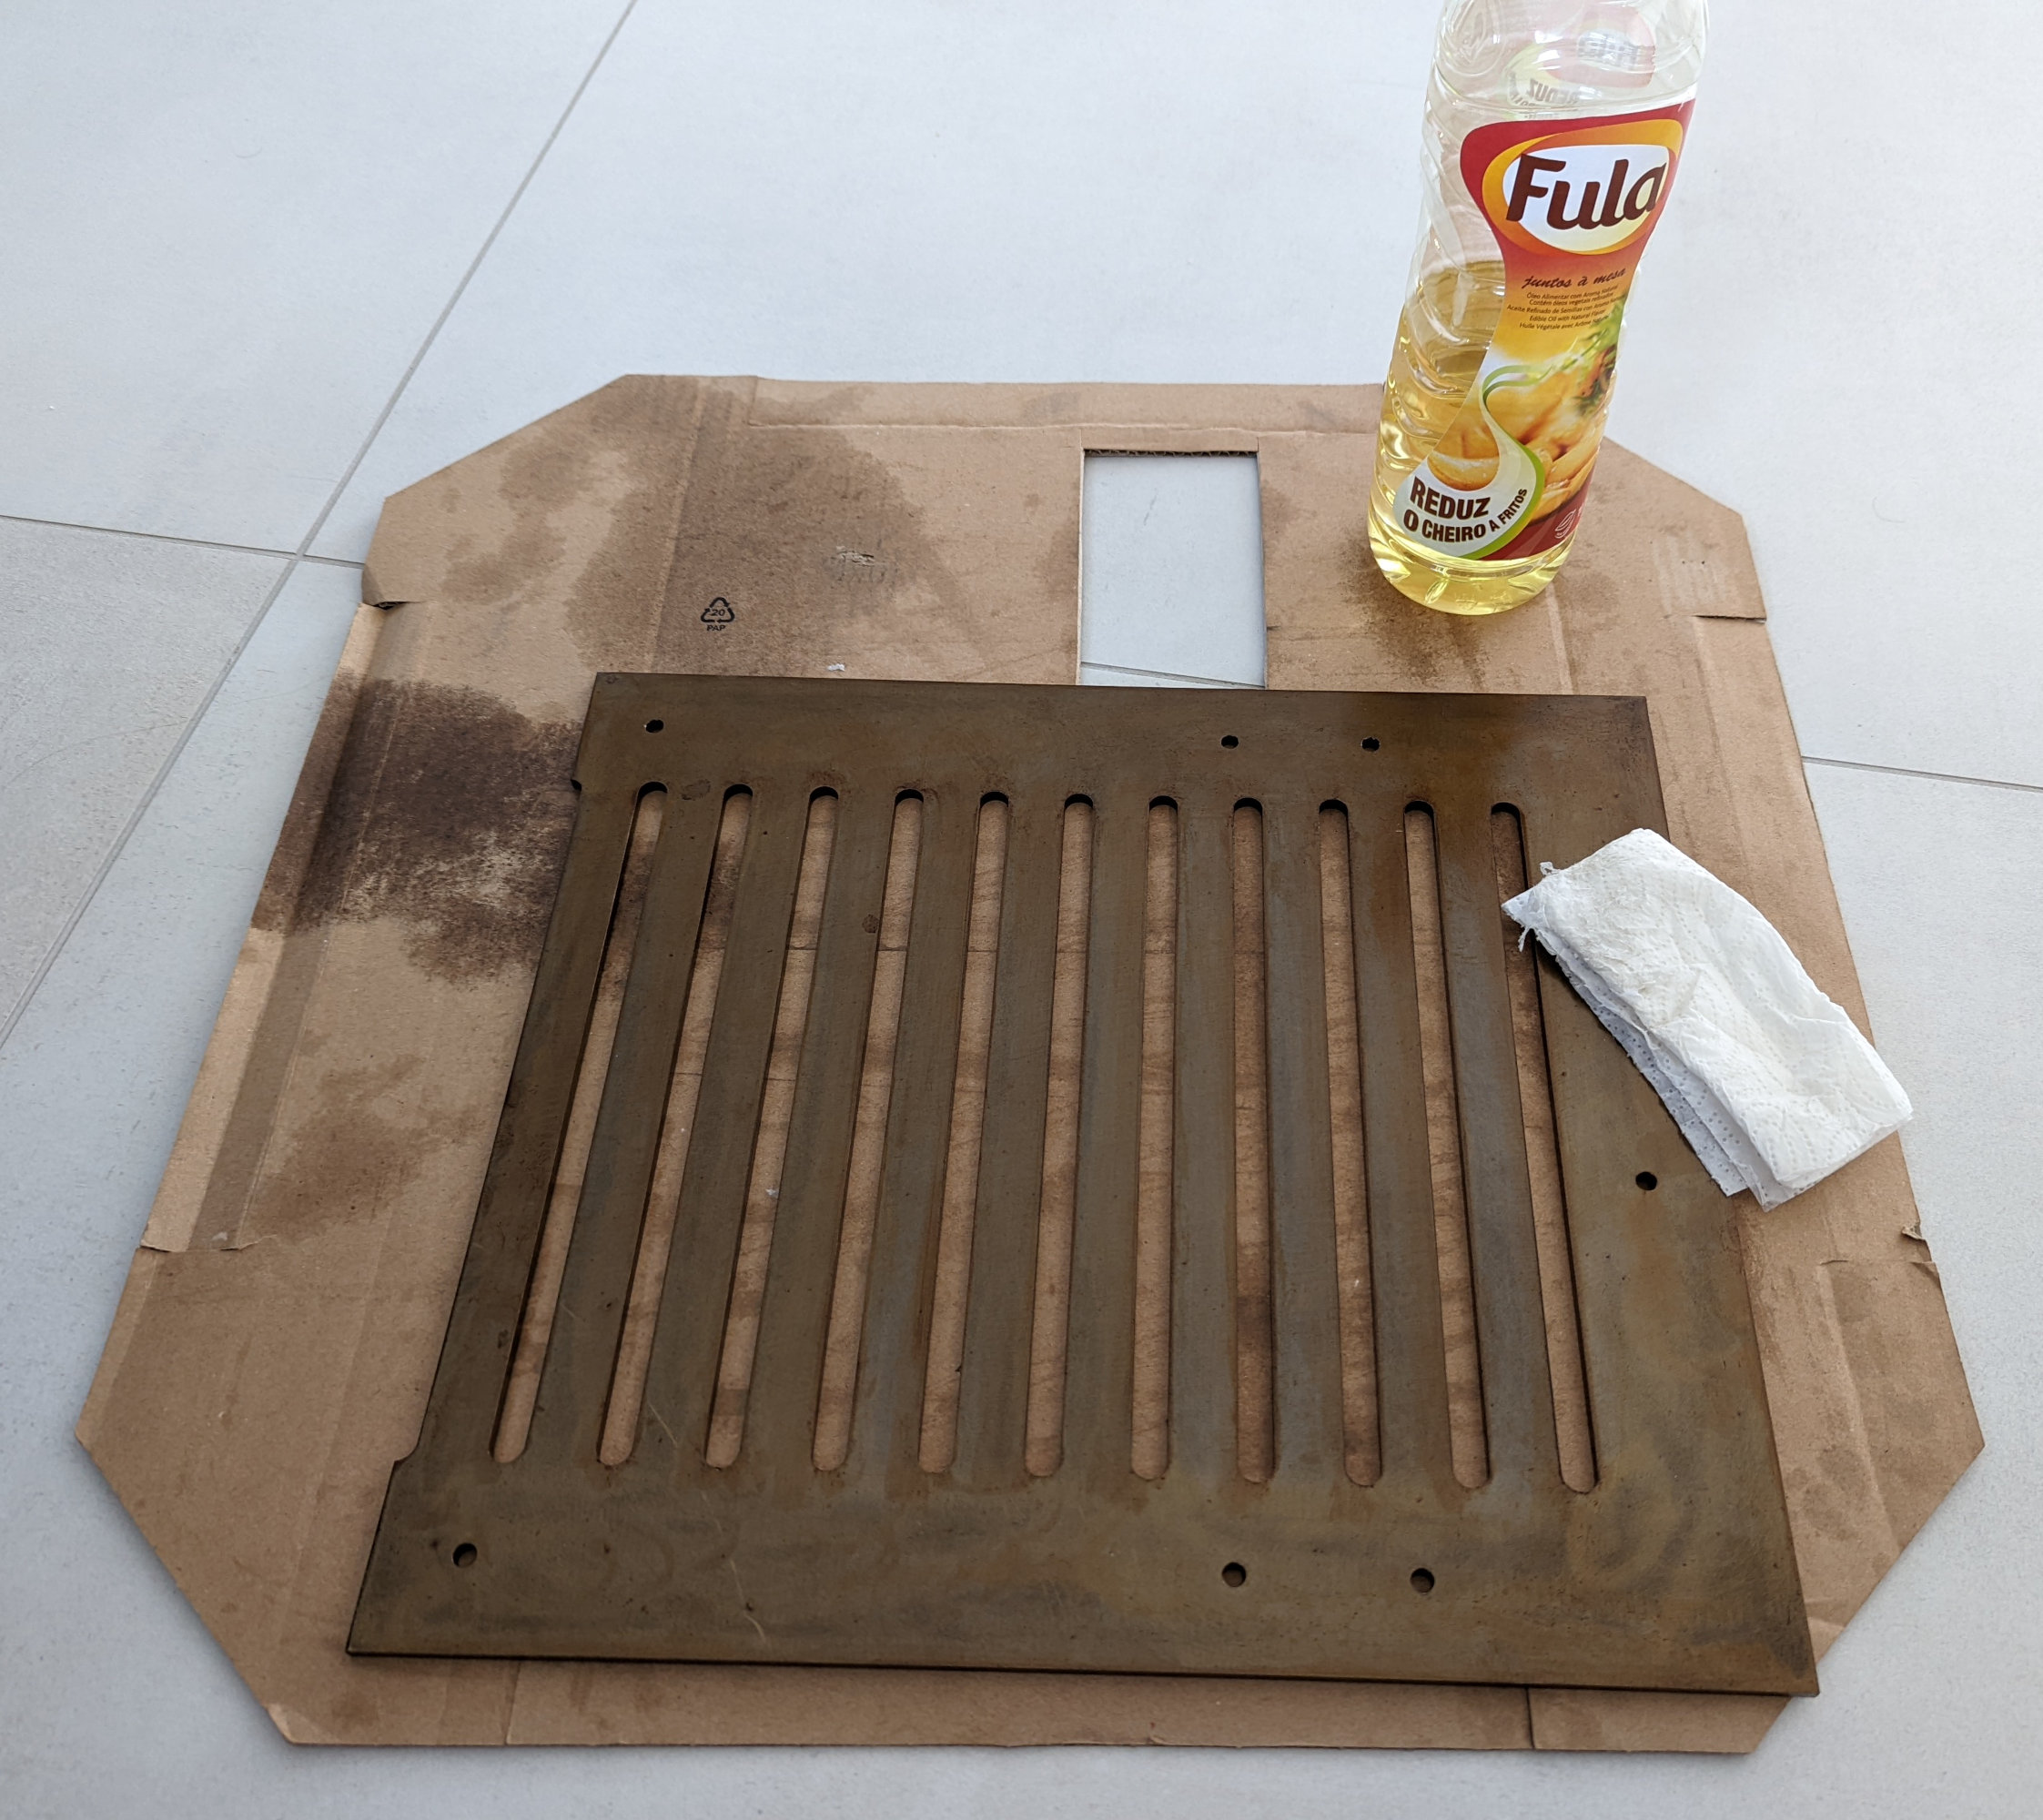
There is an unbelievable amount of information and controversy online about the best way to build up a seasoning layer. Somehow the topic has reached almost cultist levels of hype. My process was just wiping a coating of cheap frying oil (a mix of sunflower and corn oil) onto the parts with a paper towel, baking them in a 220 °C oven for 45 minutes, and allowing them to cool slowly. I applied anywhere between 4 and 8 layers, depending on how lazy I was feeling.
Ultimately, the coating seems to be holding up well. It’s been outside under cover for close to 6 months, and there is no sign of corrosion or degradation. The application of the coating took longer than other techniques, but it was something I did in the background over a few weeks. I’ll be sure to provide an update if anything changes in the future.
A Raincover
It was difficult to find a decent quality outdoor furniture or BBQ cover that fit the dimensions of the cooking station. The “600D Polyester Oxford Fabric” cover I purchased off Amazon was terrible quality. When held up to a light, I saw a starfield of pinholes in the fabric, and the seams weren’t even taped. I returned it and ended up back at square one.
After more fruitless searching, I decided to make one. I purchased a heavy-duty 650 g/m² PVC tarpaulin that gave me a 3 x 2 m piece of fabric to work with. I had no sewing machine so I experimented with gluing the seams. PVC cement (the stuff you normally use for gluing irrigation piping) is a solvent based cement. It partially dissolves a layer of PVC on each of the two surfaces to be joined, which are then pushed and smeared together. After the solvent evaporates, the two parts are fused together.
I’m no polymer chemist, but I figured PVC pipe cement would probably work to glue the seams for my vinyl raincover. I cut a few test strips from the tarpaulin and tried it out. After 12 hours of curing, the only way I could peel apart the two strips was by yanking hard enough that the PVC layer delaminated from the inner fabric reinforcement. The glue held.
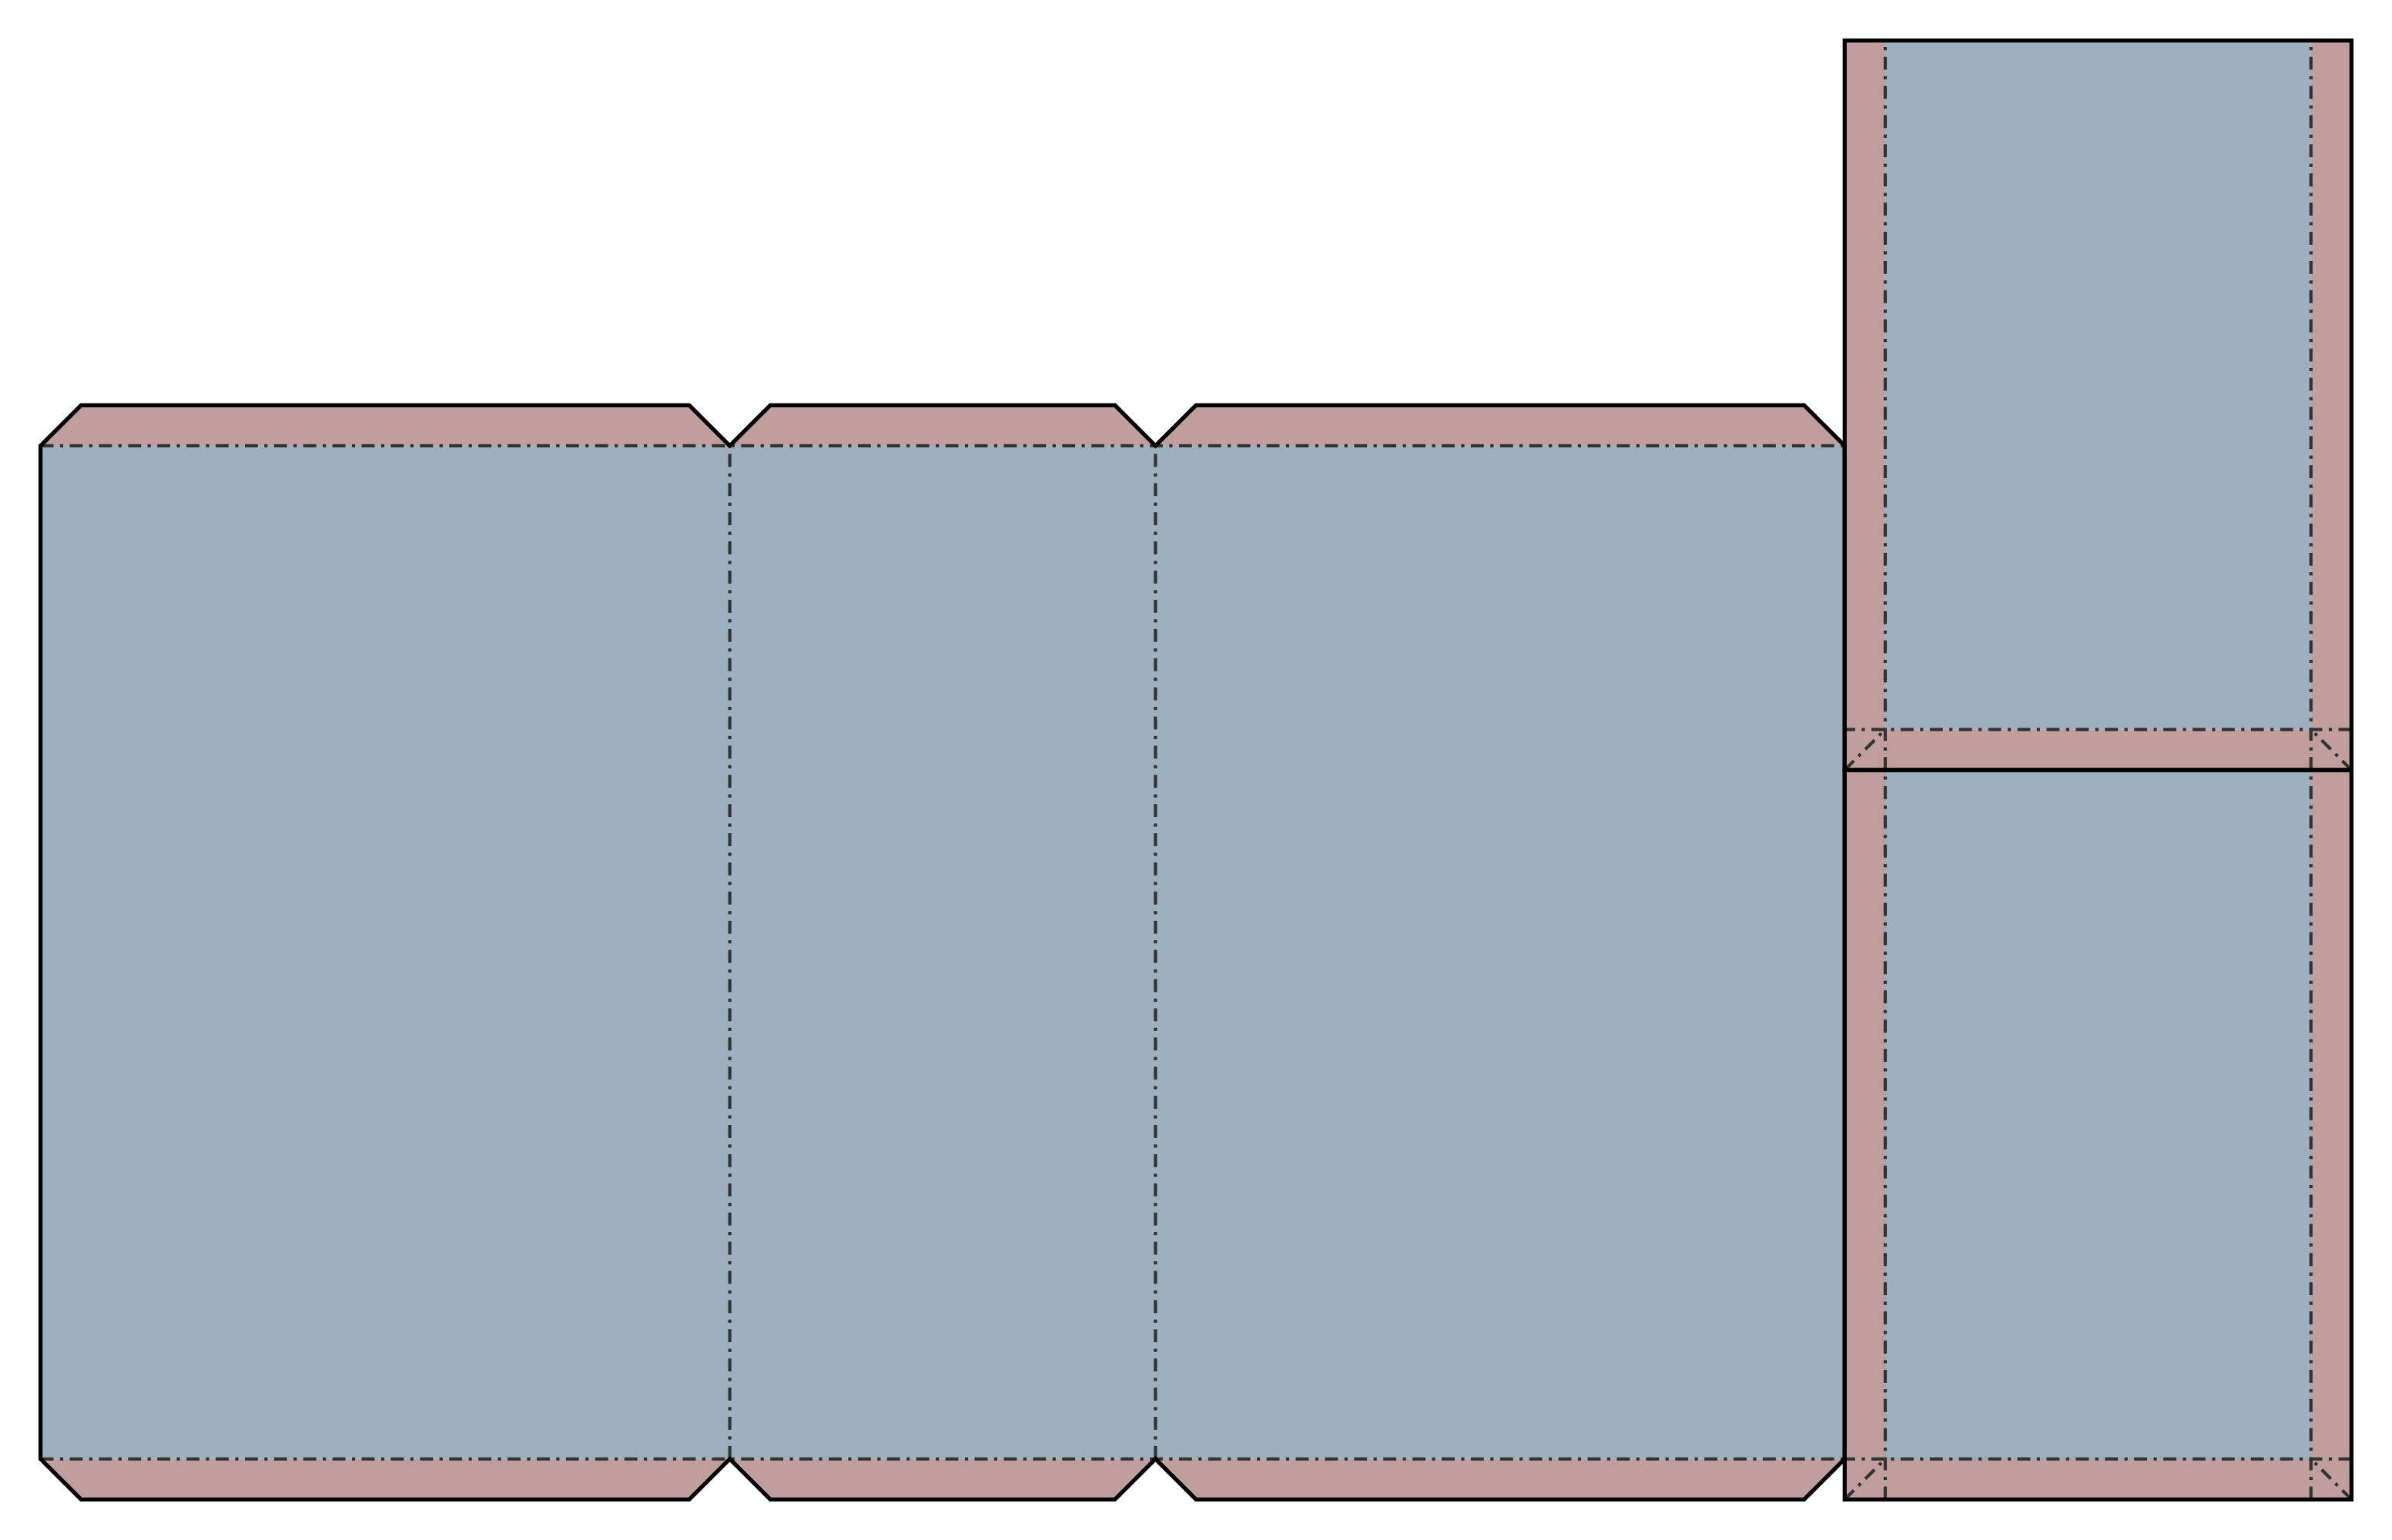
The tarpaulin was just the right size to cut out the three panels that made up the raincover. I was careful with the way the panels came together in the corners, preferring to fold the feature into the end panels to maintain watertightness. There was plenty of overlap at the seams, both for strength and because I knew the glue joints wouldn’t be perfect.
Making the raincover was essentially just large scale papercraft. I marked out the pattern and cut the tarpaulin with regular scissors. Ironing the folds with a cool iron helped to get crisp creases that held position. Glue was applied to both surfaces at the seam before bringing them together. A long flat piece of timber with weights on top let me apply even pressure to the seams while they dried.
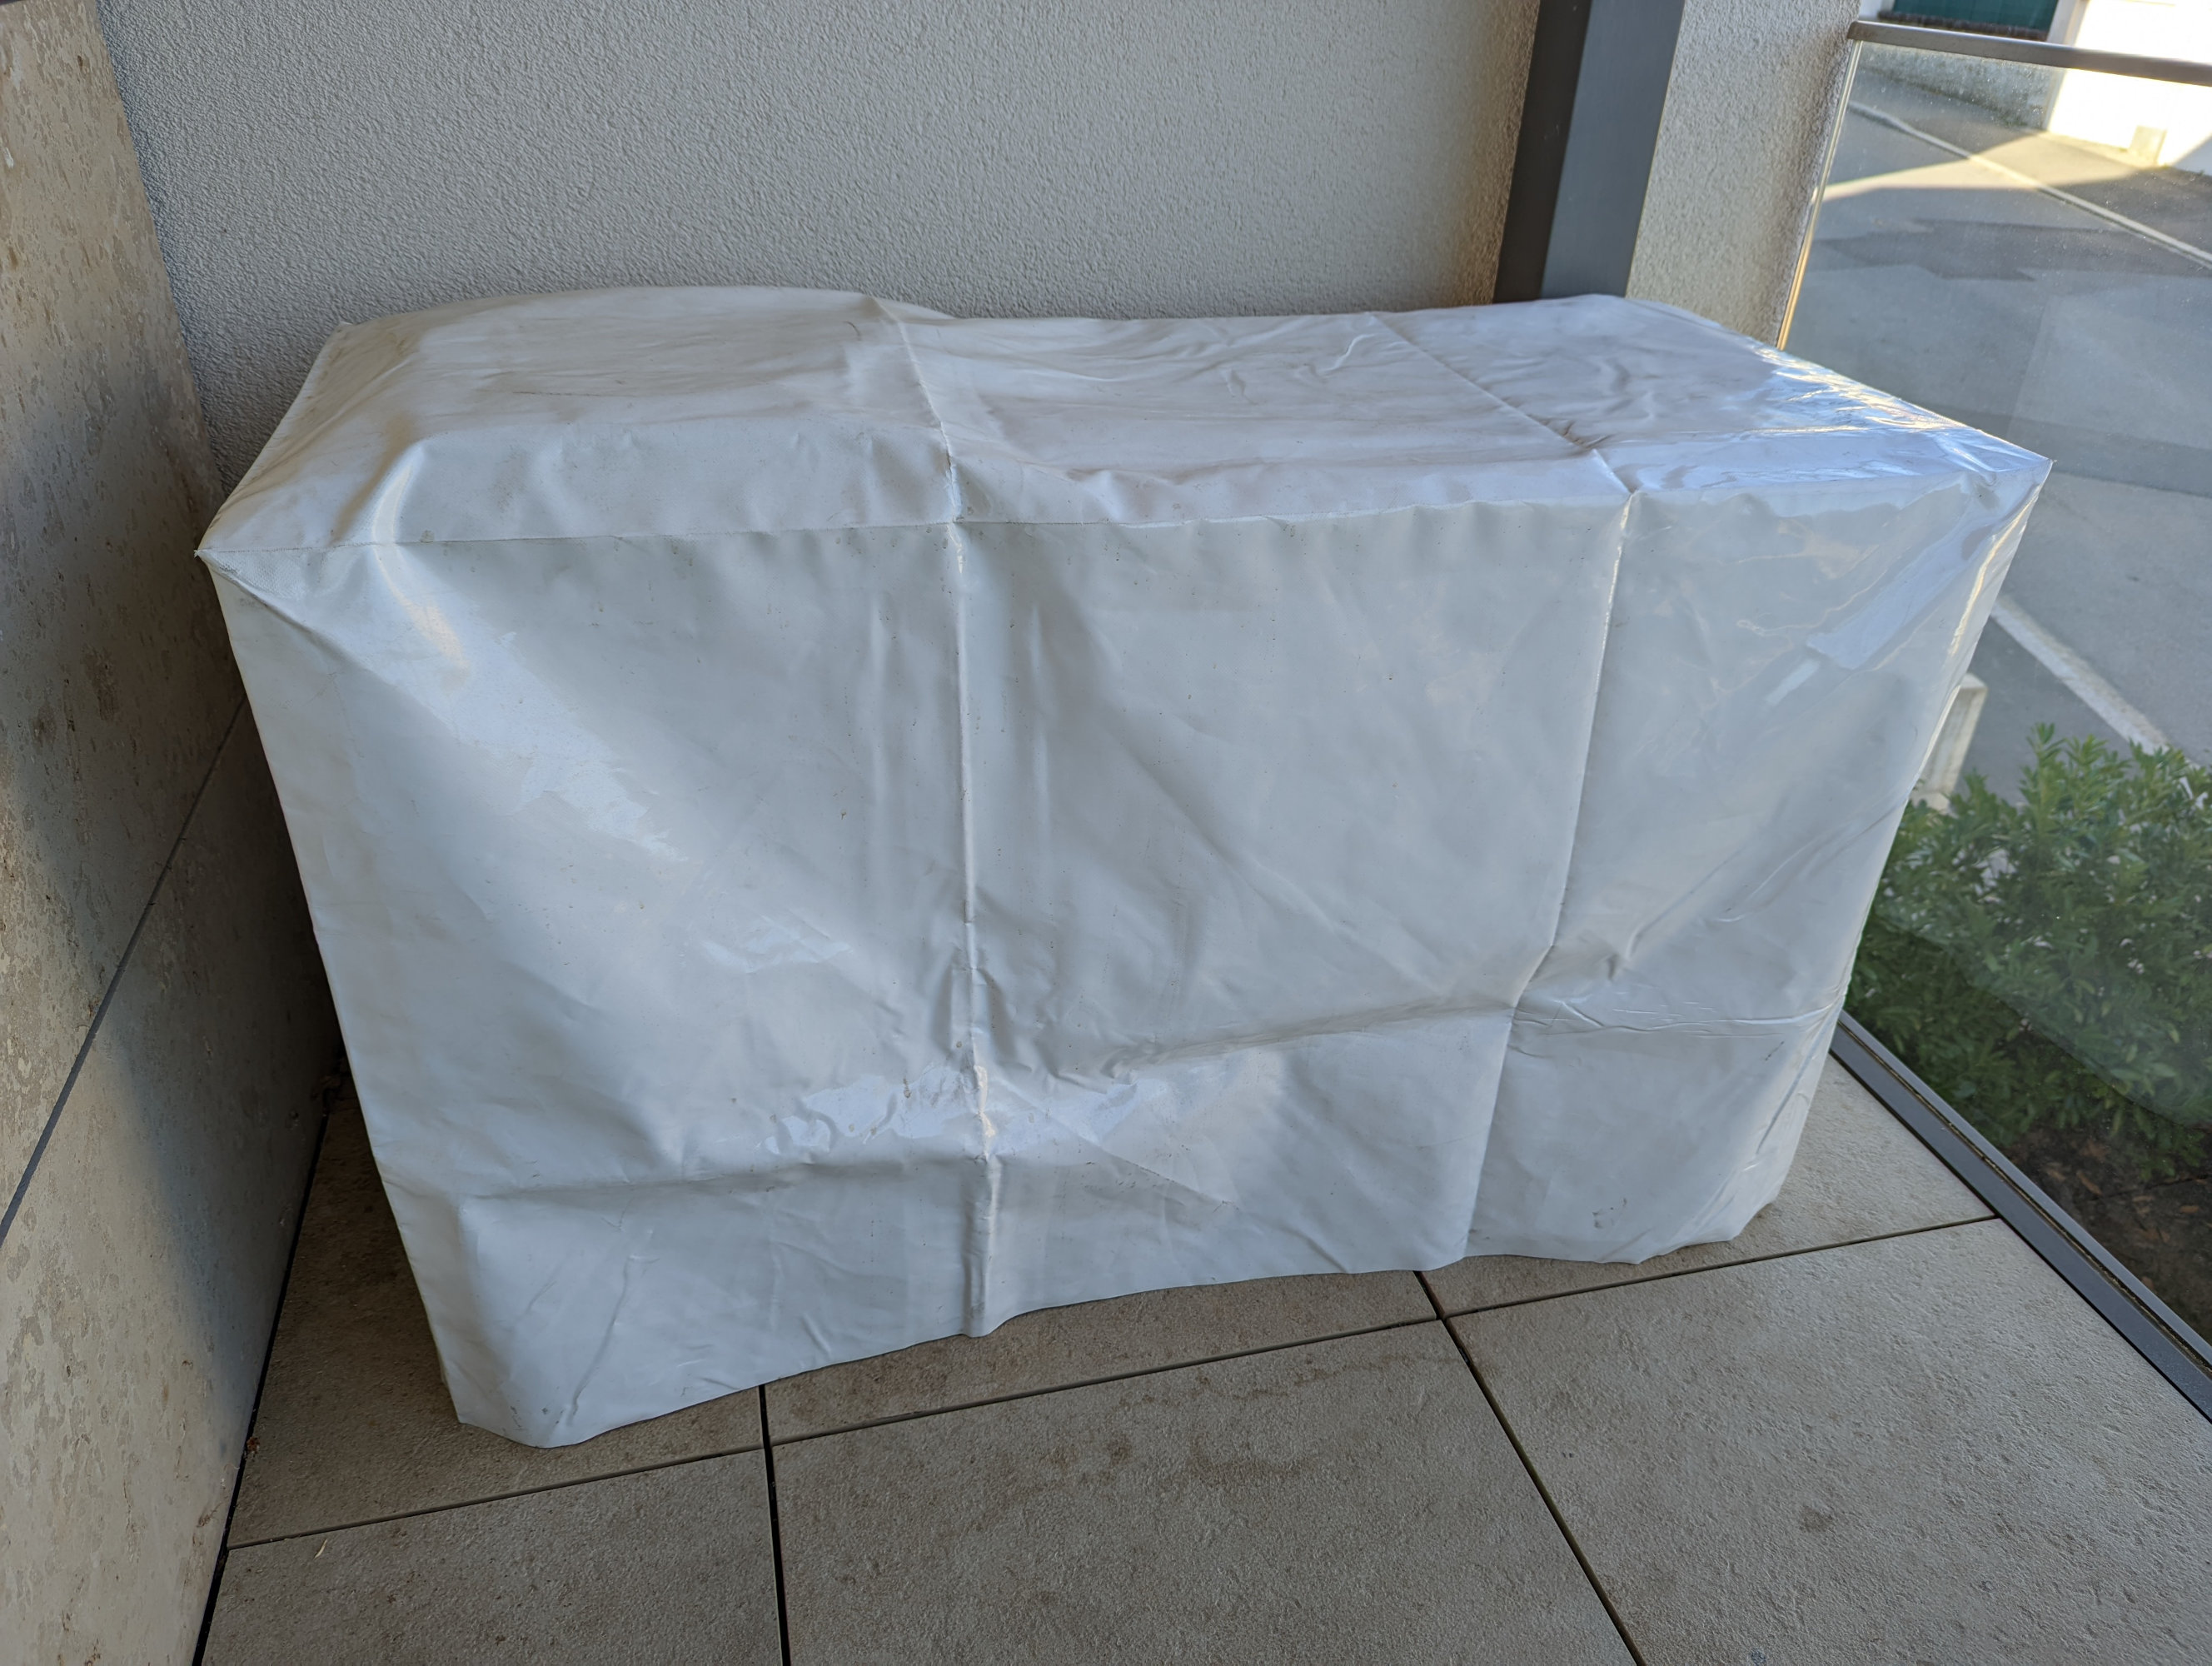
The raincover has endured a handful of decent downpours, blustery storms and direct morning sunlight without any problem at all. It’s showing no sign of leaking, degradation, wear or tearing. My only real complaint is that the fabric is possibly a bit too heavy, especially around the seams. It makes it difficult to fold into a neat package after I’ve removed it.
First Tests
So, the big question — how does it go? Below I’ve provided a small gallery of images from the past few months of use.
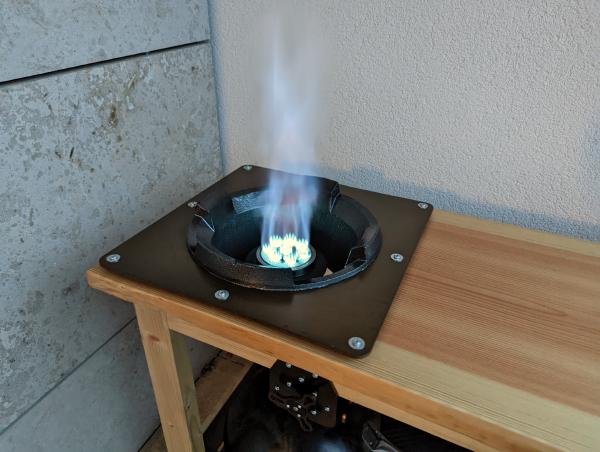


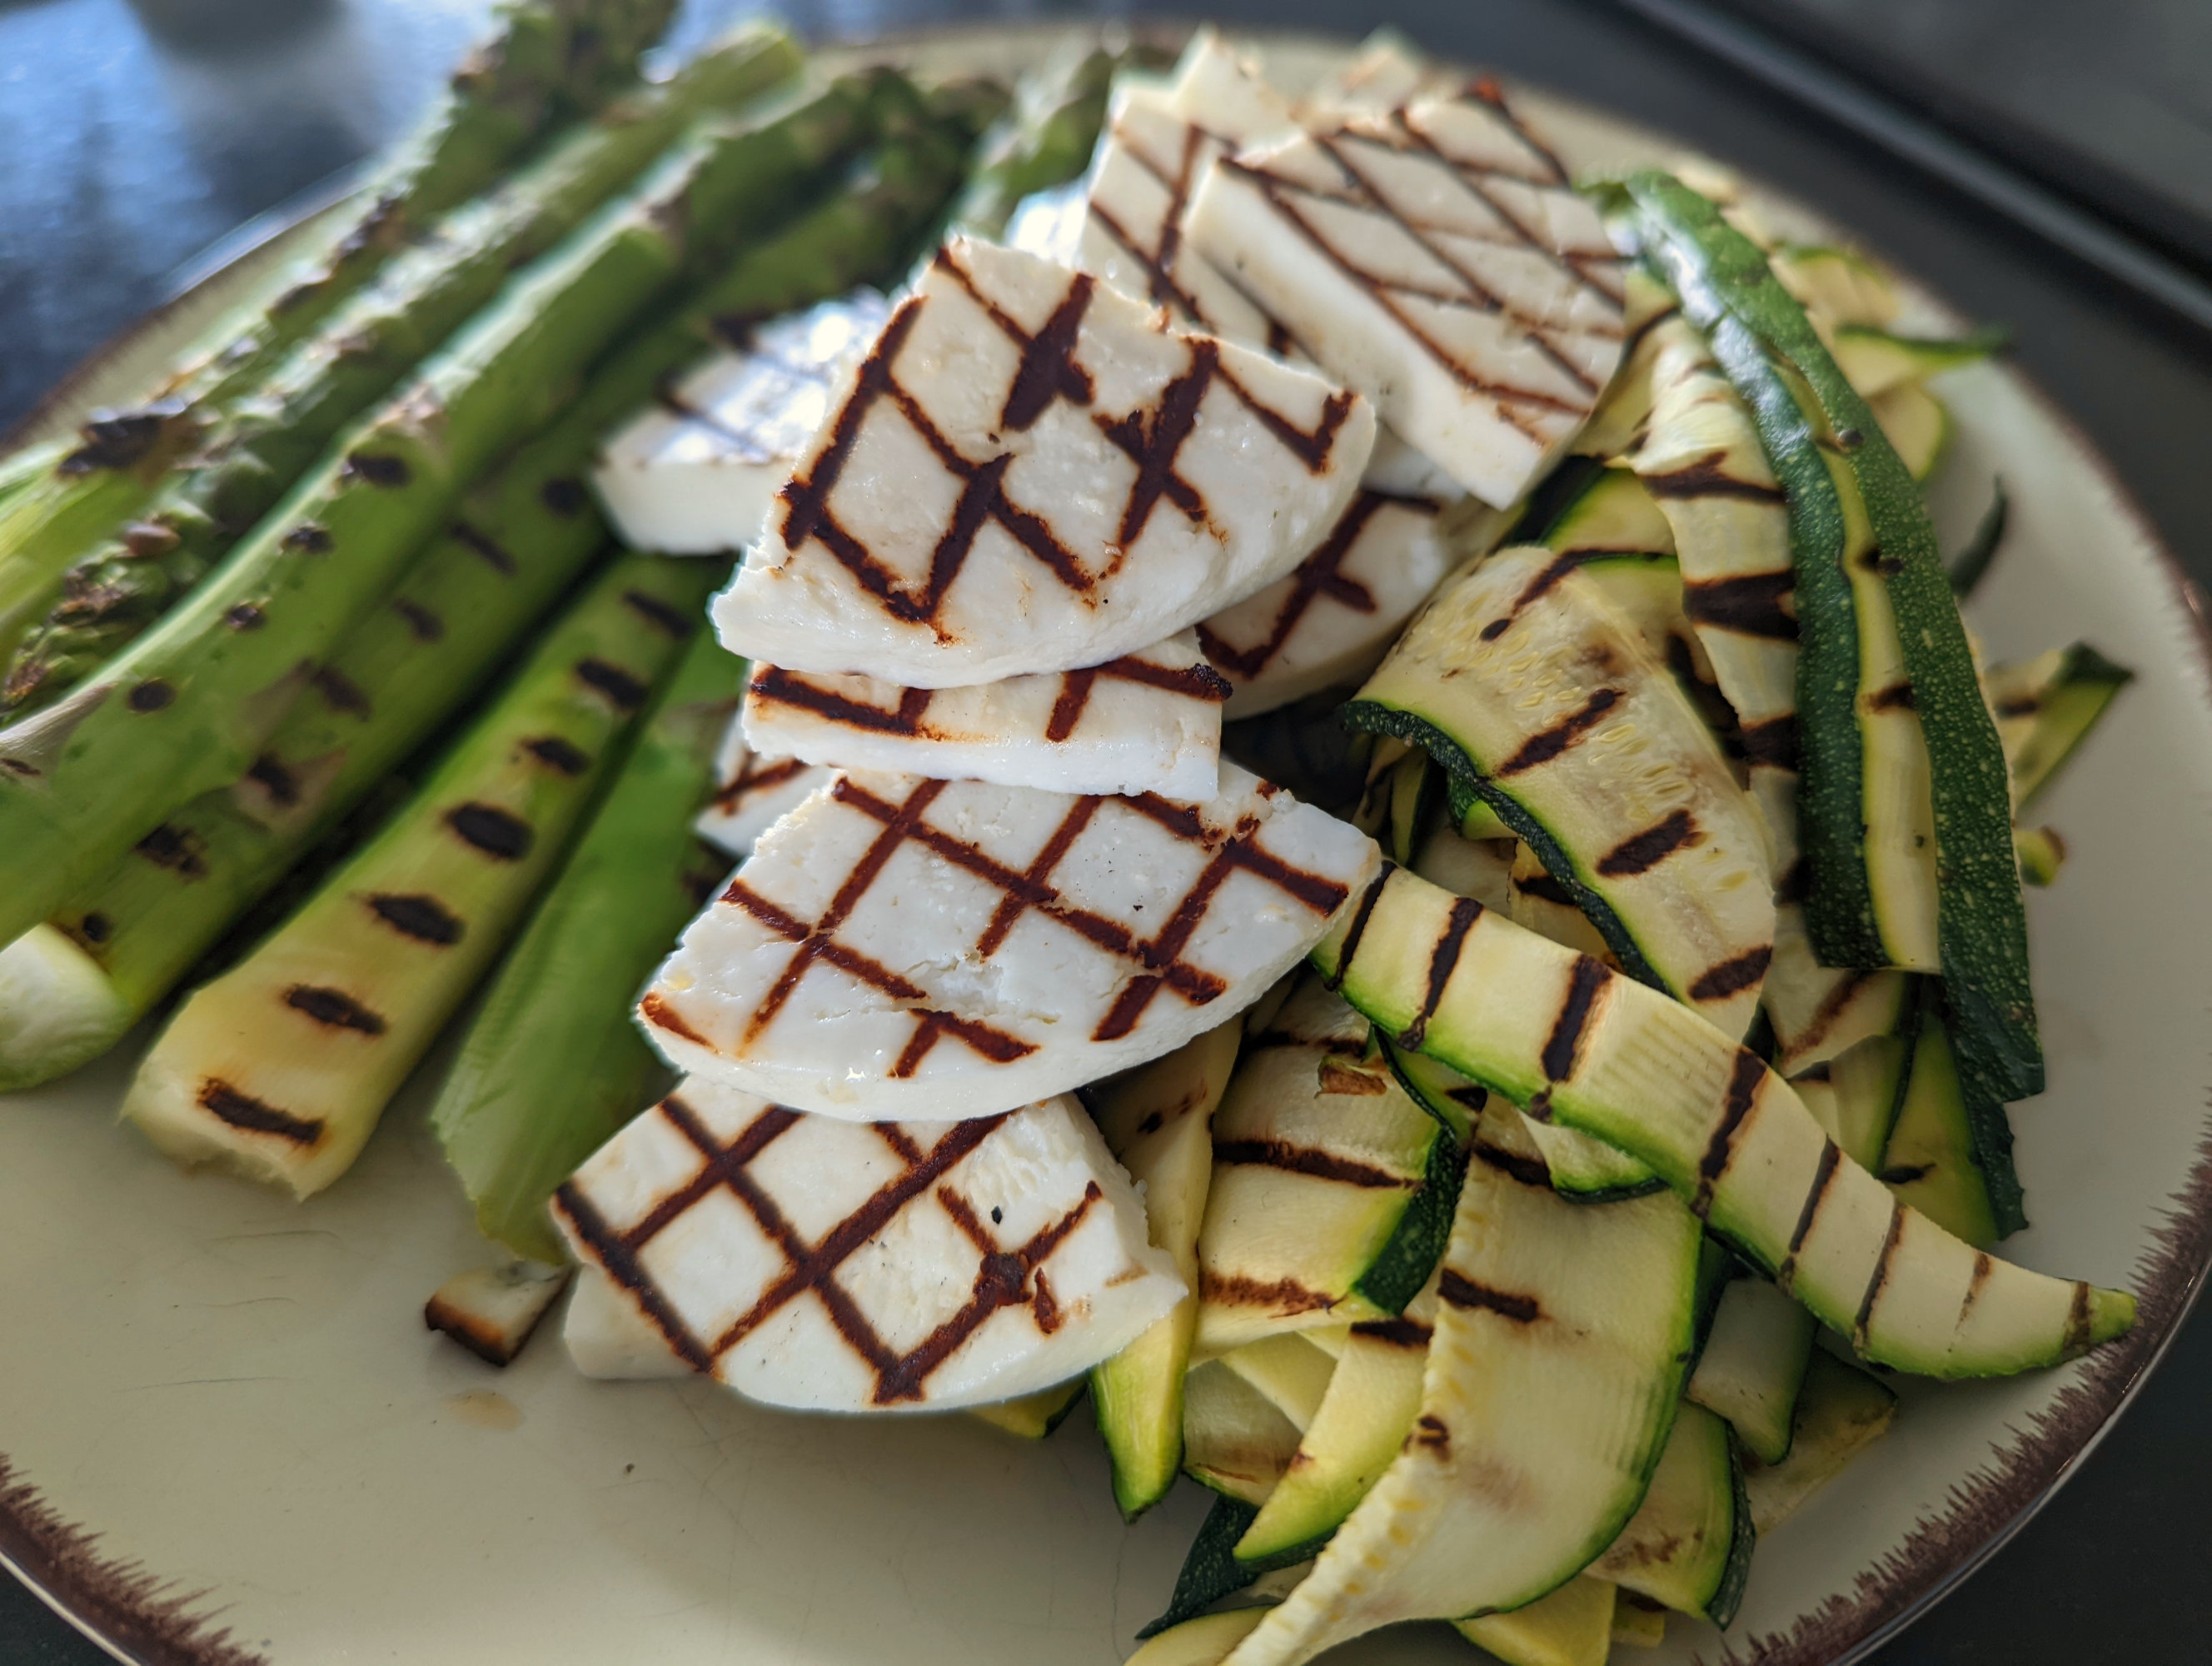


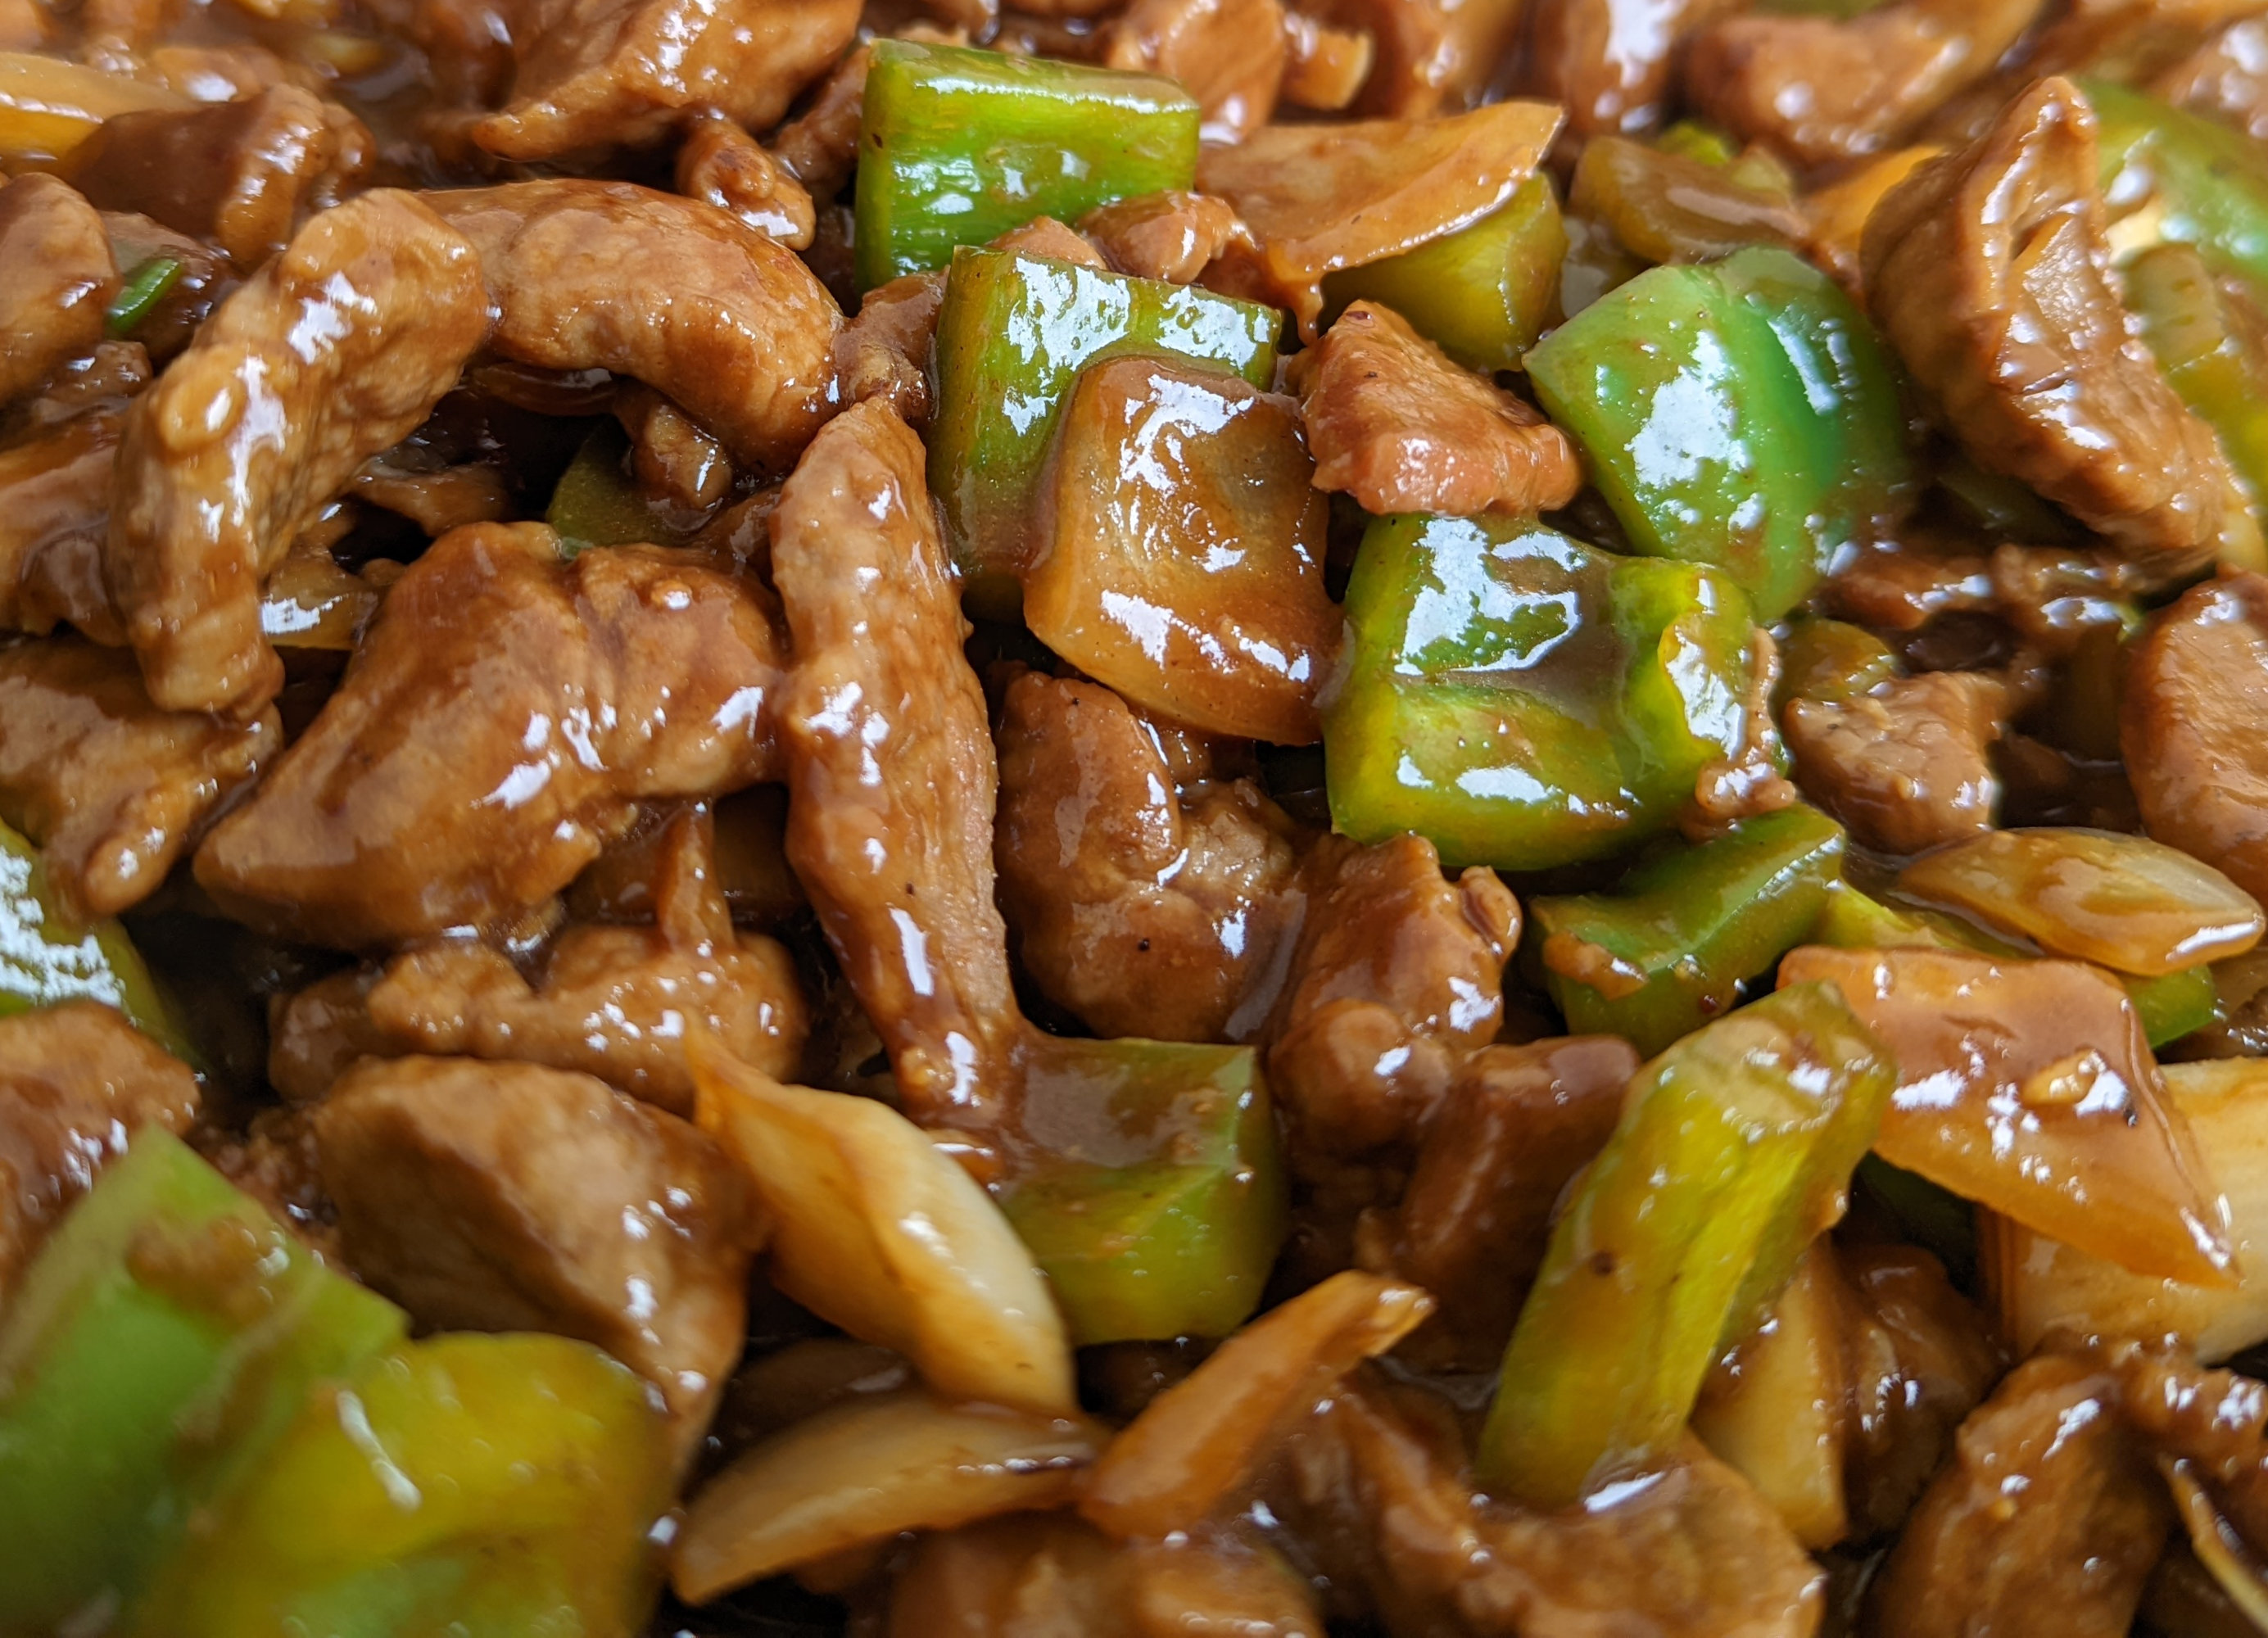

The short answer is — pretty fantastically. The burner has plenty of power, is easily controllable and is well positioned. The mounting plate acts as a great heat shield / heat break, and I have plenty of benchtop space for mise en place.
There may be a need in the future for a little extra heat shielding on the inside of the benchtop apron. It can get warm when I use full flame for long periods of time because one side of the burner heat shield is open. I’d also like to investigate creating some sort of heat diffuser I can install when I’m using the grill. The concentrated flame is great for stir fry, but results in very uneven heat on the grill plate.
For now, I’m still learning proper stir fry technique and getting used to the behaviour of the grill. I’ve achieved some results that’d pass scrutiny by Uncle Roger or Alvin Cailan, but I still have a lot of practising to do. It’s a beautiful summer day here in Luxembourg today, so I might just fire up the cooking station and eat outside tonight.